

Annotation Queues
Involving subject matter experts in AI projects is essential because they provide the domain knowledge and contextual judgment that ensures model outputs are accurate, relevant, and aligned with real-world expectations. Annotation Queues in Opik make it simple for subject matter experts (SMEs) to review and annotate agent outputs. This feature streamlines the human-in-the-loop process by providing easy queue management, simple invitation flows, and a distraction-free annotation experience designed for non-technical users.
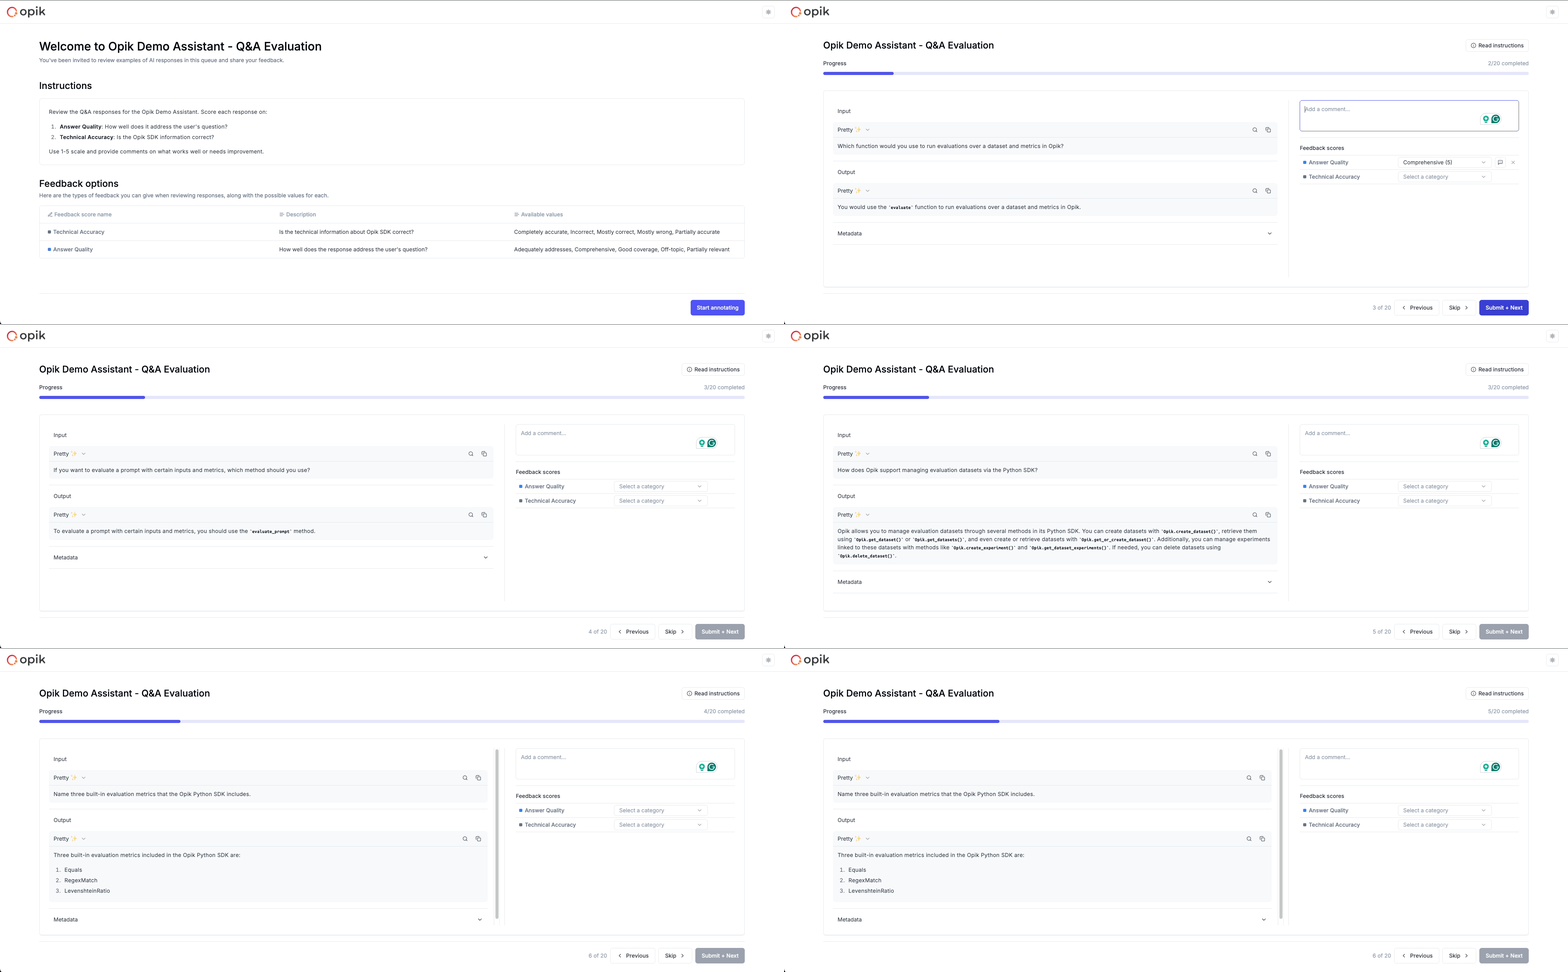
Annotation Queues are collections of traces or threads that need human review and feedback. They enable you to organize content for review, share with SMEs easily, collect structured feedback, and track progress across all your evaluation workflows.
Creating and Managing Annotation Queues
Each annotation queue is defined by a collection of traces or threads, evaluation instructions, and feedback definitions:
- Queue Configuration: Set up the queue with clear instructions and scope
- Content Selection: Add traces or threads that need human review
- SME Access: Share queue links with subject matter experts for annotation
Setting Up Your First Queue
Navigate to the Annotation Queues page in your project and click Create Queue.
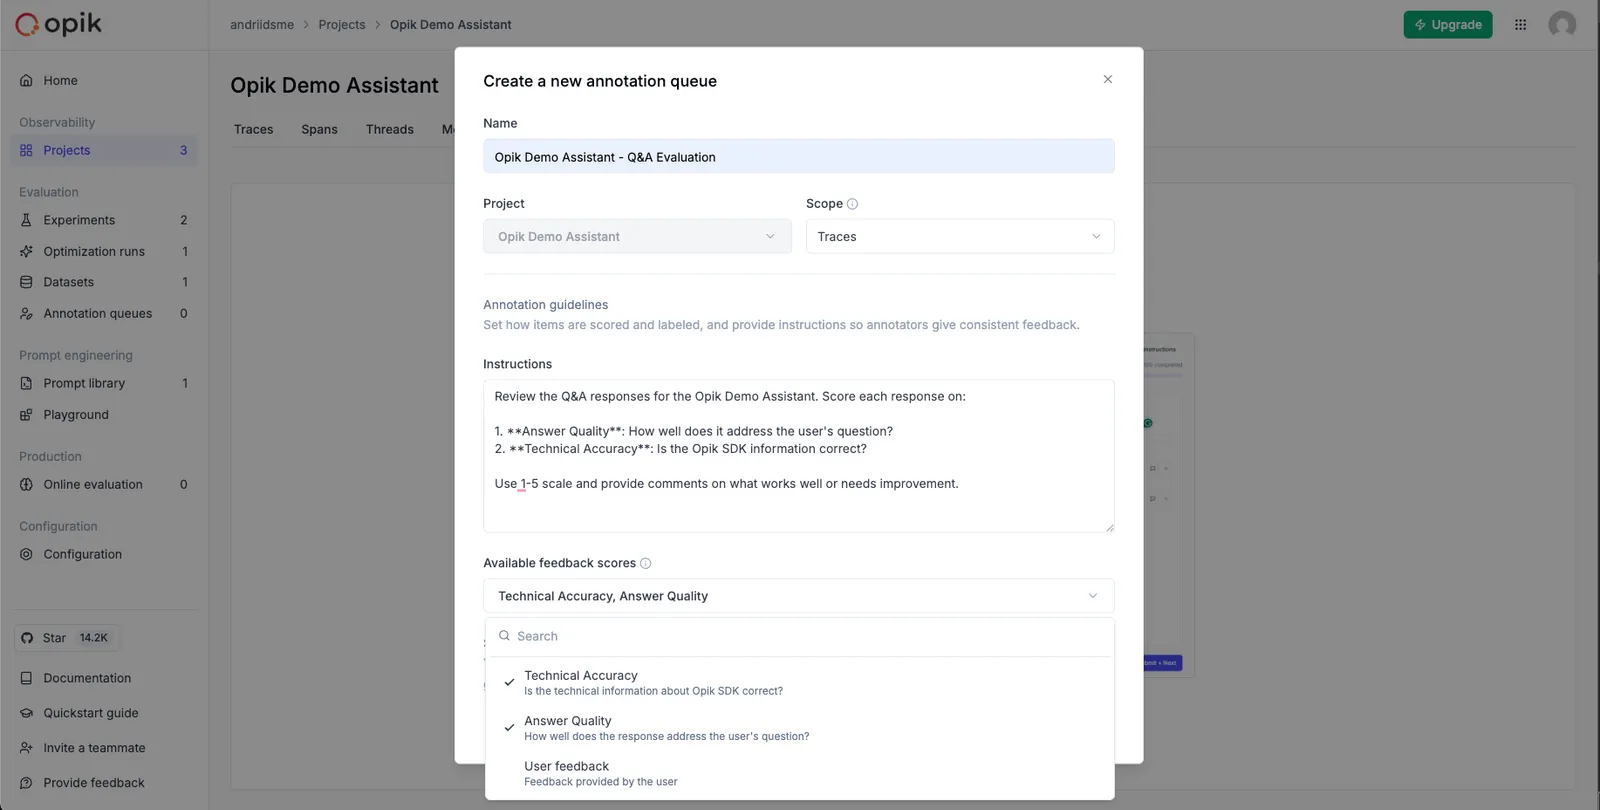
Configure your queue with:
- Name: Clear identification for your queue
- Scope: Choose between traces or threads
- Instructions: Provide context and guidance for reviewers
- Feedback Definitions: Select the metrics SMEs will use for scoring
Adding Content to Your Queue
You can add items to your queue in several ways:
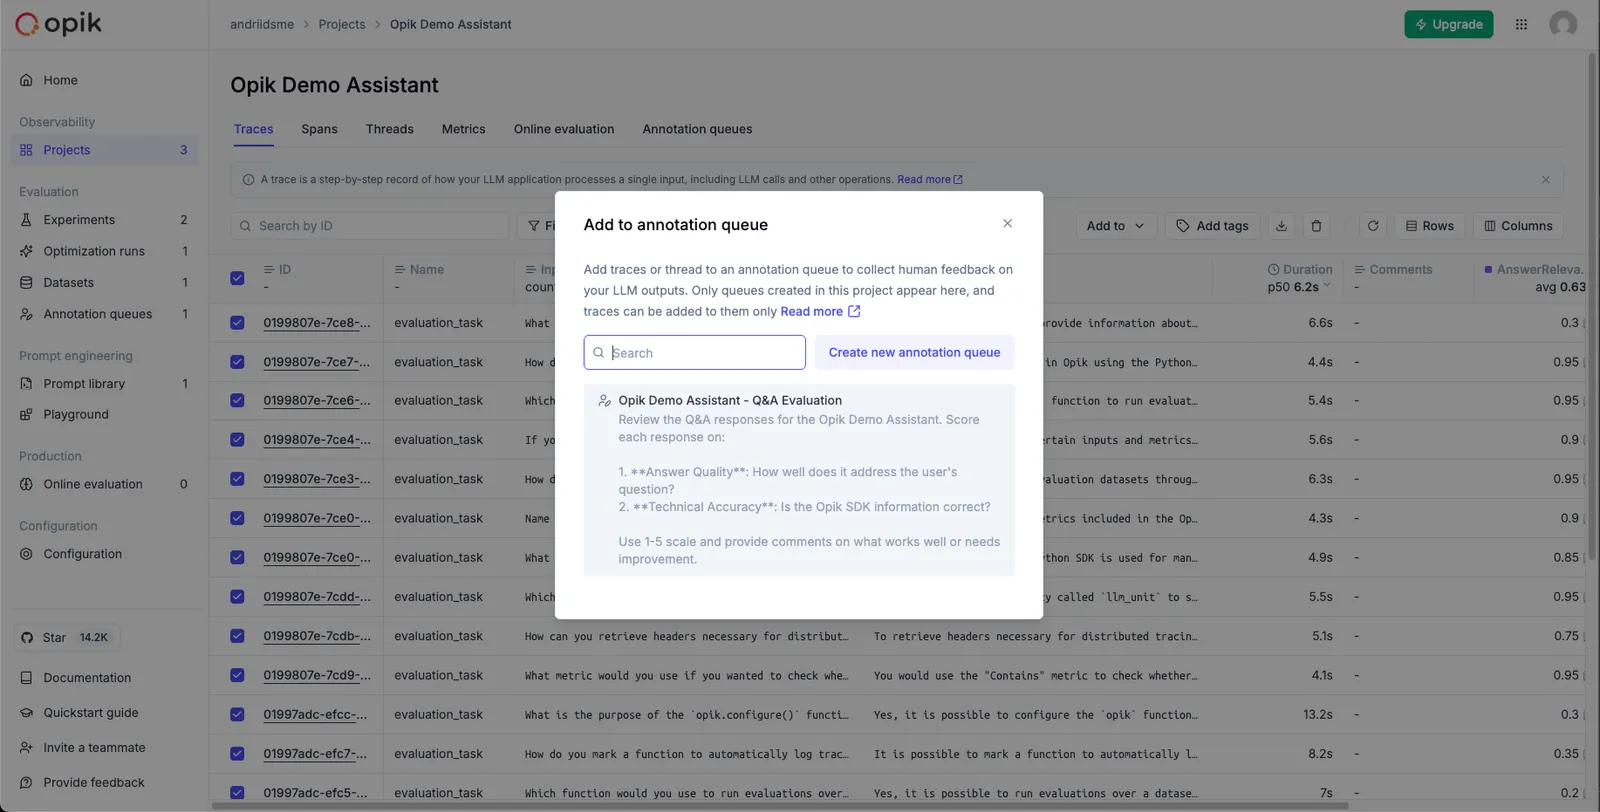
From Traces/Threads Lists:
- Select one or multiple items
- Click Add to -> Add to annotation queue
- Choose an existing queue or create a new one
From Individual Trace/Thread Details:
- Open the trace or thread detail view
- Click Add to -> Add to annotation queue in the actions panel
- Select your target queue
Populating a Queue Automatically
A queue can also collect items on its own, so low-quality output reaches reviewers without anyone watching the traces list. Turn on Automation when creating or editing a queue, then describe what is worth reviewing as conditions on feedback scores:
- All conditions must hold for an item to be added — they are combined with AND, and you can set up to five
- An item with no value for a score in the condition never matches it
- Where several people have scored the same name, the conditions are matched against the average of their values, so a condition that holds for one reviewer’s score can stop holding once another disagrees
- Tick Cap automatically added items at to bound how large automation lets the queue grow; once the queue holds that many items, however they got there, automation stops adding until some are removed. Adding by hand is never refused. Leave it unticked for no limit. Treat the number as approximate: a burst of scores arriving at once can carry the queue a little past it before it settles
Conditions are evaluated whenever a score is written, so an item is collected once it qualifies — whether that is seconds after the trace, when an online evaluation rule scores it, or days later when someone scores it by hand. The source of the score does not matter. Collection is not instant: an item appears a few seconds after its last score, which leaves room for a run of scores to settle so a queue is not filled on a value that is about to change.
Automation looks forward, not back. Switching it on collects nothing that has already been scored, only what is scored from then on, so seed a queue with the work you already have by adding those items by hand.
Automation never adds an item a queue has already held. If a reviewer removes an item, a later score will not bring it back — but you can always add it again yourself. Manual additions keep working on an automated queue, and the queue’s items table shows how each item arrived under Source.
Only traces and threads your application logged are collected — the ones that come from the SDK or the REST API. Playground runs, experiment traces, optimization runs and traces produced by evaluators are scored like any other, but automation skips them, so trying a prompt in the Playground never sends work to your reviewers. Those can still be added by hand.
Automation works the same way for thread queues, matching on thread scores instead of trace scores.
Automation is configured in the UI. The SDK helpers below create queues without it — open the queue and choose Edit to give one conditions afterwards.
Sharing with Subject Matter Experts
Once your queue is set up, you can share it with SMEs:
Copy Queue Link:
SME Access Required: Subject matter experts must be invited to your workspace before they can access annotation queues. Make sure to invite them to your project first, then share the queue link.
- Click the Share queue button on your queue to copy the queue link
- Share the link directly with SMEs via email, Slack, or other communication tools
SME Annotation Experience
When SMEs access a queue, they experience a streamlined, distraction-free interface designed for efficient review.
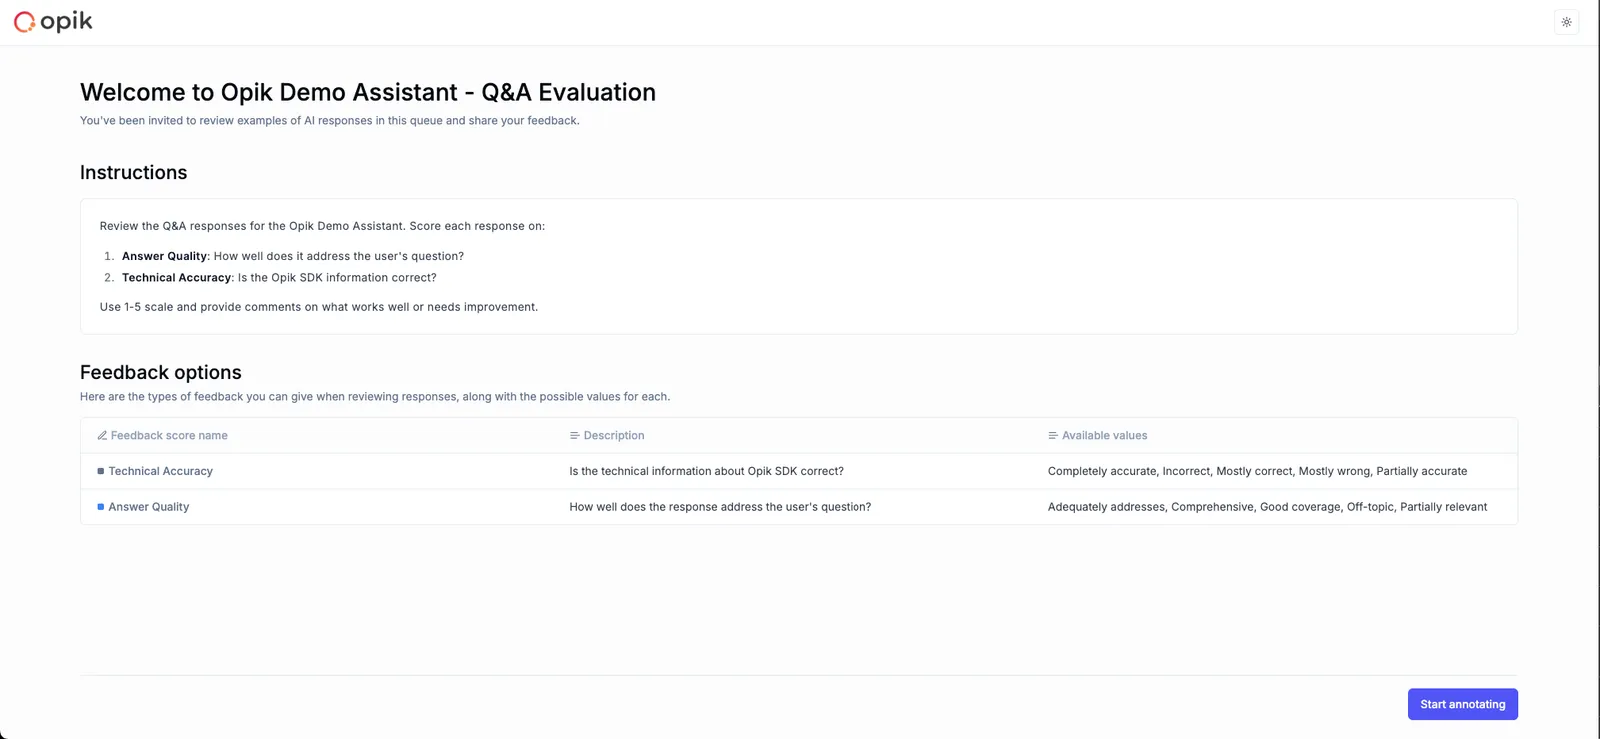
The annotation workflow begins with clear instructions and context, allowing SMEs to understand what they’re evaluating and how to provide meaningful feedback.
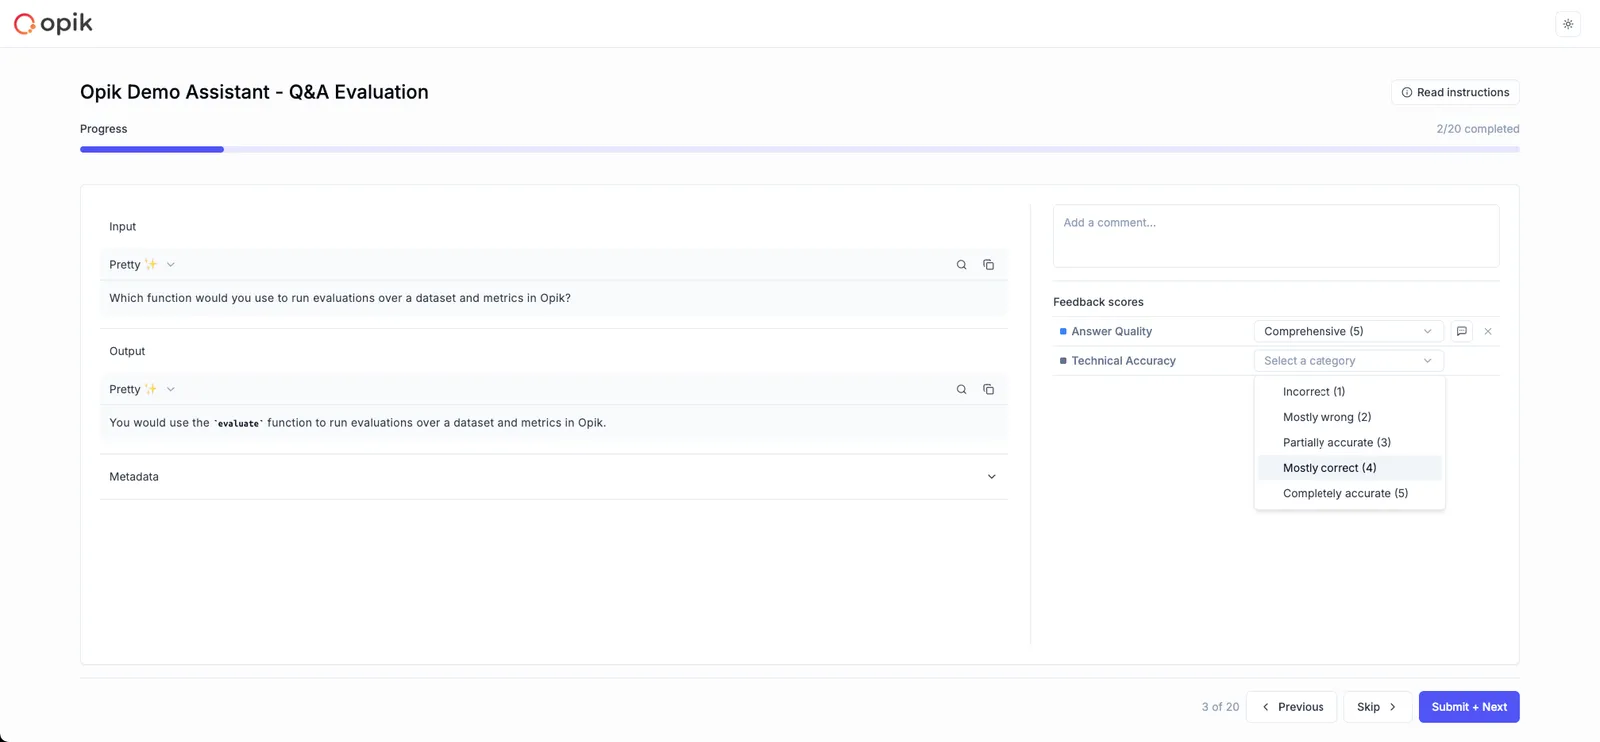
The SME interface provides:
- Clean, focused design: No technical jargon or complex navigation
- Clear instructions: Queue-specific guidance displayed prominently
- Structured feedback: Predefined metrics with clear descriptions
- Progress tracking: Visual indicators of completion status
- Comment system: Optional text feedback for additional context
Annotation Workflow
- Access the queue: SME clicks the shared link
- Review content: Examine the trace or thread output
- Provide feedback: Score using predefined metrics
- Add comments: Optional text feedback
- Submit and continue: Move to the next item
Managing Queues programmatically
You can create and manage annotation queues programmatically using the Python or TypeScript SDK. This is useful for automating the process of adding items to queues based on specific criteria.
Creating an Annotation Queue
Python
TypeScript
Creating a Traces Annotation Queue
Adding Traces to a Queue
Python
TypeScript
Fetching Items from a Queue
Use get_items() to retrieve all the traces (or threads, for a thread queue) currently in a queue. The items are scoped to the queue’s project.
Python
TypeScript
Working with Thread Queues
Python
TypeScript
Updating and Deleting Queues
Python
TypeScript
Listing Annotation Queues
Listing Annotation Queues
Python
TypeScript
Learn more
You can learn more about Opik’s annotation and evaluation features in: