Quickstart
This guide helps you integrate the Opik platform with your existing Agent. The goal of this guide is to help you log your first traces and start tracking your prompts and agent configuration in Opik.
Prerequisites
Before you begin, you’ll need to choose how you want to use Opik:
- Opik Cloud: Create a free account at comet.com/opik
- Self-hosting: Follow the self-hosting guide to deploy Opik locally or on Kubernetes
Logging your first LLM calls
Opik makes it easy to integrate with your existing LLM application. Pick the tab that matches your stack and follow the three steps to log your first trace:
Python SDK
TypeScript SDK
OpenAI (Python)
OpenAI (TS)
LangGraph
AI integration
All integrations
If you are using the Python function decorator, you can integrate by:
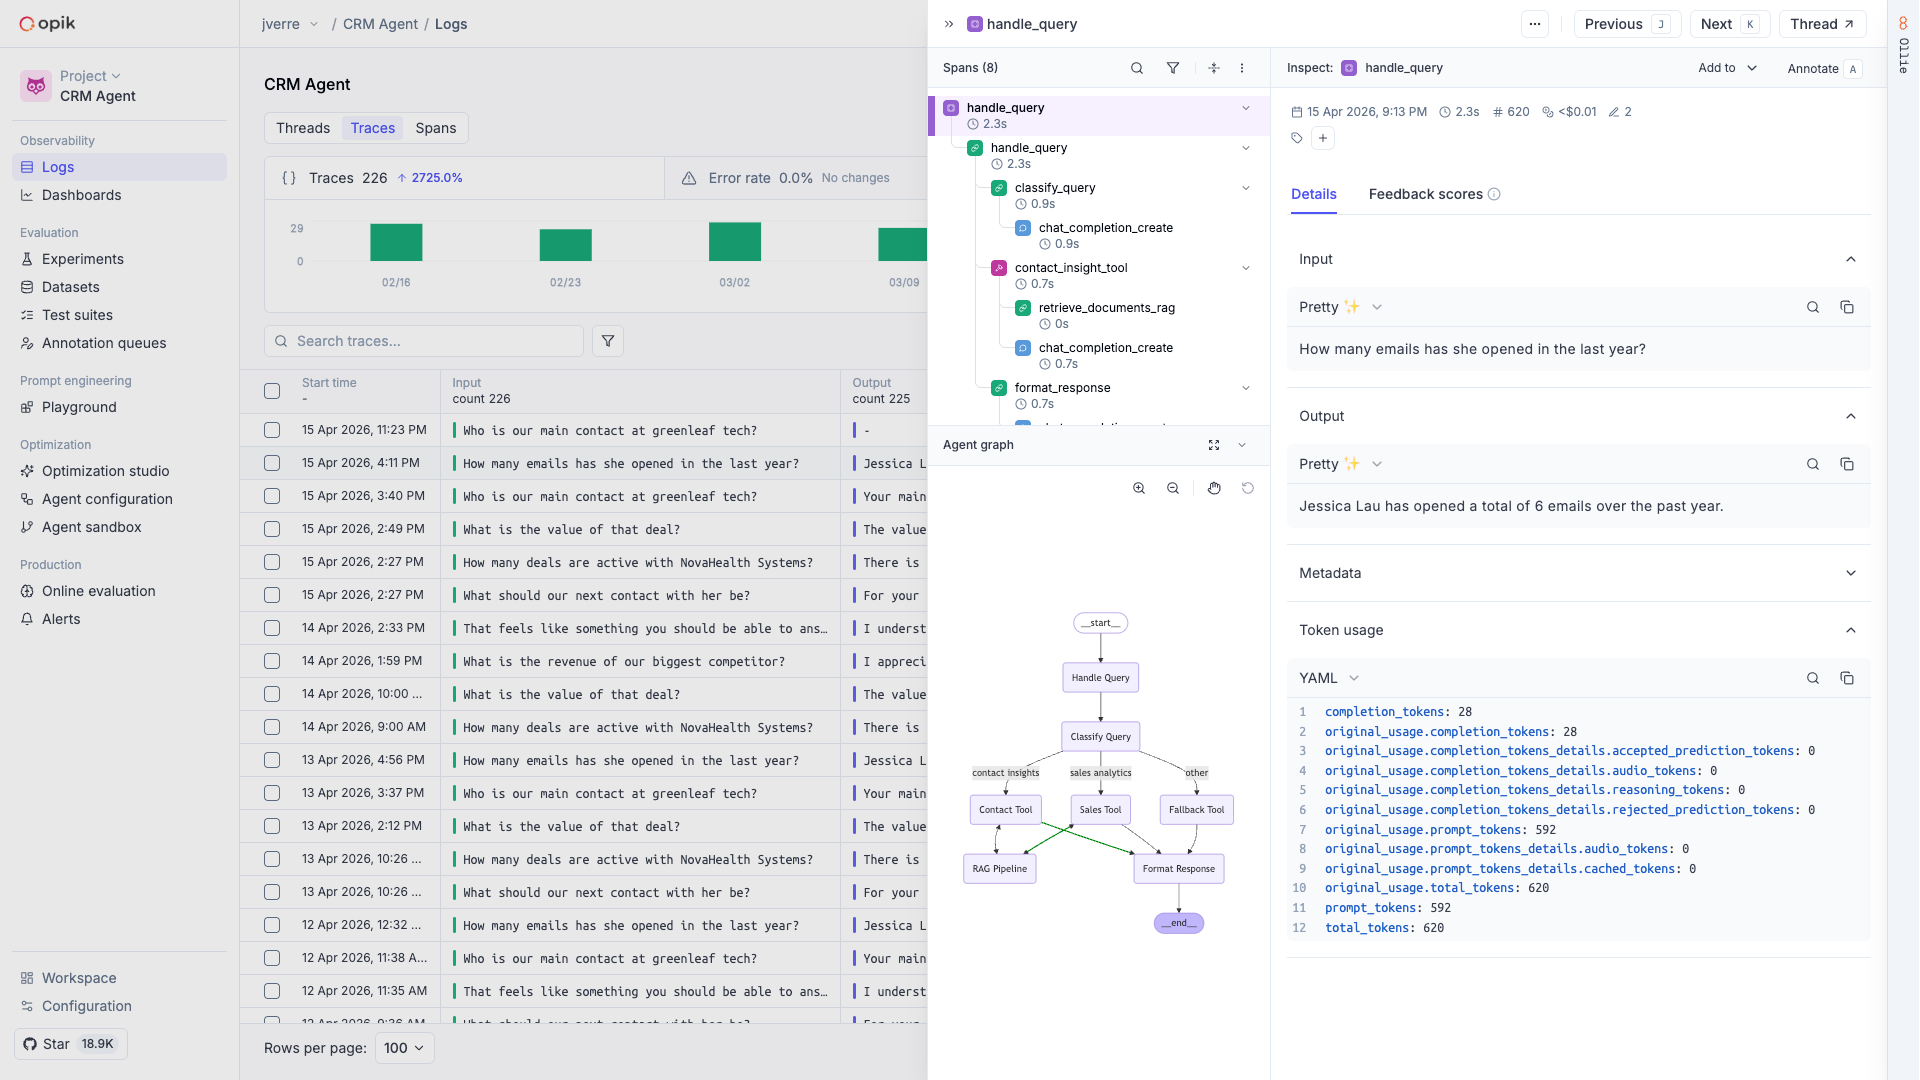
Analyze your traces
After running your application, you will start seeing your traces in Opik and you can use Ollie to analyze them and improve your agent.
If you don’t see traces appearing, reach out to us on Slack or raise an issue on GitHub and we’ll help you troubleshoot.
Next steps
Now that you have logged your first traces, here’s what to explore next:
- In depth guide on agent observability: Learn how to customize the data that is logged to Opik and how to log conversations.
- Opik Experiments: Opik allows you to automated the evaluation process of your LLM application so that you no longer need to manually review every LLM response.
- Opik’s evaluation metrics: Opik provides a suite of evaluation metrics (Hallucination, Answer Relevance, Context Recall, etc.) that you can use to score your LLM responses.