Evaluate multi-turn agents

Step-by-step guide to evaluate multi-turn agents

When working on chatbots or multi-turn agents, it can be challenging to evaluate the agent’s behavior over multiple turns because you don’t know what the user would ask as a follow-up question.

To solve this, we can use an LLM to simulate the user — generating realistic follow-up messages based on the conversation so far and running this for a configurable number of turns.

Once we have this conversation, we can use Opik evaluation features to score the agent’s behavior.

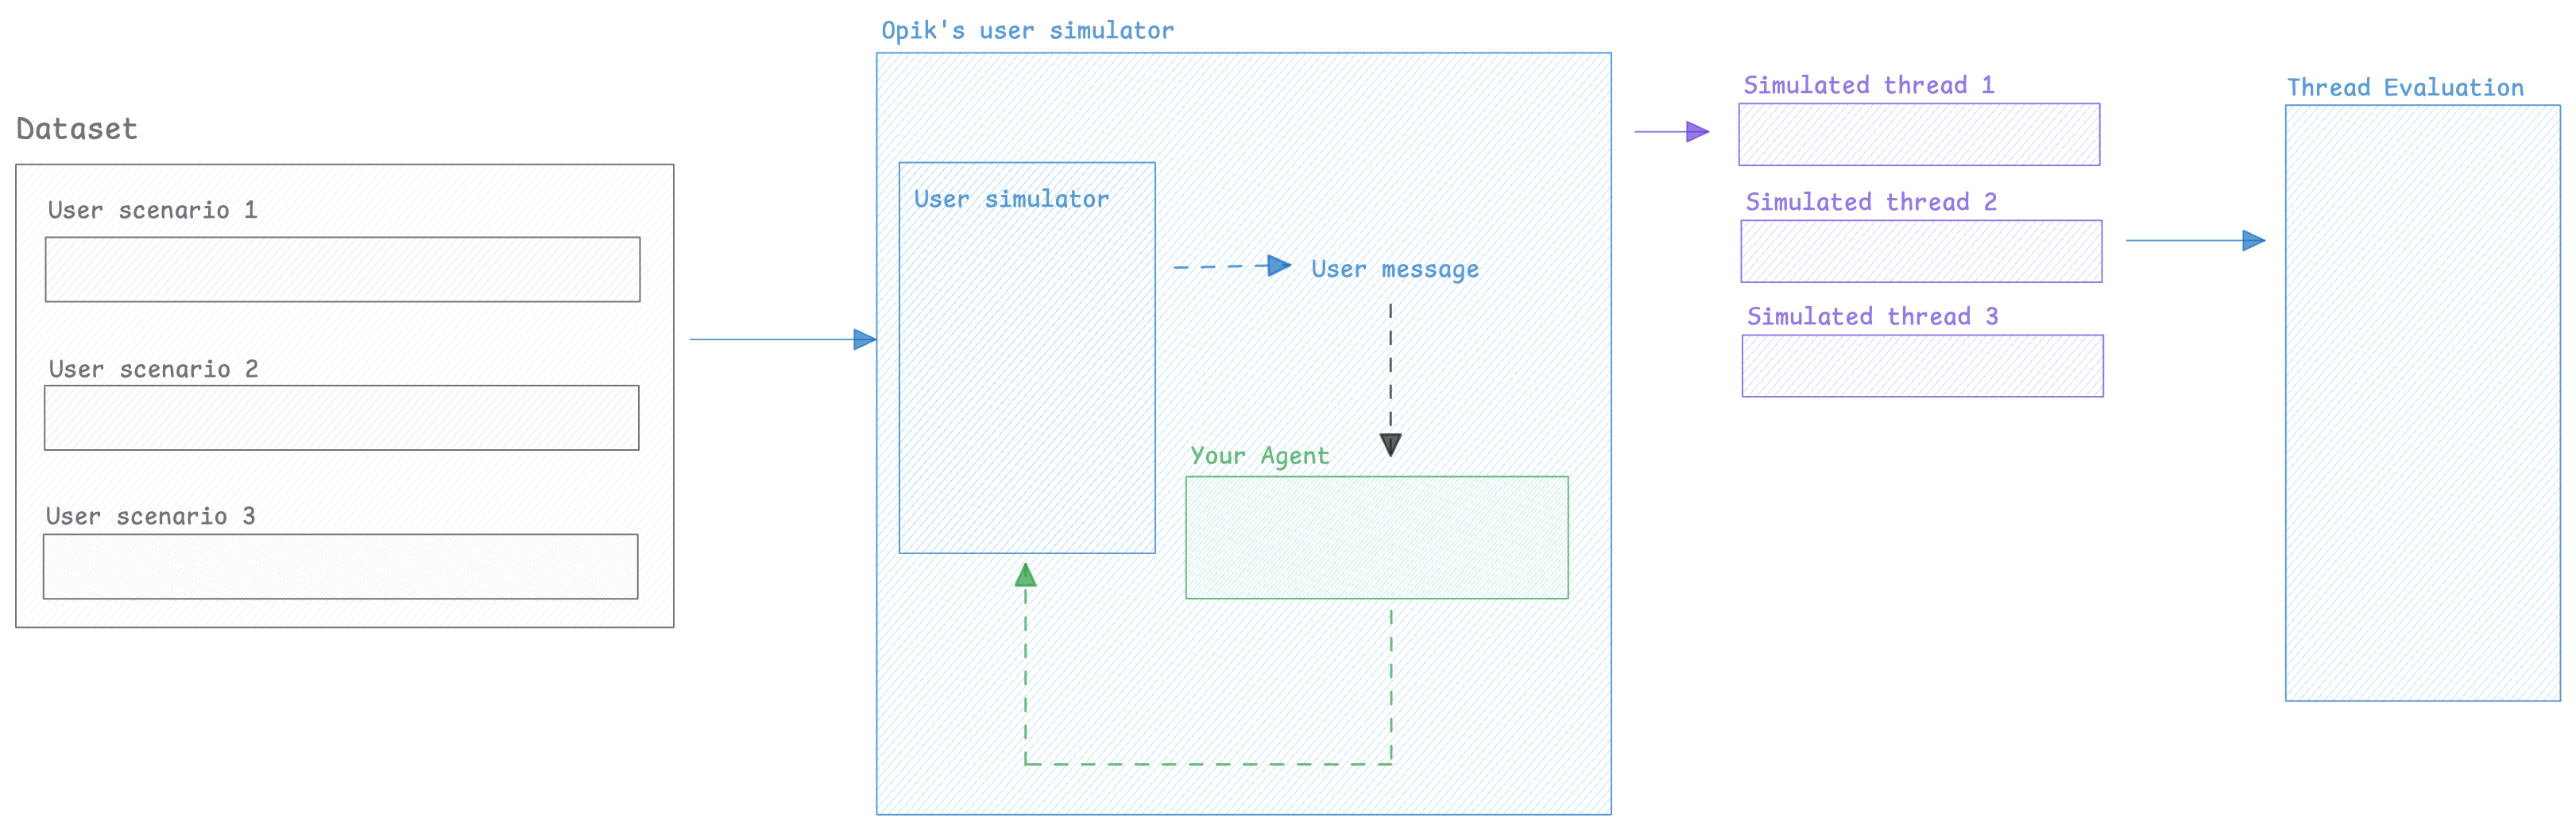
Creating the user simulator

In order to perform multi-turn evaluation, we need to create a user simulator that will generate the user’s response based on previous turns

User simulator
1from opik.simulation import SimulatedUser
2
3user_simulator = SimulatedUser(
4 persona="You are a frustrated user who wants a refund",
5 model="openai/gpt-4.1",
6)
7
8conversation_history = [
9 {"role": "assistant", "content": "Hello, how can I help you today?"}
10]
11
12for turn in range(3):
13 # Generate a user message based on the conversation so far
14 user_message = user_simulator.generate_response(conversation_history)
15 conversation_history.append({"role": "user", "content": user_message})
16 print(f"User: {user_message}")
17
18 # In practice, this would be your agent's response
19 agent_response = f"Placeholder agent response for turn {turn + 1}"
20 conversation_history.append({"role": "assistant", "content": agent_response})
21 print(f"Assistant: {agent_response}\n")

Now that we have a way to simulate the user, we can create multiple simulations that we will in turn evaluate.

Running simulations

1

1. Create a list of scenarios

In order to more easily keep track of the scenarios we will be running, let’s create a dataset with the user personas we will be using:

Create dataset with user personas
1import opik
2
3opik_client = opik.Opik()
4dataset = opik_client.get_or_create_dataset(name="Multi-turn evaluation")
5dataset.insert([
6 {"user_persona": "You are a frustrated user who wants a refund"},
7 {"user_persona": "You are a user who is happy with your product and wants to buy more"},
8 {"user_persona": "You are a user who is having trouble with your product and wants to get help"}
9])
2

2. Create our agent app

The run_simulation function expects an app callable with the following contract: it receives a user_message string and a thread_id keyword argument, and returns a message dict {"role": "assistant", "content": "..."}. The app is responsible for managing its own conversation history using the thread_id.

Here is an example using LangChain:

Example agent app (LangChain)
1from langchain.agents import create_agent
2from opik.integrations.langchain import OpikTracer
3
4opik_tracer = OpikTracer()
5
6agent = create_agent(
7 model="openai:gpt-4.1",
8 tools=[],
9 system_prompt="You are a helpful assistant",
10)
11
12agent_history = {}
13
14def run_agent(user_message: str, *, thread_id: str, **kwargs) -> dict[str, str]:
15 if thread_id not in agent_history:
16 agent_history[thread_id] = []
17
18 agent_history[thread_id].append({"role": "user", "content": user_message})
19 messages = agent_history[thread_id]
20
21 response = agent.invoke({"messages": messages}, config={"callbacks": [opik_tracer]})
22 agent_history[thread_id] = response["messages"]
23
24 return {"role": "assistant", "content": response["messages"][-1].content}
3

3. Run the simulations

Now that we have a dataset with the user personas, we can run the simulations:

Run simulations
1import opik
2from opik.simulation import SimulatedUser, run_simulation
3
4# Fetch the user personas
5opik_client = opik.Opik()
6dataset = opik_client.get_or_create_dataset(name="Multi-turn evaluation")
7
8# Run the simulations
9all_simulations = []
10for item in dataset.get_items():
11 user_persona = item["user_persona"]
12 user_simulator = SimulatedUser(
13 persona=user_persona,
14 model="openai/gpt-4.1",
15 )
16 simulation = run_simulation(
17 app=run_agent,
18 user_simulator=user_simulator,
19 max_turns=5,
20 )
21
22 all_simulations.append(simulation)

Each simulation result is a dictionary with:

  • thread_id: Unique identifier for the conversation thread
  • conversation_history: List of message dicts ({"role": "user"|"assistant", "content": "..."})

The run_simulation function keeps track of the internal conversation state by constructing a list of messages with the result of the run_agent function as an assistant message and the SimulatedUser’s response as a user message.

If you need more complex conversation state, you can create threads using the SimulatedUser’s generate_response method directly.

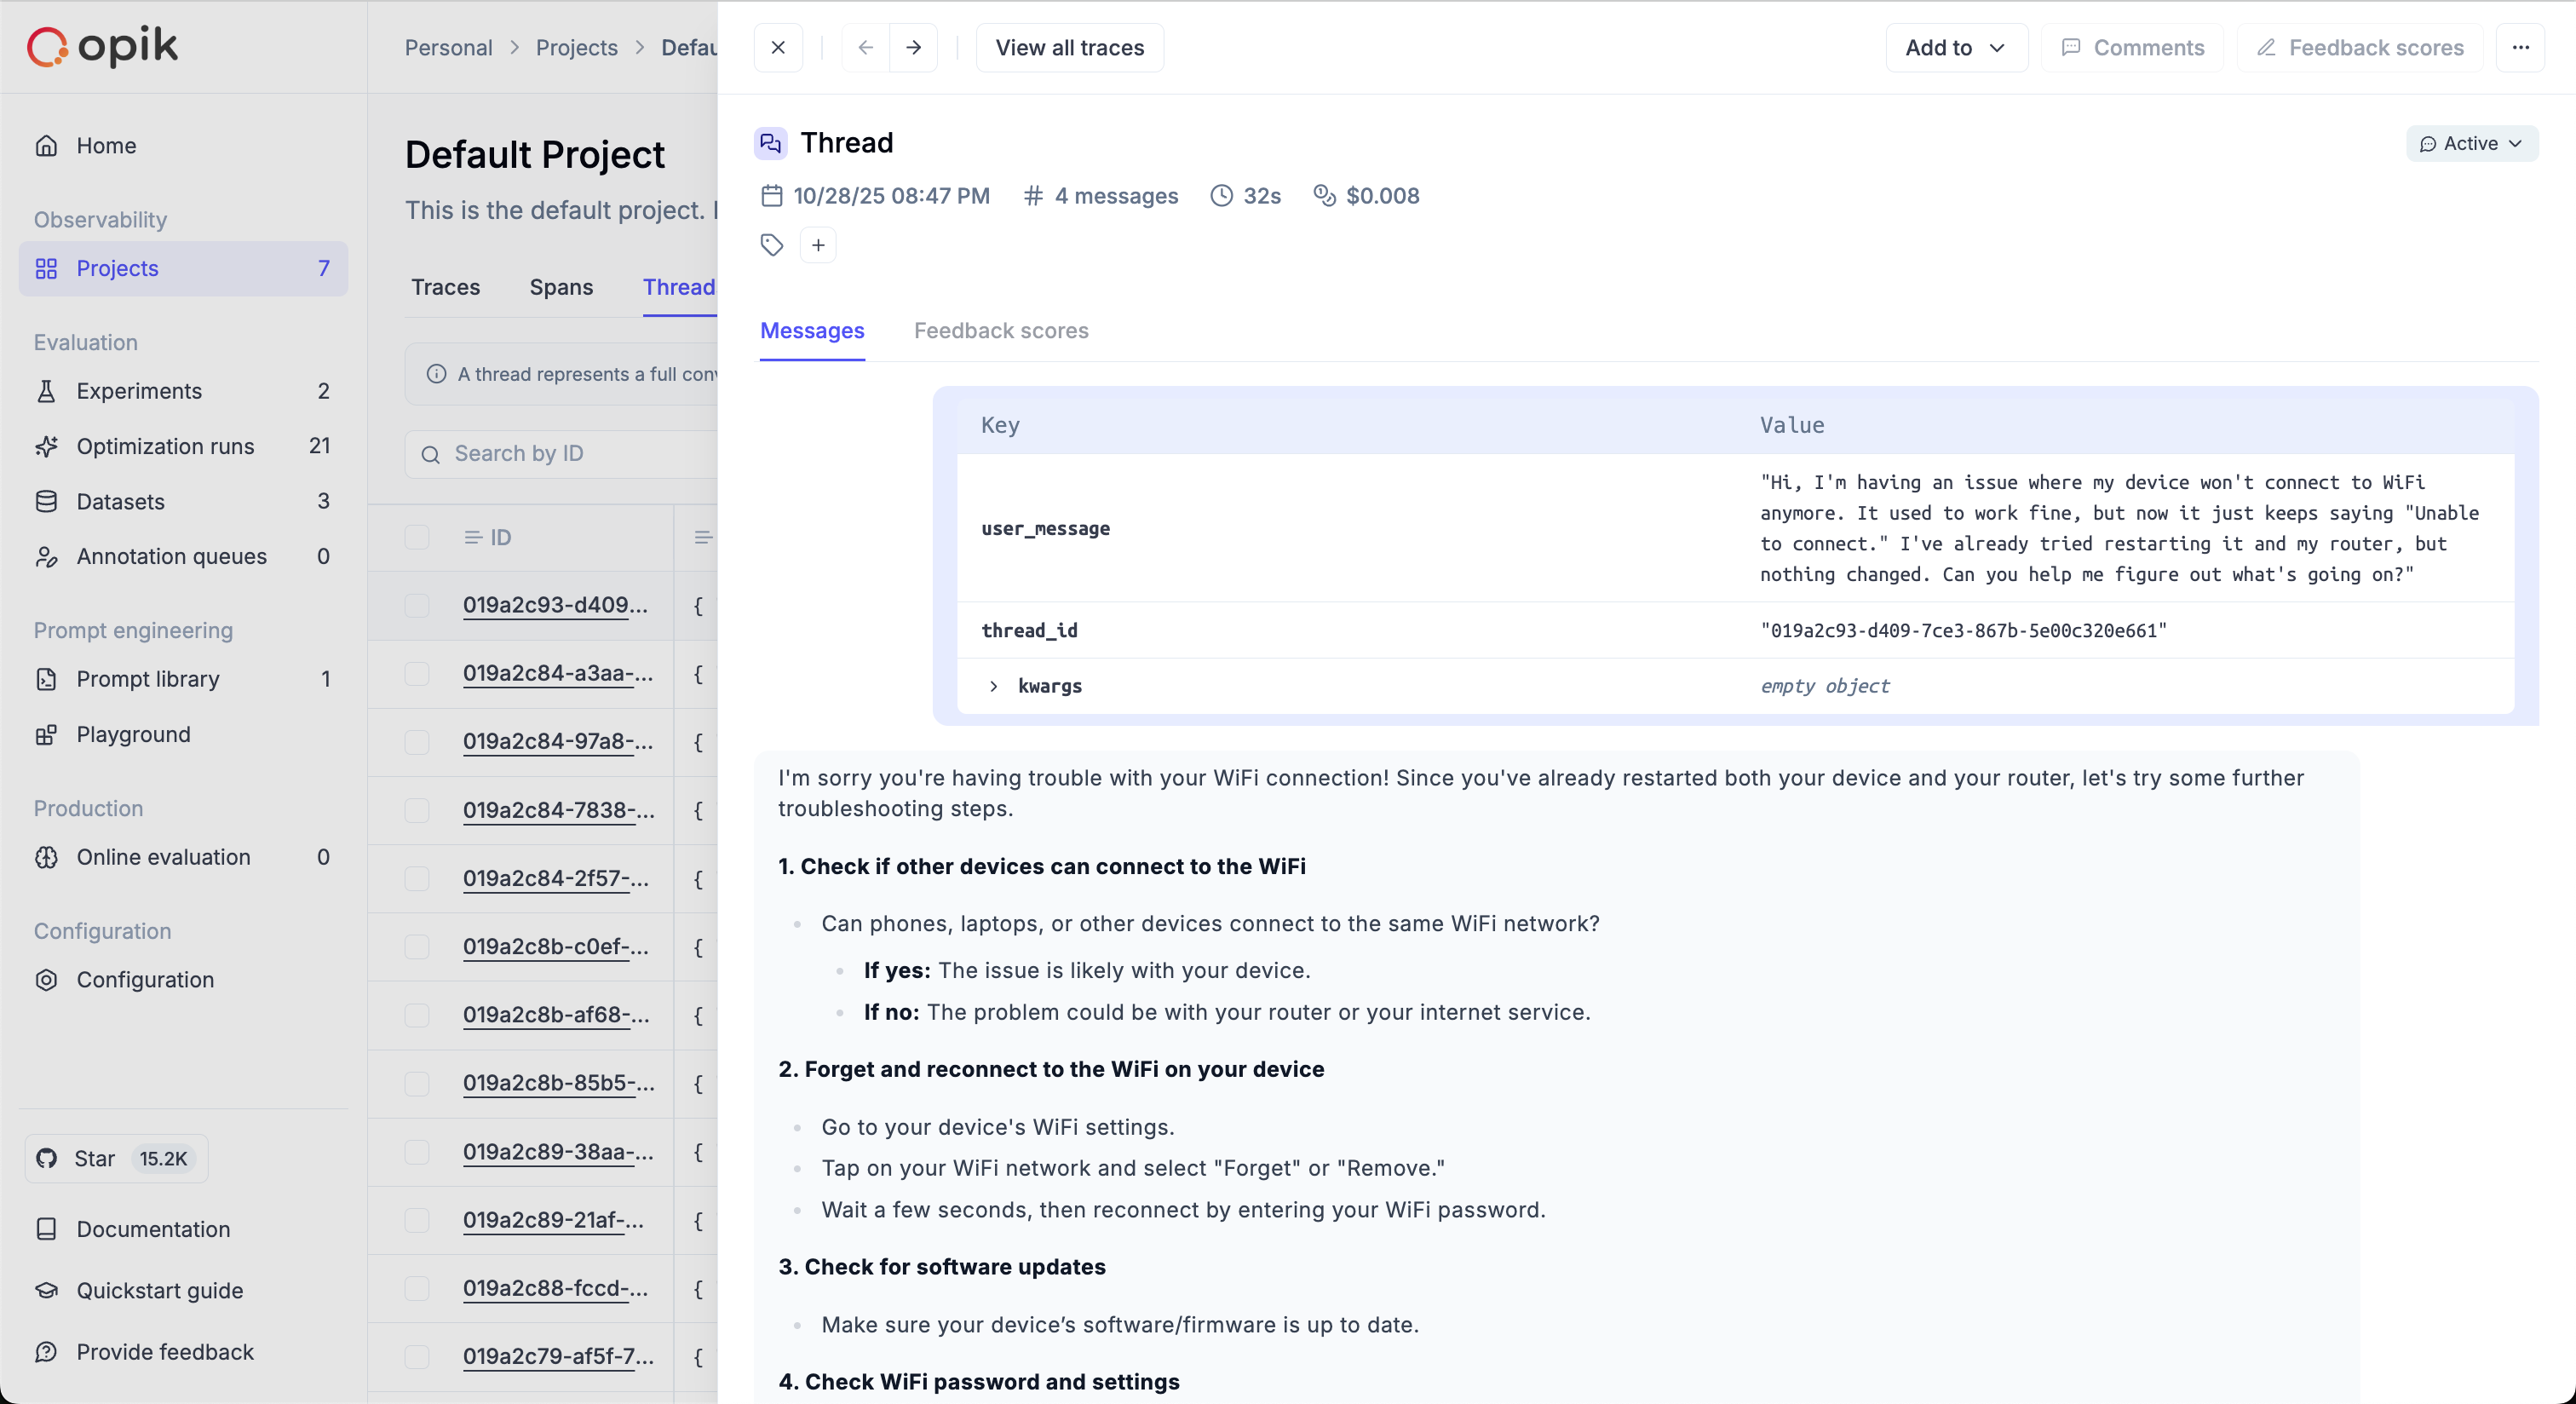
The simulated threads will be available in the Opik thread UI:

Scoring threads

When working on evaluating multi-turn conversations, you can use one of Opik’s built-in conversation metrics or create your own.

If you’ve used the run_simulation function, you will already have a list of conversation messages that you can pass directly to the metrics, otherwise you can use the evaluate_threads function:

1import opik
2from opik.evaluation.metrics import ConversationalCoherenceMetric, UserFrustrationMetric
3
4opik_client = opik.Opik()
5
6# Define the metrics you want to use
7conversation_coherence_metric = ConversationalCoherenceMetric()
8user_frustration_metric = UserFrustrationMetric()
9
10for simulation in all_simulations:
11 conversation = simulation["conversation_history"]
12
13 coherence_score = conversation_coherence_metric.score(conversation)
14 frustration_score = user_frustration_metric.score(conversation)
15
16 opik_client.log_threads_feedback_scores(
17 scores=[
18 {
19 "id": simulation["thread_id"],
20 "name": "conversation_coherence",
21 "value": coherence_score.value,
22 "reason": coherence_score.reason
23 },
24 {
25 "id": simulation["thread_id"],
26 "name": "user_frustration",
27 "value": frustration_score.value,
28 "reason": frustration_score.reason
29 }
30 ]
31 )

You can learn more about the evaluate_threads function in the evaluate_threads guide.

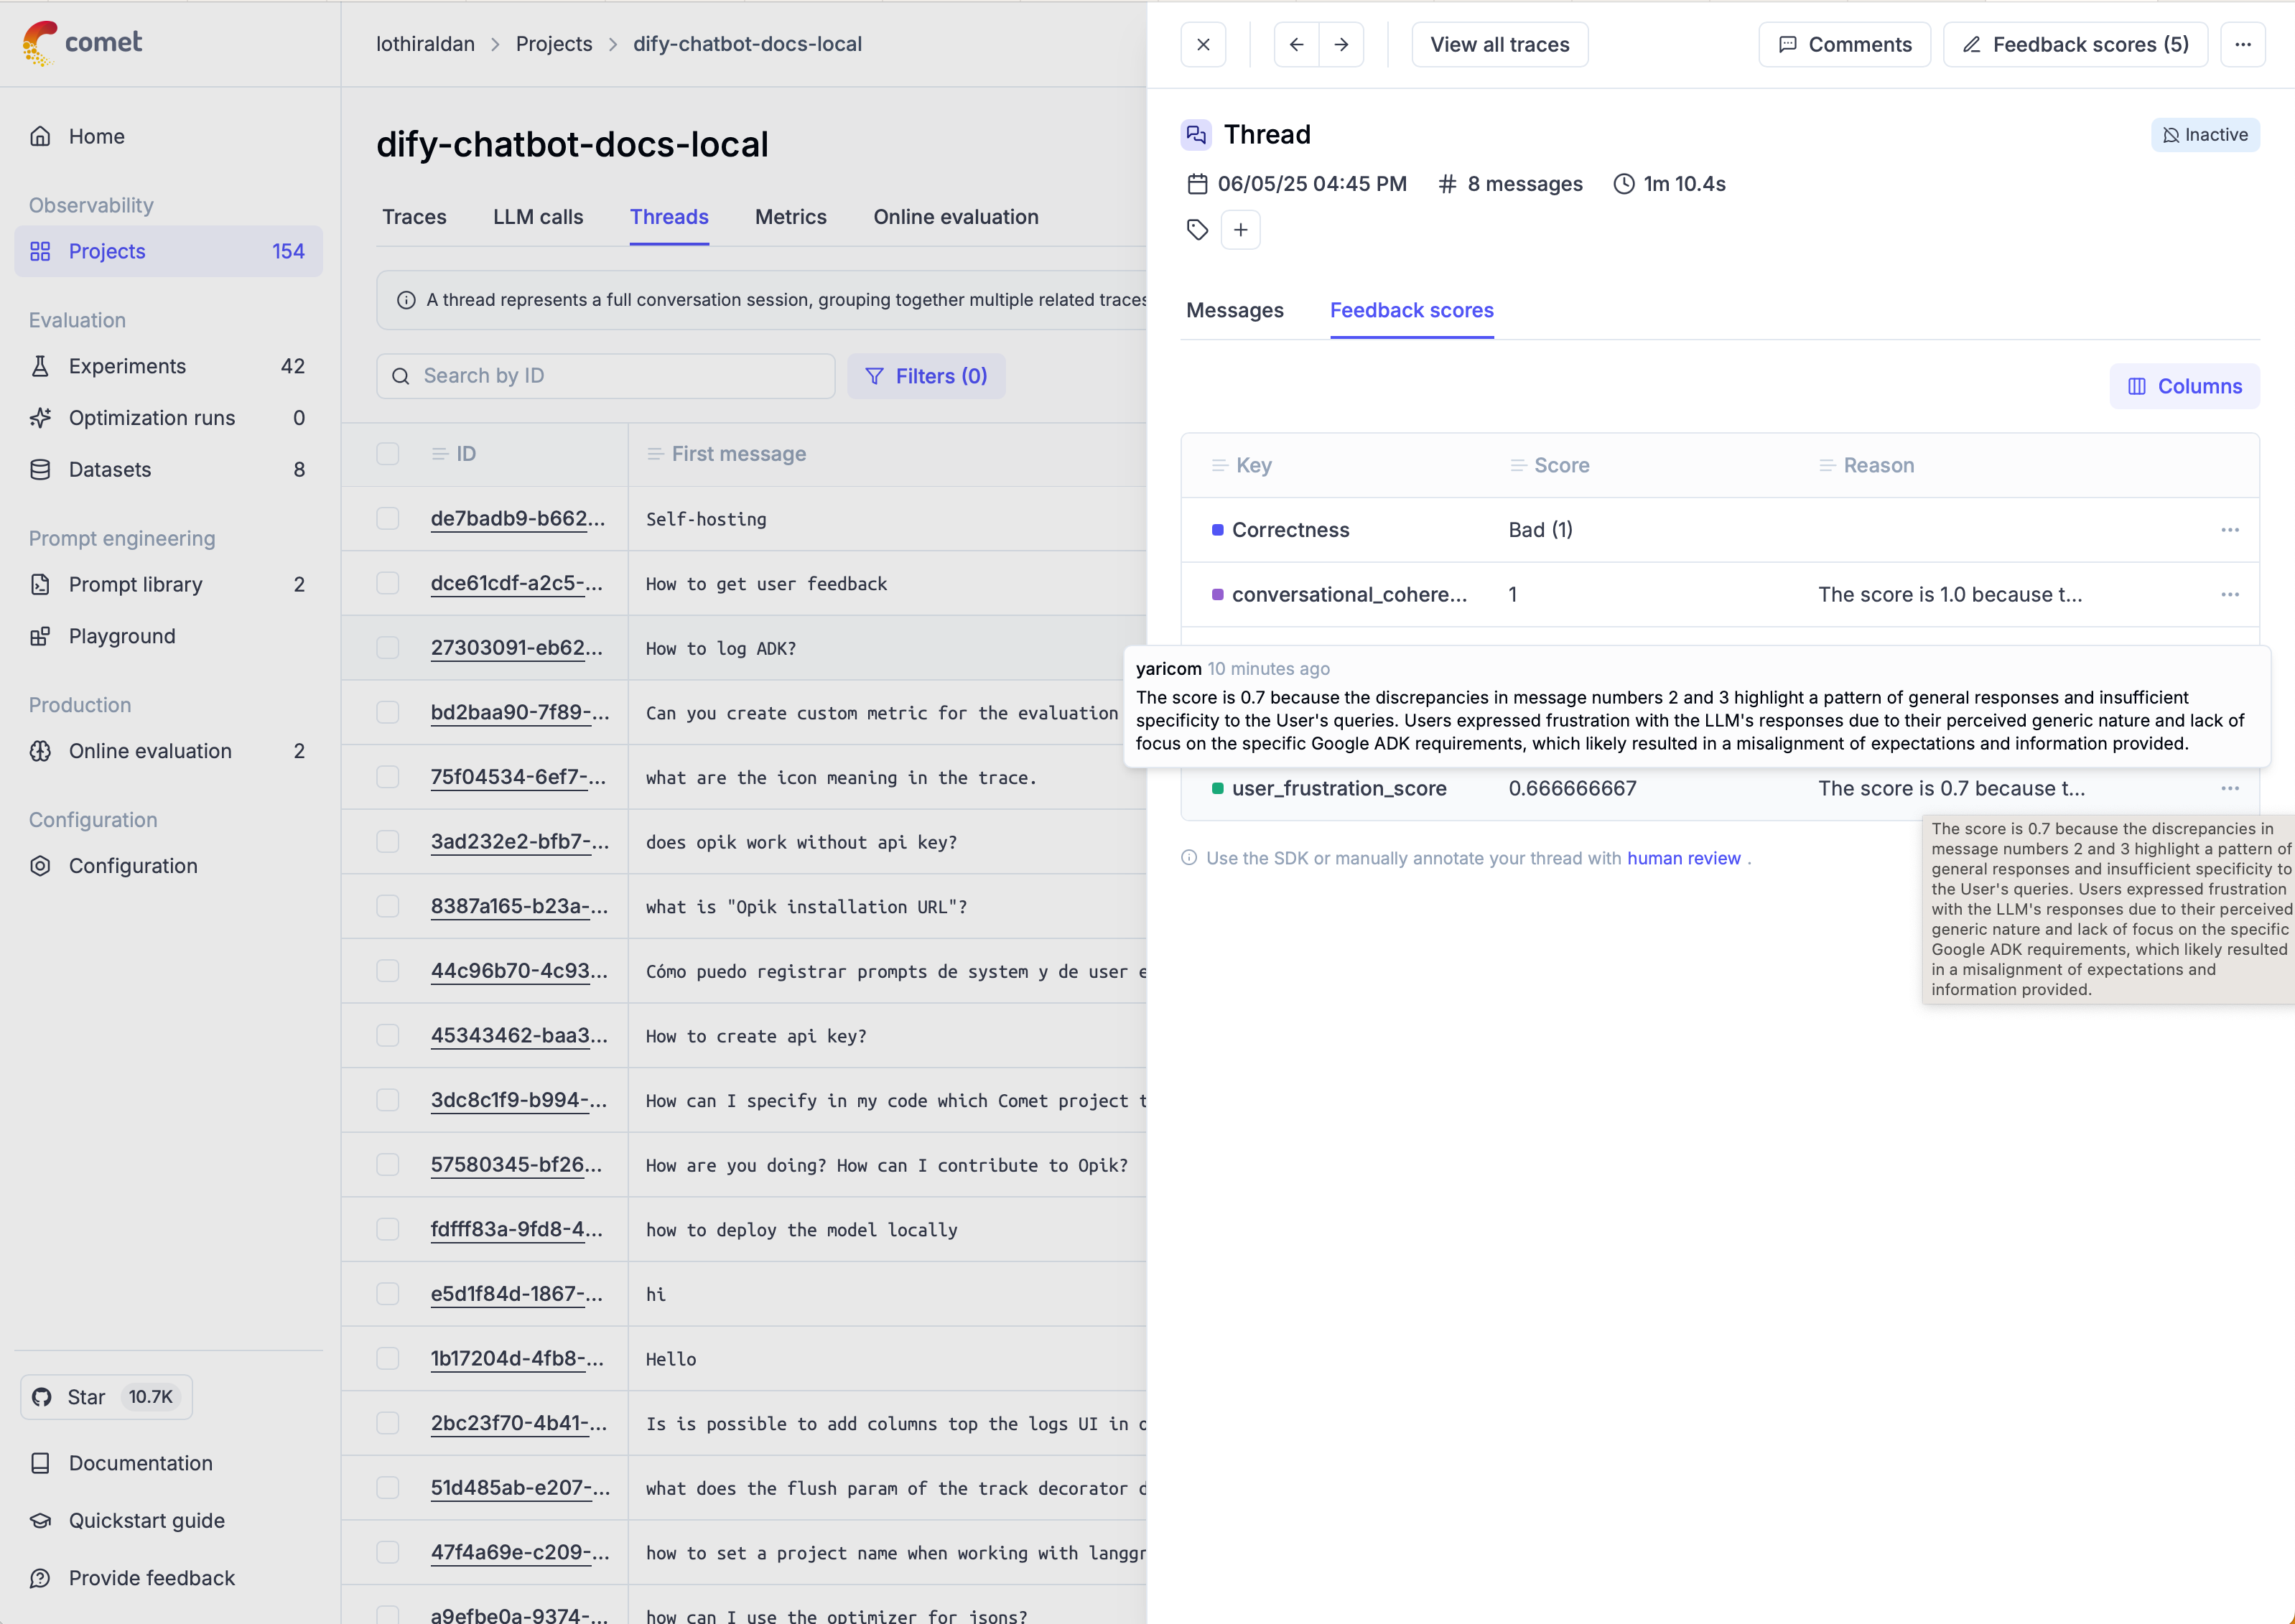
Once the threads have been scored, you can view the results in the Opik thread UI:

Next steps