Comet is a meta Machine Learning experimentation platform, providing many features to track, compare, optimize and monitor experiments and models. In practice, Comet permits tracking datasets and code changes. It also provides tools to improve productivity and collaboration, including panels and reports.
Recently, Comet has been integrated with GitLab, a very popular DevOps platform that permits the development of secure software in a single application. In practice, you can write the code related to your Machine Learning experiment locally, save it to GitLab and build reports and monitor experiment results in Comet.
Thanks to the combination between GitLab and Comet, you can build CI/CD (Continuous Integration and Continuous Delivery/Continuous Deployment) applications easily and quickly.
How can you achieve such a goal? Let’s look at a practical example.
Imagine that your team wants to build a Machine Learning model that classifies if a banknote is true or false. You write your code and then you want to track your experiment in Comet by monitoring the most popular evaluation metrics for your models, such as precision, recall, and accuracy. Imagine, also, that some members of your team improve your model and want to integrate the changes to your code. Before accepting your colleagues’ code, you want to make sure that her changes improve the model. To solve your problem, you can exploit the power of GitLab.
In this article, I describe how to set up the described scenario in Comet and how to integrate it in GitLab. For a more detailed experiment, you can refer to Dhruv Nair’s article, entitled Streamline ML Model Development with GitLab’s DevOps Platform and Comet.
Set up of an Experiment in Comet
Firstly I log in to the Comet Platform. Then, I create a New Project, by clicking the top right button.

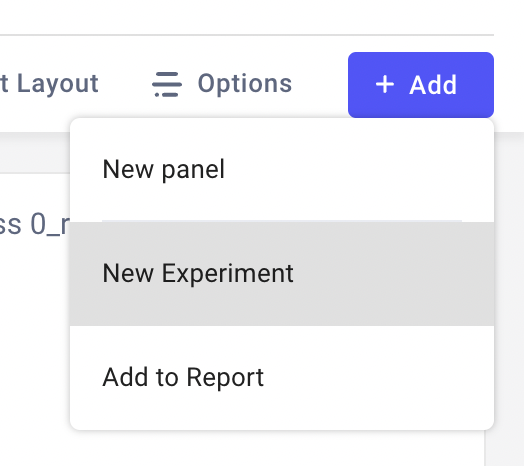
Once created, I make a new Experiment by clicking on the top right ‘Add’ button, as shown in the Figure on the left.
I copy the generated code. Each experiment is identified by its API key and refers to a specific workspace, which corresponds to your username.
Now, I can write the code for my classifier. I create a new empty script, named classifier.py.
Firstly, I define two environment variables, which contain my Experiment secrets:
COMET_API_KEY = os.environ.get("COMET_API_KEY")
COMET_WORKSPACE = os.environ.get("COMET_WORKSPACE")
The two variables will be configured later in GitLab, as explained later in this article.
Then, I paste the code generated by my Comet experiment:
from comet_ml import Experimentexperiment = Experiment(
   api_key=COMET_API_KEY,
   project_name="banknote",
   workspace=COMET_WORKSPACE,
)
Now, I load the banknote dataset:
import pandas as pddf = pd.read_csv('source/data_banknote_authentication.csv')
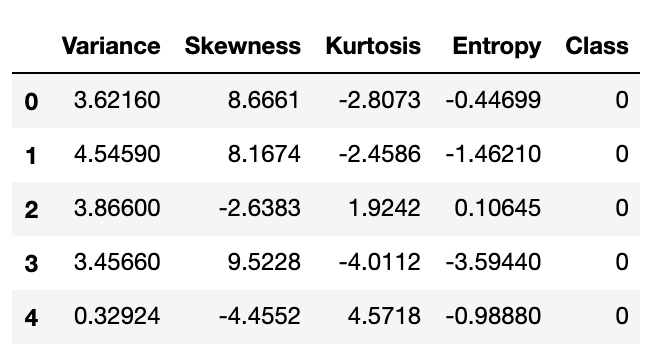
I extract from it X and Y:
cols = ['Variance', 'Skewness', 'Kurtosis', 'Entropy']
X = df[cols]
Y = df['Class']
Since the input features are not scaled, I transform them through a Min-Max Scaler:
from sklearn.preprocessing import MinMaxScalerscaler = MinMaxScaler()
X_scaled = scaler.fit_transform(X)
I split the dataset into training and test sets:
from sklearn.model_selection import train_test_splitX_train, X_test, y_train, y_test = train_test_split(X_scaled, Y, test_size=0.33, random_state=42)
And I fit a K-Neighbors Classifier:
from sklearn.neighbors import KNeighborsClassifiermodel = KNeighborsClassifier(n_neighbors=3)
model.fit(X_train,y_train)
Now I evaluate the model:
from sklearn.metrics import classification_reporty_pred = model.predict(X_test)target_names=['class 0', 'class 1']
report = classification_report(y_test, y_pred, target_names=target_names, output_dict=True)
Finally, I save results in my Comet Experiment:
for label, metric in report.items():
  try:
    experiment.log_metrics(metric, prefix=label)
  except:
    experiment.log_metric(label, metric)
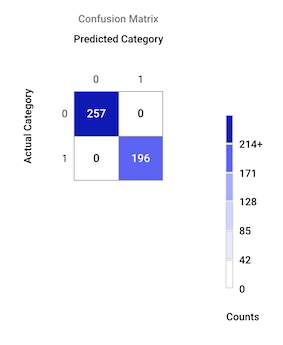
I also build a confusion matrix:
experiment.log_confusion_matrix(y_test.tolist(), y_pred.tolist())
I save my script, and I run it:
python classifier.py
When the script is completed, I can check the results in my Comet workspace. There is a table with all my metrics, as shown in the following figure:

In addition, the confusion matrix has been created:
The experiment is ready and working. The next step involves its integration with GitLab.
How does the team at Uber manage to keep their data organized and their team united? Comet’s experiment tracking. Learn more from Uber’s Olcay Cirit.
Set-Up of Gitlab
Firstly, I log in to GitLab. Then, I create a new project by clicking the top right button. I entitle my project banknote.

Configure Environment Variables
Then, I must configure the two environment variables exploited by my script. I select my project, then, from the menu on the left, I select Settings → CI/CD → Variables →Expand. I can add two protected variables, named COMET_API_KEY and COMET_WORKSPACE, as shown in the following figure:
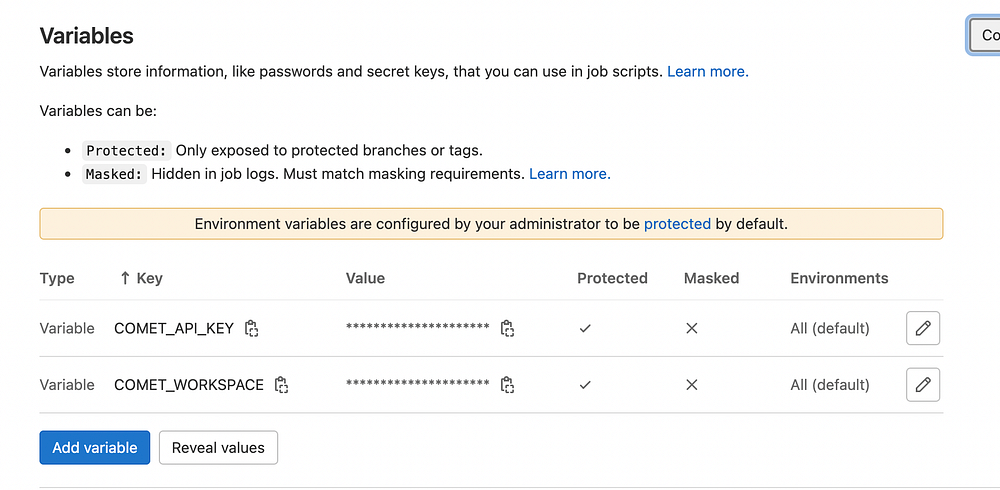
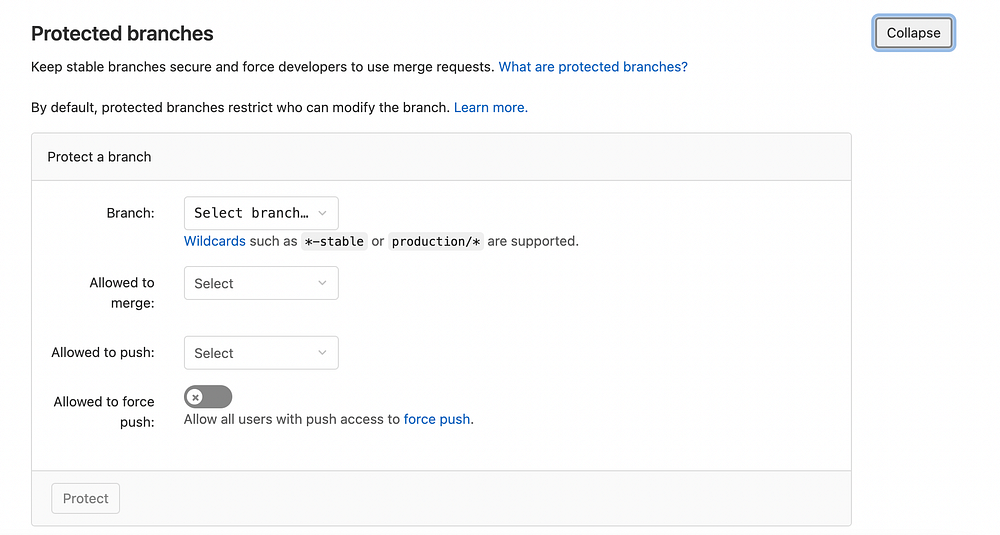
Only protected branches of the repository can access the protected variables. The main branch is considered protected by default. You can manage who can access protected variables in the Protected Branches tab, which can be accessed from Settings →Repository →Protected Branches →Expand.
Add files to the Project
Once variables have been set, I clone the repository in my local file system. I copy the repository URL which is available by clicking the clone button and I write in a terminal the following command:
git clone <my_repository_url>
A new folder appears in my file system, called banknote. I copy the classifier.py file in this folder, as well as the CSV file. I also create a requirements.txt file, containing the list of libraries needed to run my experiment:
comet-ml
pandas
scikit-learn
Then, I add them to the git repository and I save all the changes to my remote workspace in GitLab:
cd banknote
git add classifier.py
git add requirements.txt
git add source/*.csv
git commit -m "Initial Import"
git push origin
Run the Experiment on GitLab
Now I’m ready to run my experiment in GitLab. I can exploit the CI/CD module provided by GitLab: from the menu on the left, I select CI/CD →Editor →Create a new CI/CD pipeline. An editor opens, showing the default .gitlab-ci.yml file. This script specifies the steps needed to run the experiment. I remove the default code and I paste the following one to my .gitlab-ci.ymlfile:
image: python:3.8build-classification:
  script:
     - pip install -r requirements.txt
     - python classifier.py
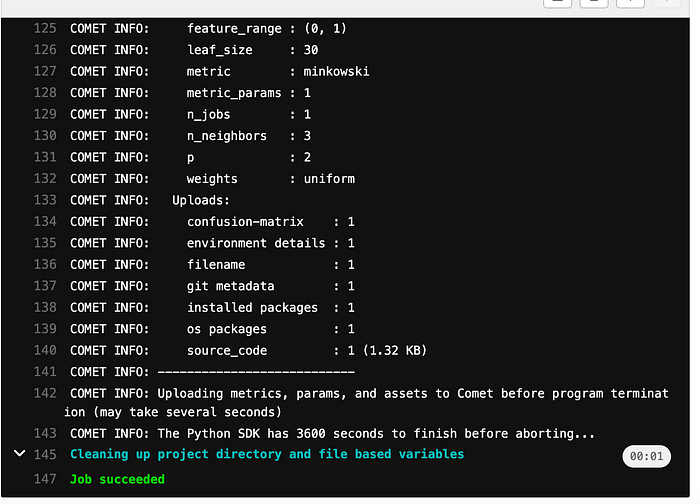
I commit changes and automatically the code is executed. When the pipeline is ready, I can click the View pipeline button, located in the top right of the page, and then on the build-classification button

A terminal opens showing the output of the script:
The results of the experiment run in GitLab are available in Comet. In addition, every time I run a new pipeline in the CI/CD environment, a new experiment is created in Comet.
If a colleague of yours proposes some changes to the code through a pull request, before accepting her changes to the code, you can verify the results in Comet and then decide whether to accept or not.
Summary
Congratulations! You have just learned how to integrate Comet and GitLab to track your experiments! The process is simple and requires the following steps:
- Create a new project in Comet and then a new experiment.
- Write the code for your experiment using your preferred editor.
- Create a new project in Gitlab.
- Add your files to the project.
- Create a new CI/CD pipeline and run the code in Gitlab.
- Track the results in Comet.
Comet is a very powerful platform, that also provides other interesting features, which permit you to monitor and visualize your model data in a very innovative way. For example, you can build personalized panels and reports, as well as monitor your experiments during and after the training phase.
Try Comet for free today! Happy coding 🙂