Getting Started with Stack Navigator Using react-navigation 5 in React Native and Expo Apps

Just recently, the 5th stable version of the React Navigation library was released. Without a doubt, it’s one of the most popular navigation solutions in React Native apps that also has support for Expo.
Recently, it underwent some core changes. Specifically, how you used to define routes up until react-navigation version 4.x.x has some major changes.
Some of the highlights, which the team of maintainers enumerated in a blog post, are that the navigation patterns are now more component-based, common use cases can now be handled with pre-defined Hooks, a new architecture allows you to configure and update a screen from the component itself, and a few other changes, as well.
The major highlight of these new changes is the component-based configuration. If you have experience developing with web-based libraries such as ReactJS in combination with react-router, you won’t experience much of a learning curve here.
However, if you’re diving into React Native recently, chances are that you are going to use react-navigation. As such, I’d recommend starting with this latest version. I hope this tutorial serves as a starting point or a refreshing one in your journey.
Table of Contents
- Requirements
- Install dependencies
- Create mock screens
- Create a basic stack navigator
- Specifying options for each screen in Stack Navigator
- Navigating between two screens
- Enabling gestures in react-navigation
- Passing data between routes
- How to use params in the screen’s title
- Using common screenOptions to modify header styles
- Making the back button title invisible on iOS
- Understanding header modes and changing them in an Android app
- Directly navigating from the third screen to the top of the stack screen navigator
- Conclusion
Requirements
Requirements for this tutorial are simple. Have the following installed on your local dev environment:
- Node.js version >=
10.x.xinstalled - Have access to one package manager such as npm or yarn
- Latest
expo-cliversion installed (or use npx)
Do note that, without diving too much into the configuration of native binaries with the react-navigation library, I’m going to use the expo-cli to generate the project and the Expo client to view the output from time to time. Make sure you have both installed.
Install dependencies
To start, generate a new Expo project with a blank template by running the following command in a terminal window:
npx expo init [Project Name]

# after the project directory has been generated

cd [Project Name]
Next, install the following dependencies for the react-navigation library to work. The first command is going to install the core utilities of react-navigation that are used by navigators to create the navigation structure in the app.
The second command uses expo install instead of npm install or yarn add. The reason is that expo is going to install the version of the libraries mentioned that are compatible with the Expo SDK.
yarn add @react-navigation/native @react-navigation/stack

# use expo install for Expo projects only
expo install react-native-gesture-handler react-native-reanimated react-native-screens react-native-safe-area-context @react-native-community/masked-view
Do note that the package @react-navigation/stack is only required when you’re going to use the Stack navigation pattern in the app. For example, if you’re just going to use tab navigation, you’ll need install a different package, as discussed here.
Create mock screens
Create a new directory src/screens and inside it, create two new files called Home.js and Detail.js. The code snippet for both of these files is listed below:
// src/screens/Home.js

import React from 'react'
import { StyleSheet, View, Text } from 'react-native'

function Home() {
  return (
    <View style={styles.container}>
      <Text style={styles.text}>Home Screen</Text>
    </View>
  )
}

const styles = StyleSheet.create({
  container: {
    flex: 1,
    justifyContent: 'center',
    alignItems: 'center',
    backgroundColor: '#ebebeb'
  },
  text: {
    color: '#101010',
    fontSize: 24,
    fontWeight: 'bold'
  }
})

export default Home

// src/screens/Detail.js
These screen components are for demonstration purposes. You have to feed the routes to the navigator to work with—these screen components are going to the routes.
Create a basic stack navigator
In this section, let’s set up a basic stack navigator. Start by creating a new directory src/navigation. The best definition of what a stack navigator does can be read from its docs:
React Navigation’s stack navigator provides a way for your app to transition between screens and manage navigation history. If your app uses only one stack navigator then it is conceptually similar to how a web browser handles navigation state — your app pushes and pops items from the navigation stack as users interact with it, and this results in the user seeing different screens.
Now that you have an idea of what exactly a stack navigation pattern is, let’s start by creating one. Inside the src/navigation directory, create a new file called MainStackNavigator.js and import the following statements:
import * as React from 'react'
import { NavigationContainer } from '@react-navigation/native'
import { createStackNavigator } from '@react-navigation/stack'

import Home from '../screens/Home'
From the above snippet, the NavigationContainer is a component that manages the navigation tree. It also contains the navigation state and has to wrap all the navigator’s structure.
The createStackNavigator is a function used to implement a stack navigation pattern. This function returns two React components: Screen and Navigator, which help us configure each component screen. For now, let’s add one screen to this navigation pattern:
const Stack = createStackNavigator()

function MainStackNavigator() {
  return (
    <NavigationContainer>
      <Stack.Navigator>
        <Stack.Screen name='Home' component={Home} />
      </Stack.Navigator>
    </NavigationContainer>
  )
}

export default MainStackNavigator
In the above snippet, there are two required props with each Stack.Screen. The prop name refers to the name of the route, and the prop componentspecifies which screen to render at the particular route.
Don’t forget to export the MainStackNavigator since it’s going to be imported in the root of the app, (that is, inside App.js file) as shown below:
import React from 'react'

import MainStackNavigator from './src/navigation/MainStackNavigator'

export default function App() {
  return <MainStackNavigator />
}
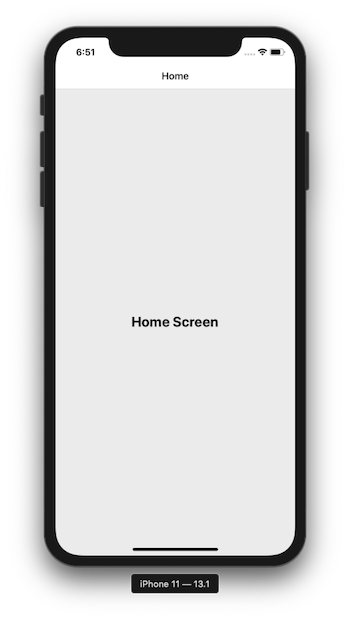
Execute the command expo start and make sure the Expo client is running either in a simulator device or a real device. You should see the Home screen, like this:
Specifying options for each screen in a stack navigator
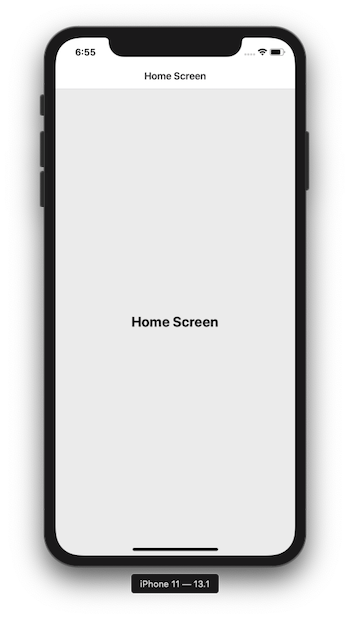
By default, a stack navigator shows the title of a screen inside the header. However, you can customize the title of a screen. Let’s change the title of the screen from Home to render Home Screen.
This is done by specifying the options on each screen, as shown below. Open the MainStackNavigator.js file and the prop options on Stack.Screenfor the Home component.
<Stack.Screen name='Home' component={Home} options={{ title: 'Home Screen' }} />
The changes are instantly reflected in the Expo client:
Navigating between two screens
In the current stack navigator structure, let’s add the second screen component called Detail. Import it from screens/Detail.js and add another route, as shown below:
// rest import statements remain same
import Detail from '../screens/Detail'

function MainStackNavigator() {
  return (
    <NavigationContainer>
      <Stack.Navigator>
        <Stack.Screen
          name='Home'
          component={Home}
          options={{ title: 'Home Screen' }}
        />
        <Stack.Screen
          name='Detail'
          component={Detail}
          options={{ title: 'Detail Screen' }}
        />
      </Stack.Navigator>
    </NavigationContainer>
  )
}
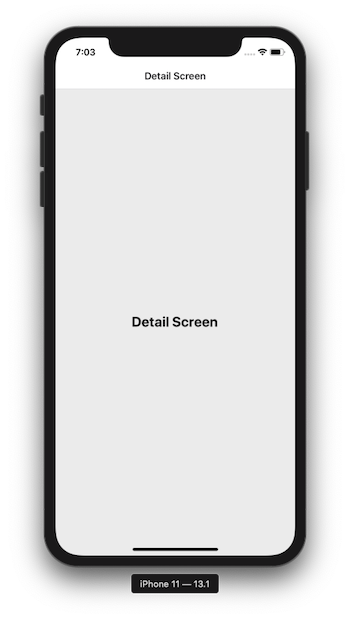
To see that the Detail screen is currently in our stack, try adding the prop initialRouteName on the Stack.Navigator. The first screen that renders is going to be the Detail screen.
<Stack.Navigator initialRouteName='Detail'>
Here is the output:
But we need a way to navigate from the Home screen to the Detail screen, not just display the later screen as the initial route. Change the value of initialRouteName to Home.
<Stack.Navigator initialRouteName='Home'>
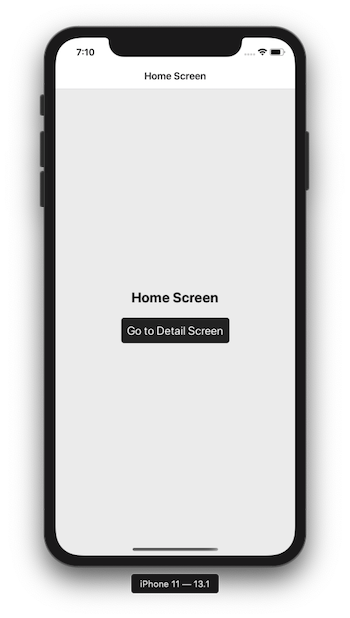
Then, open screen/Home.js and a button component that will navigate to the Detail screen when pressed.
Import TouchableOpacity from react-native core and make sure to utilize the navigation prop passed to the Home screen. This prop is passed to every screen that is a route wrapped by the stack navigator.
import React from 'react'
import { StyleSheet, View, Text, TouchableOpacity } from 'react-native'

function Home(props) {
  const { navigation } = props
  return (
    <View style={styles.container}>
      <Text style={styles.text}>Home Screen</Text>
      <TouchableOpacity
        style={styles.buttonContainer}
        onPress={() => navigation.navigate('Detail')}>
        <Text style={styles.buttonText}>Go to Detail Screen</Text>
      </TouchableOpacity>
    </View>
  )
}

const styles = StyleSheet.create({
  container: {
    flex: 1,
    justifyContent: 'center',
    alignItems: 'center',
    backgroundColor: '#ebebeb'
  },
  text: {
    color: '#101010',
    fontSize: 24,
    fontWeight: 'bold'
  },
  buttonContainer: {
    backgroundColor: '#222',
    borderRadius: 5,
    padding: 10,
    margin: 20
  },
  buttonText: {
    fontSize: 20,
    color: '#fff'
  }
})

export default Home
Here is the changed Home screen:
Enabling gestures in react-navigation
If you press the button, you’re going to notice that it navigates you to the Detail screen. On the Detail screen, do note that the back button with the name of the previous screen is shown in the header.
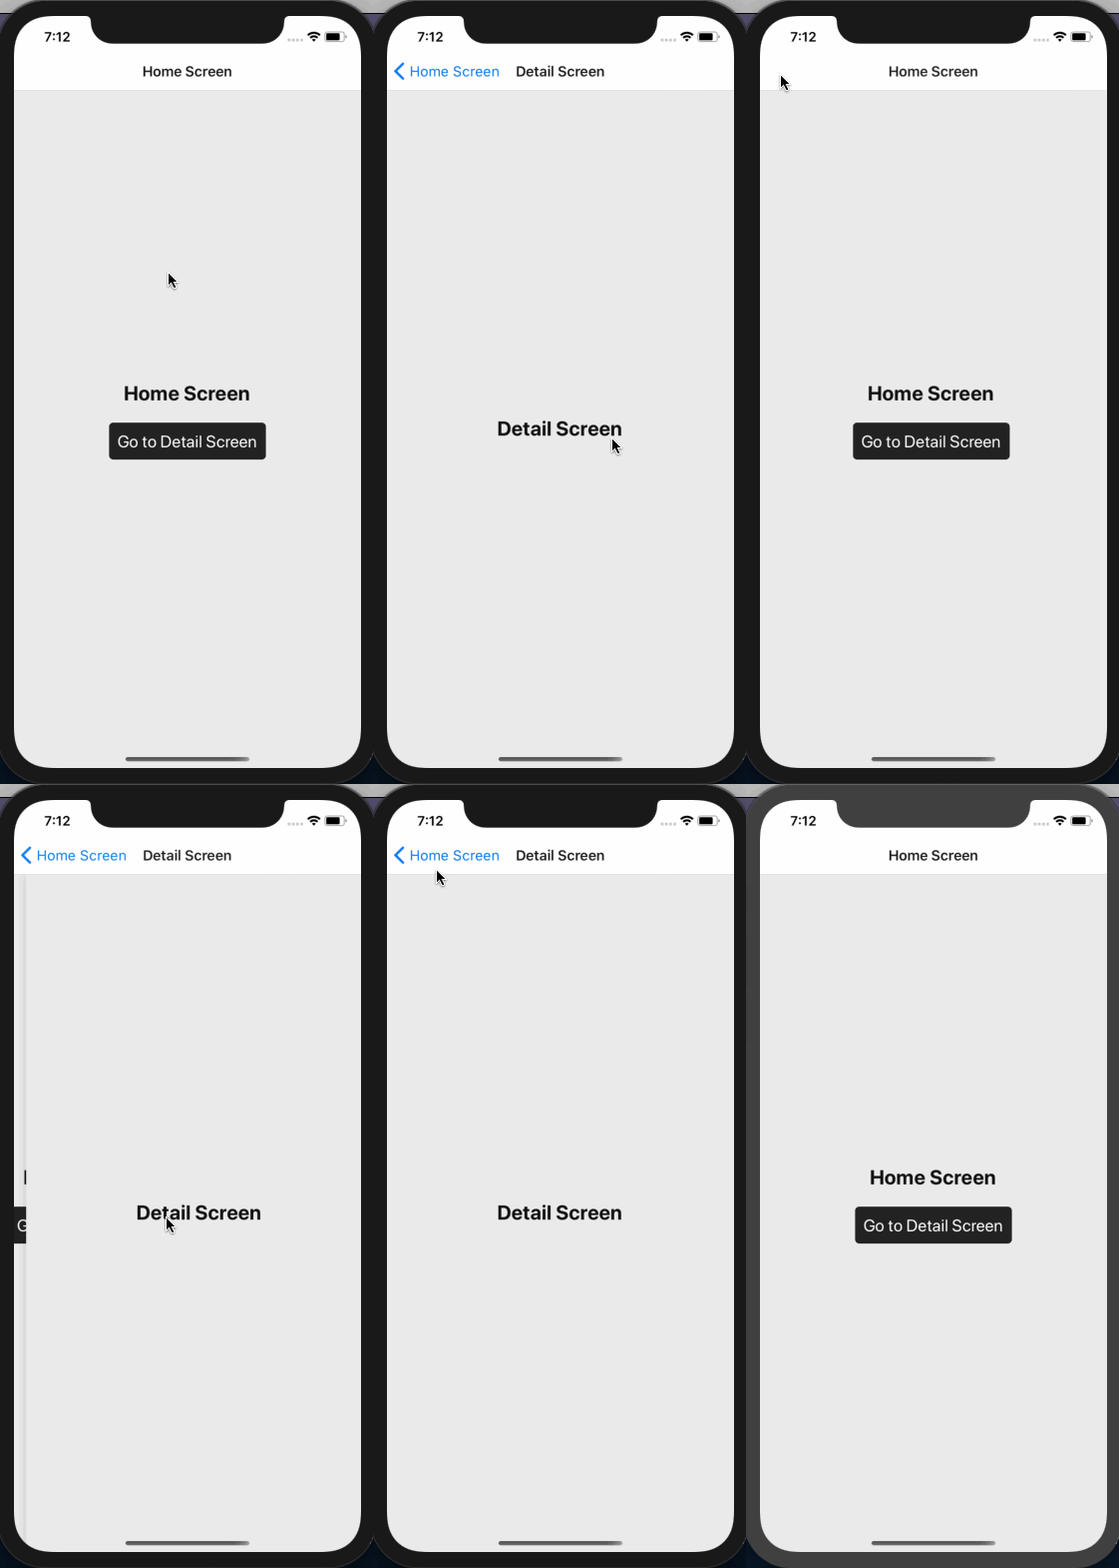
The above demo shows how navigation between two screens works on an iOS device. The default native transition on iOS when using stack navigation is that the screen is pushed or pulled from the right side. On Android, as you will notice below, the behavior is different. The new screen is pushed from the bottom.
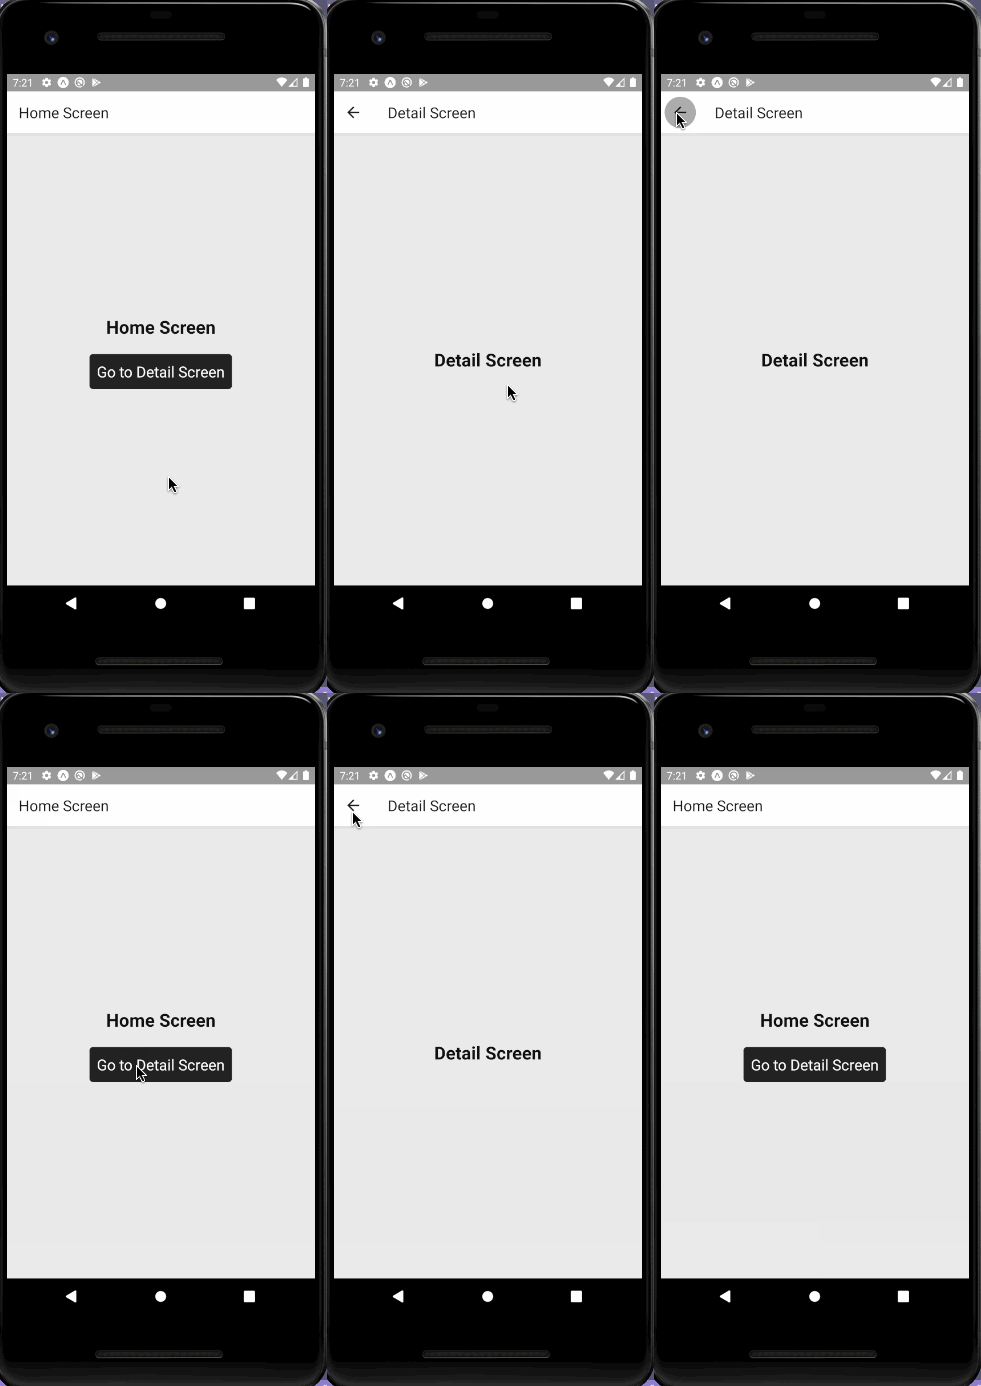
Also, in the below demo, notice that on iOS, the swipe gesture works when going back from Detail to Home. On Android, it doesn’t.
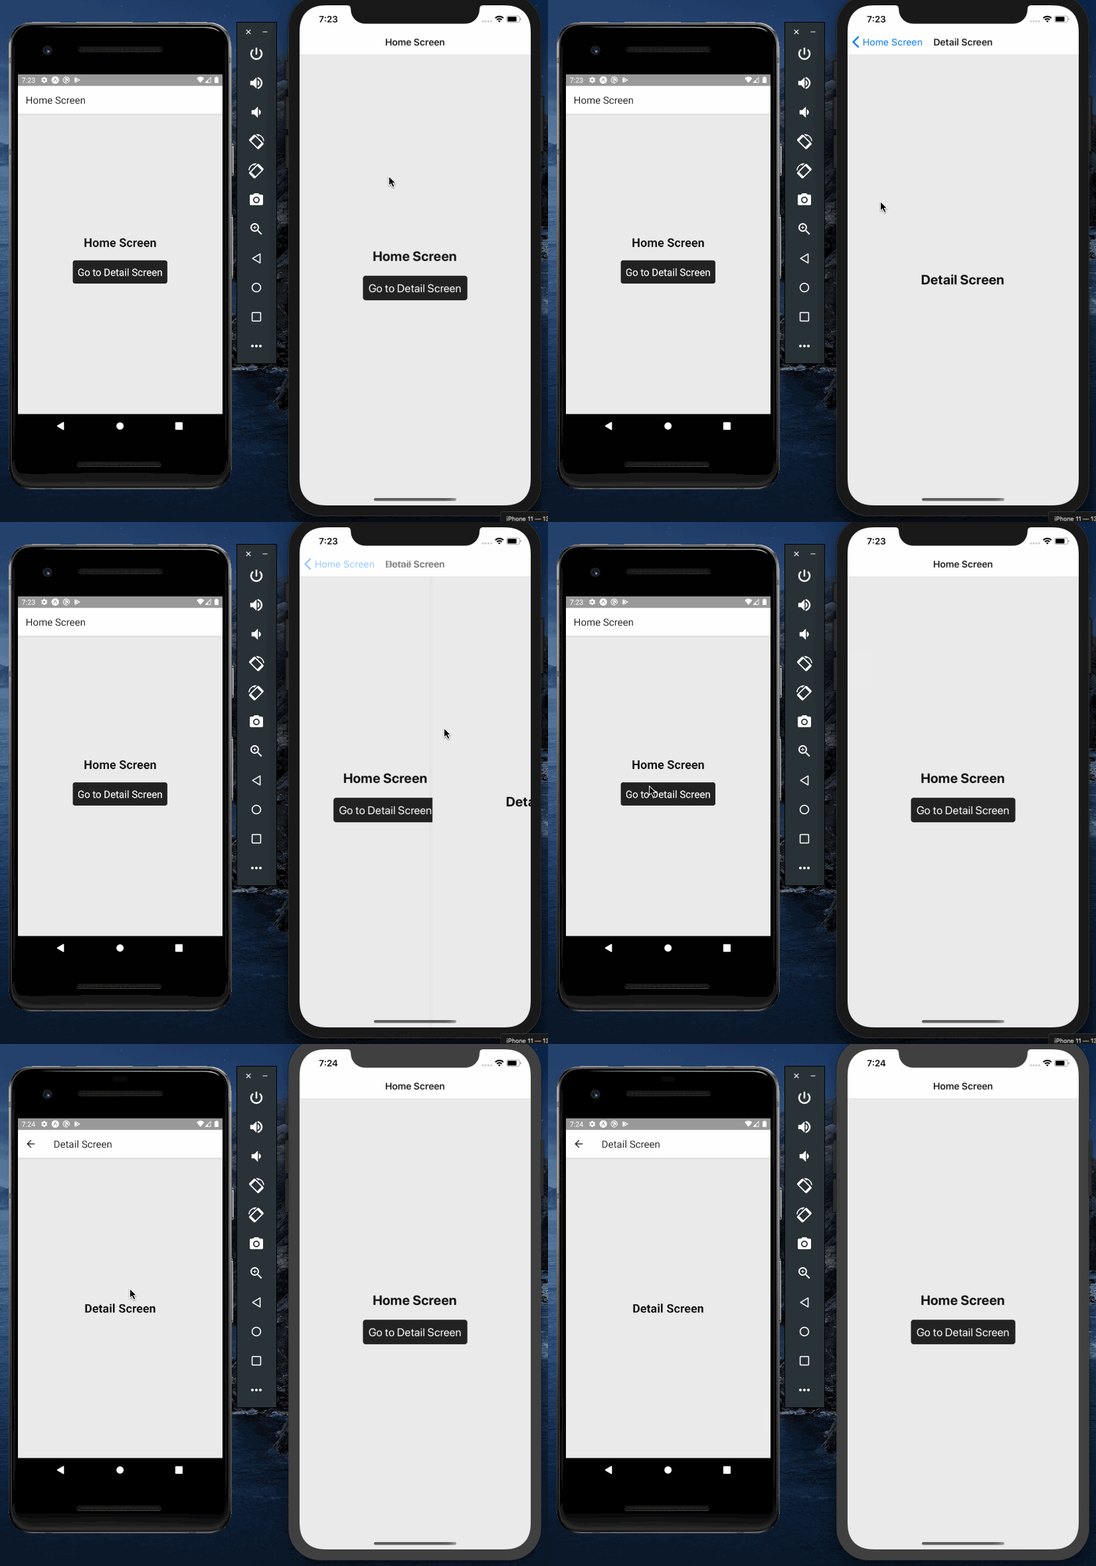
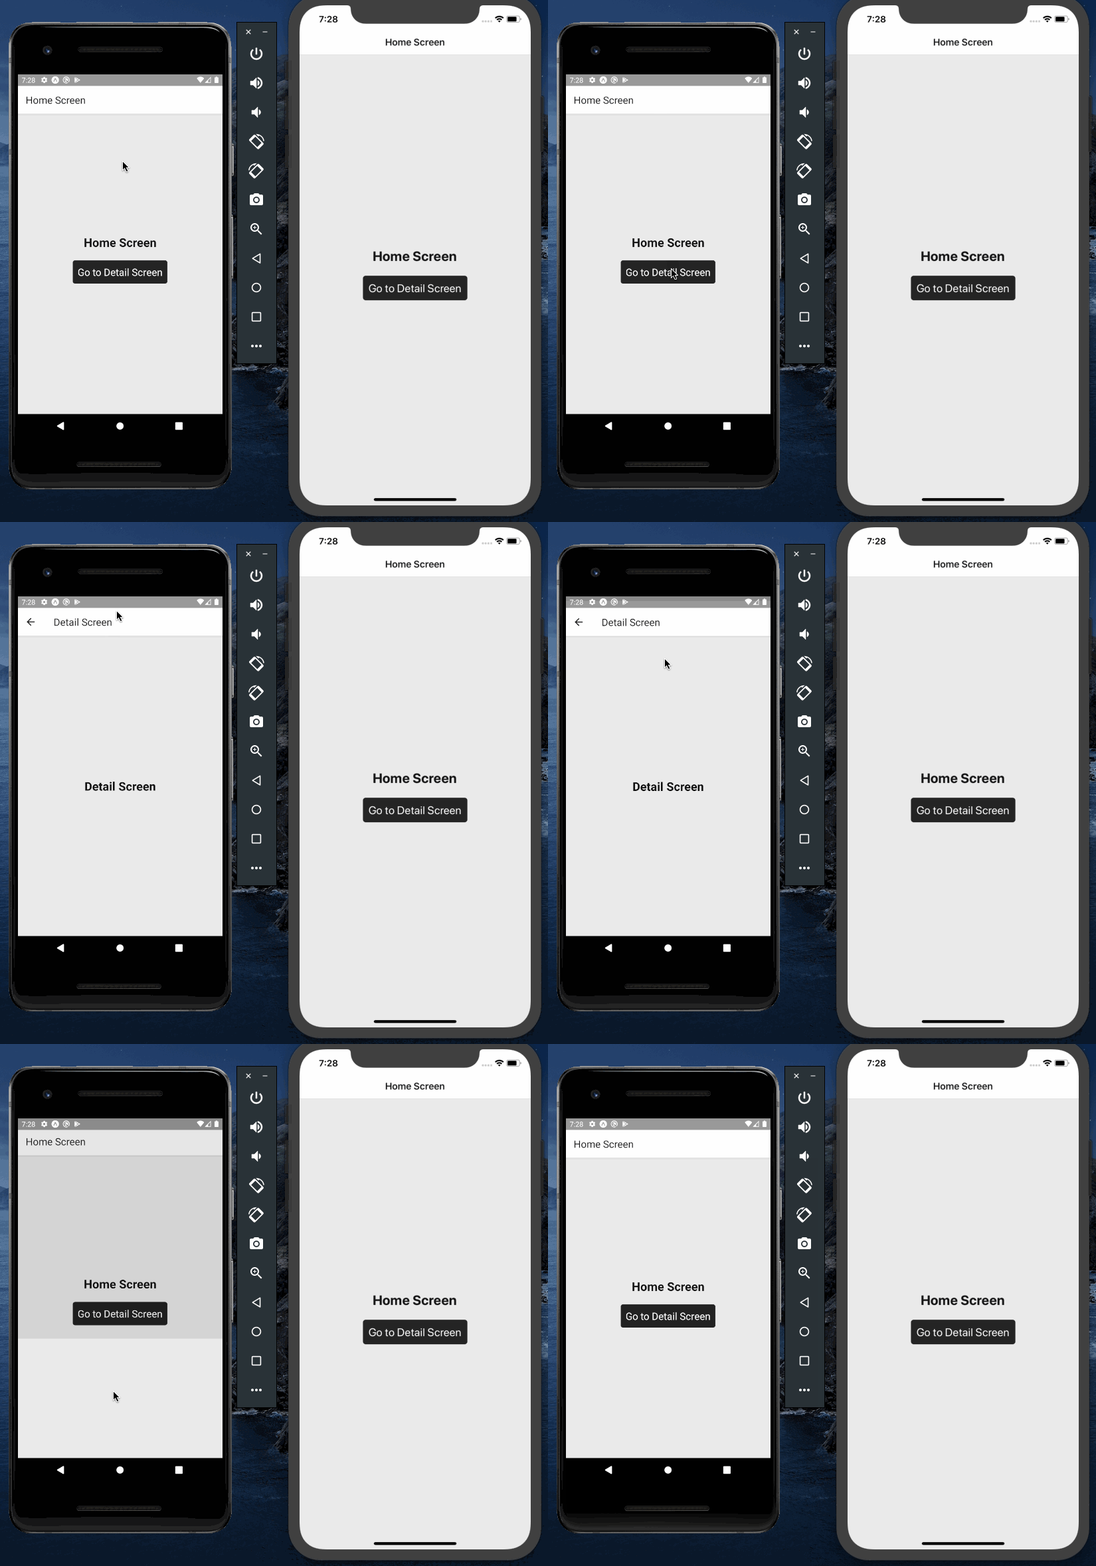
To enable gestures on Android as well, in Stack.Navigator, you have to add a prop called screenOptions. This prop is used when you want to pass some value to all the children’s routes of a stack navigator:
<Stack.Navigator
        initialRouteName='Home'
        screenOptions={{
          gestureEnabled: true
        }}>
This should enable the gestures on Android, as well.
Passing data between routes
You can pass parameters to a route by putting the params in an object as the second argument, using navigation.navigate. Let’s mimic a small example by passing data from the Home to the Detail screen.
Add the following mock object for some data in Home.js:
const character = {
  name: 'Luke Skywalker',
  home: 'Tatooine',
  species: 'human'
}
Then, in the same screen component file, modify the TouchableOpacityand pass the previous object as the second argument:
<TouchableOpacity
  style={styles.buttonContainer}
  onPress={() => navigation.navigate('Detail', { item: character })}>
  <Text style={styles.buttonText}>Who is {character.name}?</Text>
</TouchableOpacity>
Here’s the output:
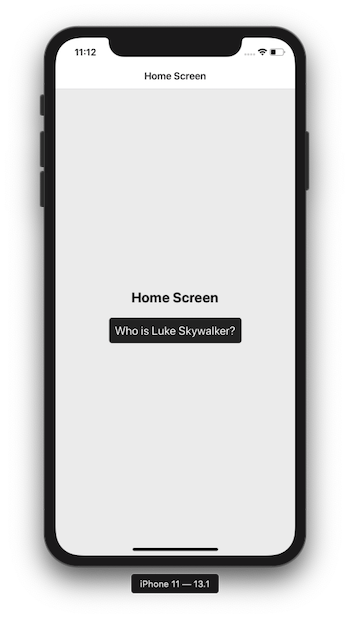
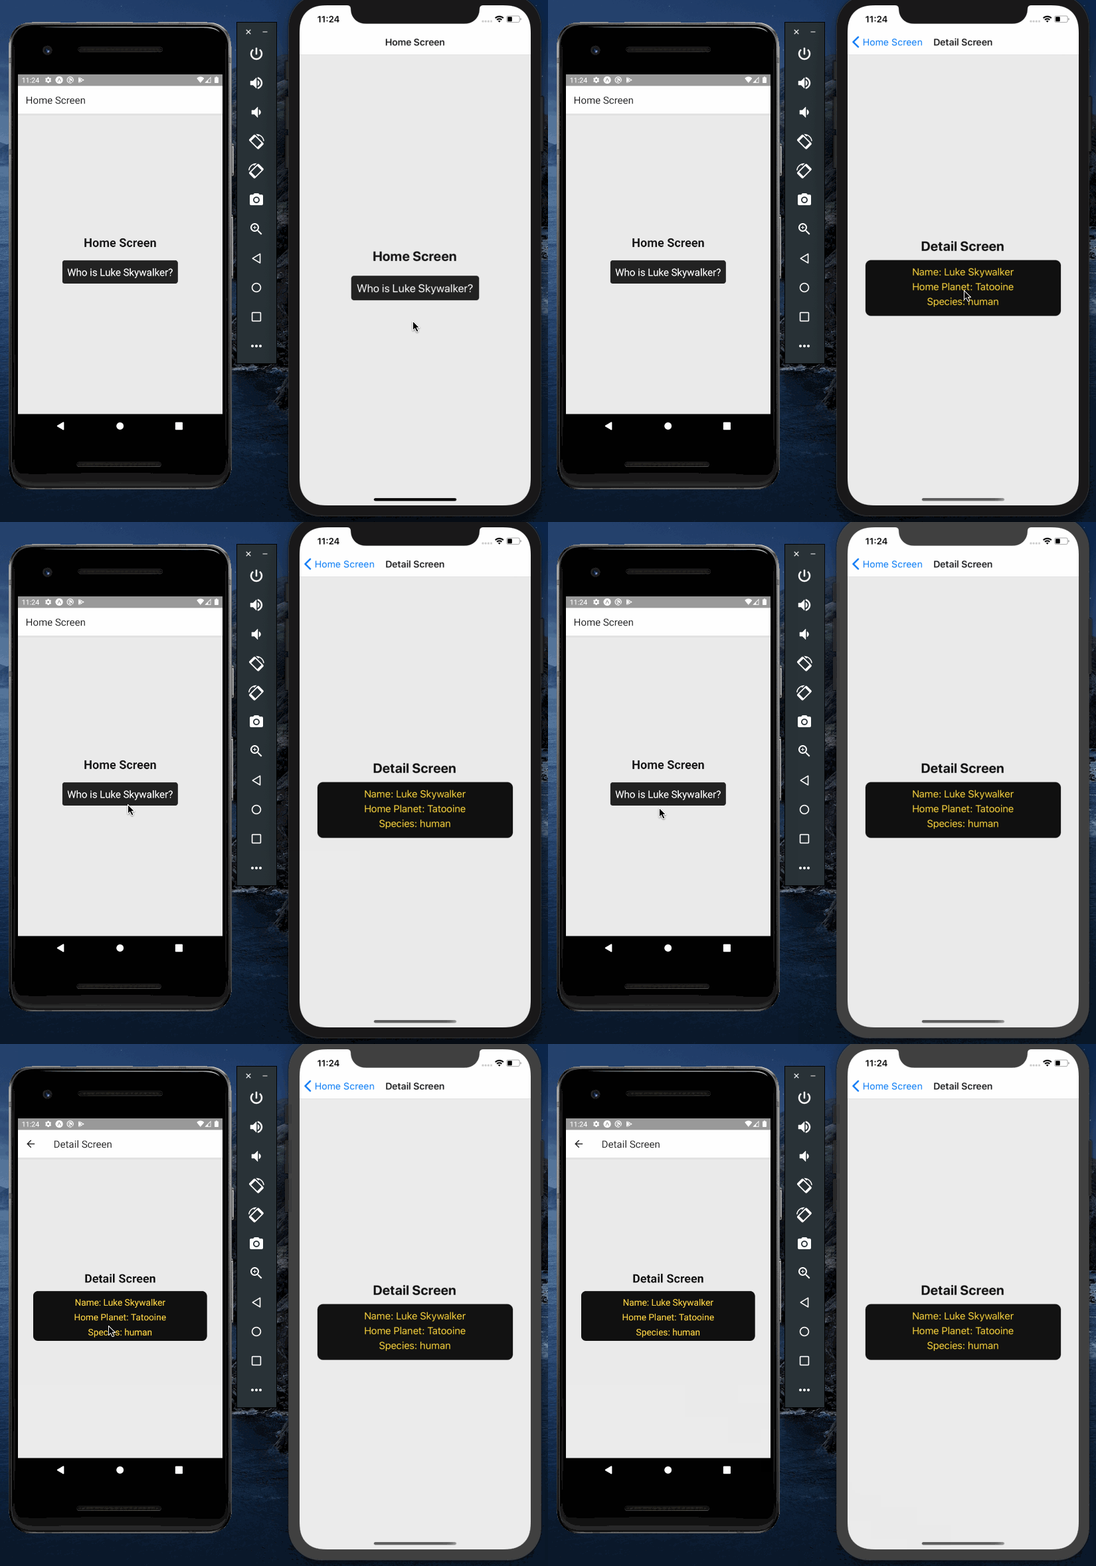
Open Detail.js and add the following code snippet. Using route.params, this screen component can read the parameters passed from the Homescreen. Inside the Detail component, let’s destructure the route.paramsand then display those values:
import React from 'react'
import { StyleSheet, View, Text } from 'react-native'

function Detail(props) {
  const { route } = props
  const { item } = route.params
  const { name, home, species } = item
  return (
    <View style={styles.container}>
      <Text style={styles.text}>Detail Screen</Text>
      <View style={styles.card}>
        <Text style={styles.cardText}>Name: {name}</Text>
        <Text style={styles.cardText}>Home Planet: {home}</Text>
        <Text style={styles.cardText}>Species: {species}</Text>
      </View>
    </View>
  )
}

const styles = StyleSheet.create({
  container: {
    flex: 1,
    justifyContent: 'center',
    alignItems: 'center',
    backgroundColor: '#ebebeb'
  },
  text: {
    color: '#101010',
    fontSize: 24,
    fontWeight: 'bold'
  },
  card: {
    width: 350,
    height: 100,
    borderRadius: 10,
    backgroundColor: '#101010',
    margin: 10,
    padding: 10,
    alignItems: 'center'
  },
  cardText: {
    fontSize: 18,
    color: '#ffd700',
    marginBottom: 5
  }
})

export default Detail
Here’s the output showing how the above works in action:
How to use params in the screen’s title
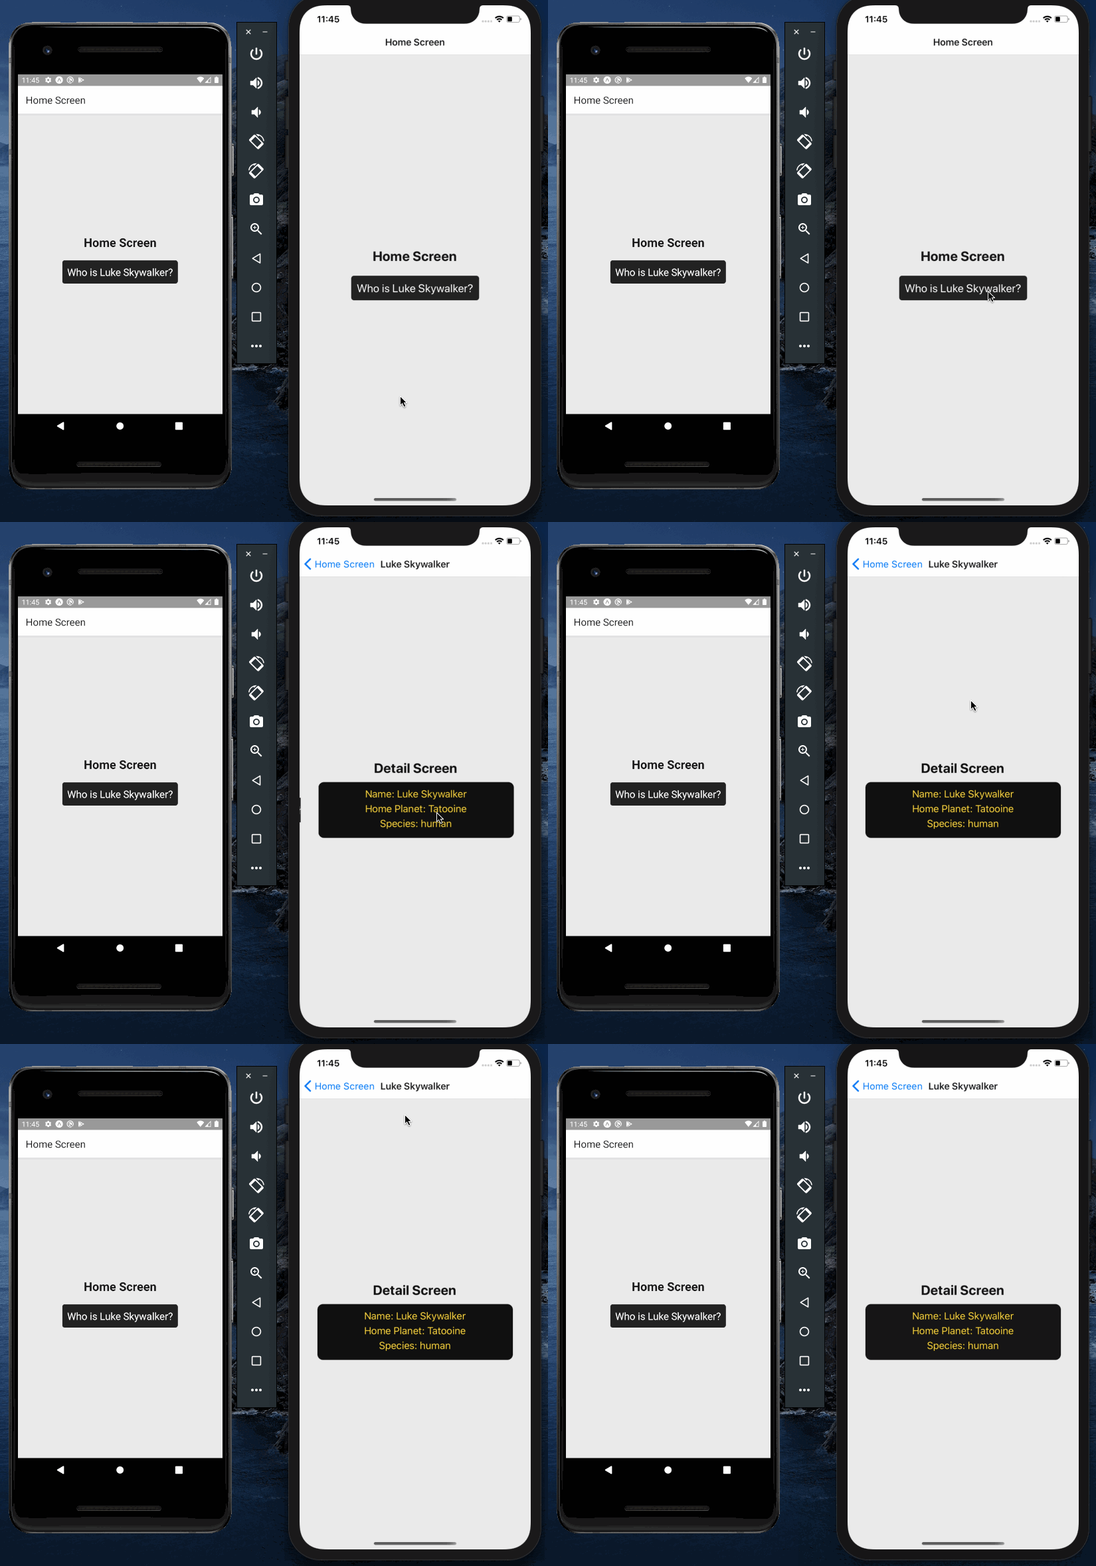
You can use params in the title of the screen component. For example, instead of saying Detail Screen, it could say the name of the character.
This can be done by passing route as an object in options for the Detailscreen in the MainStackNavigator.js file, and then using the value of the title from route.params.item.name:
<Stack.Screen
  name='Detail'
  component={Detail}
  options={({ route }) => ({
    title: route.params.item.name
  })}
/>
Here’s the output:
Using common screenOptions to modify header styles
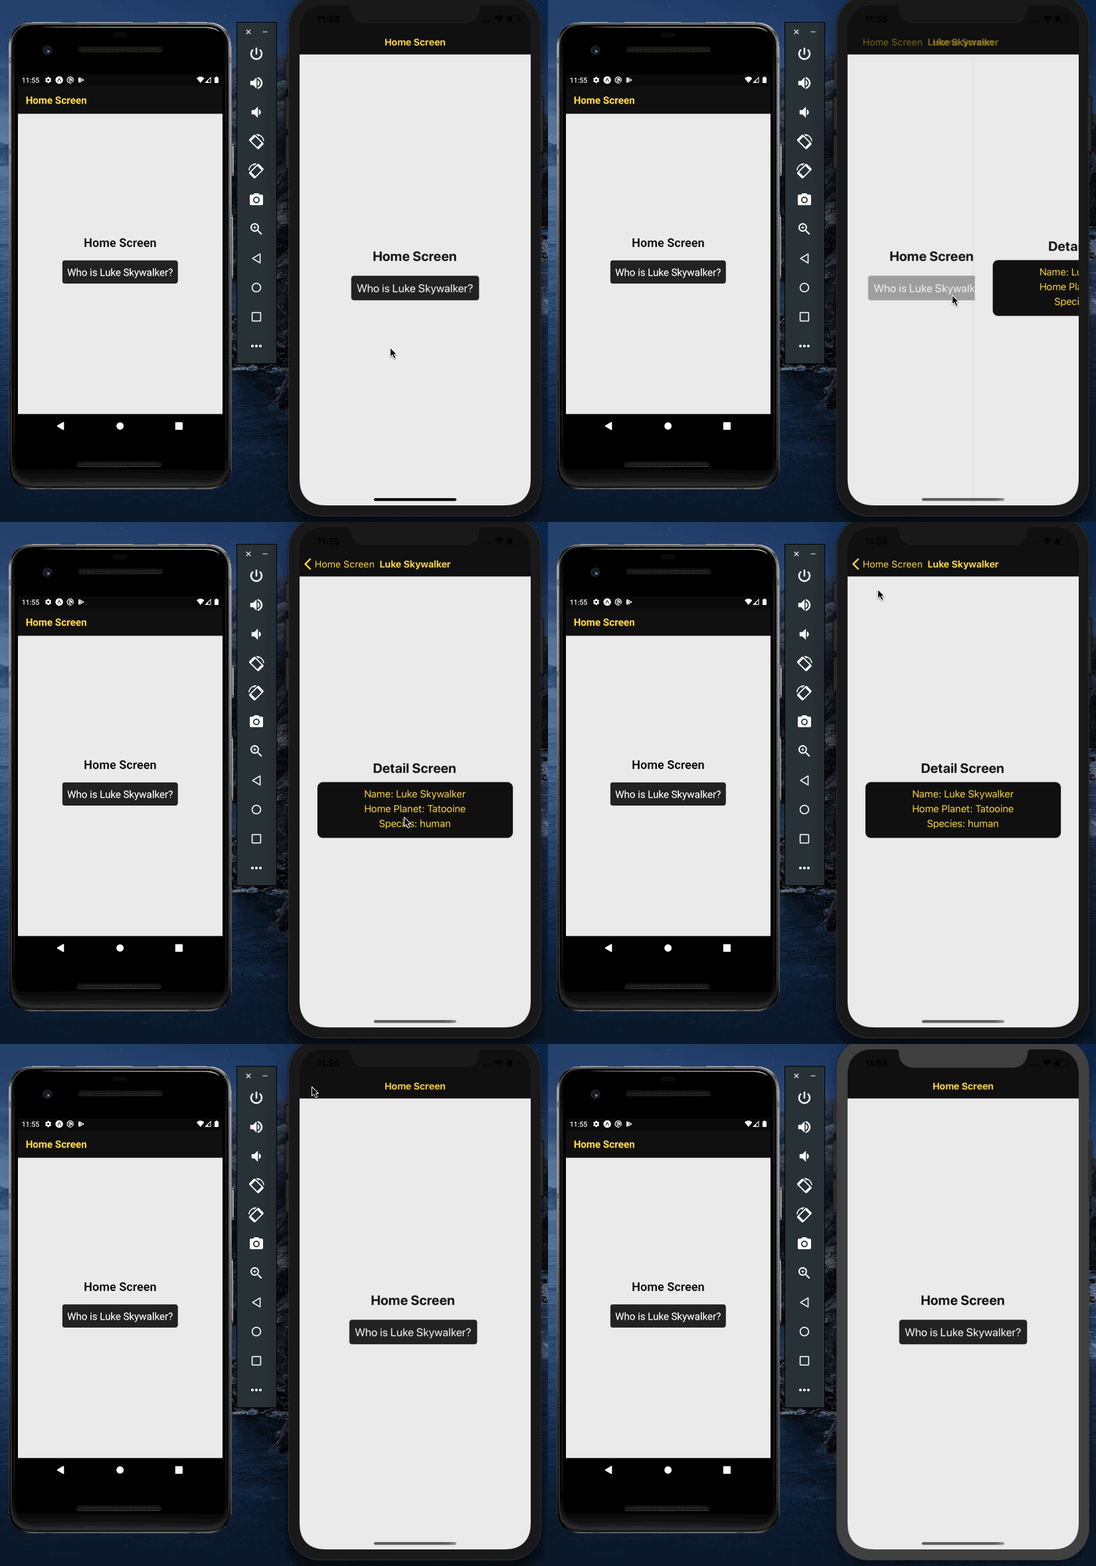
You can use the prop screenOptions to apply common styles to the header across the navigator. For example, in the code snippet below, we set three properties—headerStyle, headerTintColor, and headerTitleStyle—to change the background color of all screen headers, as well as the color of the title on each screen:
<Stack.Navigator
  initialRouteName='Home'
  screenOptions={{
    gestureEnabled: true,
    headerStyle: {
      backgroundColor: '#101010'
    },
    headerTitleStyle: {
      fontWeight: 'bold'
    },
    headerTintColor: '#ffd700'
  }}>
  {/* ... */}
</Stack.Navigator>
- The
headerStyleis a style object that can be used to set thebackgroundColorof the header for the screen component. - The
headerTitleStyleis another style object that allows you to customize the title or the text of the header. - The
headerTintColoris the color property for both the back button and the title of the header.
Here’s the output in action after the above changes:
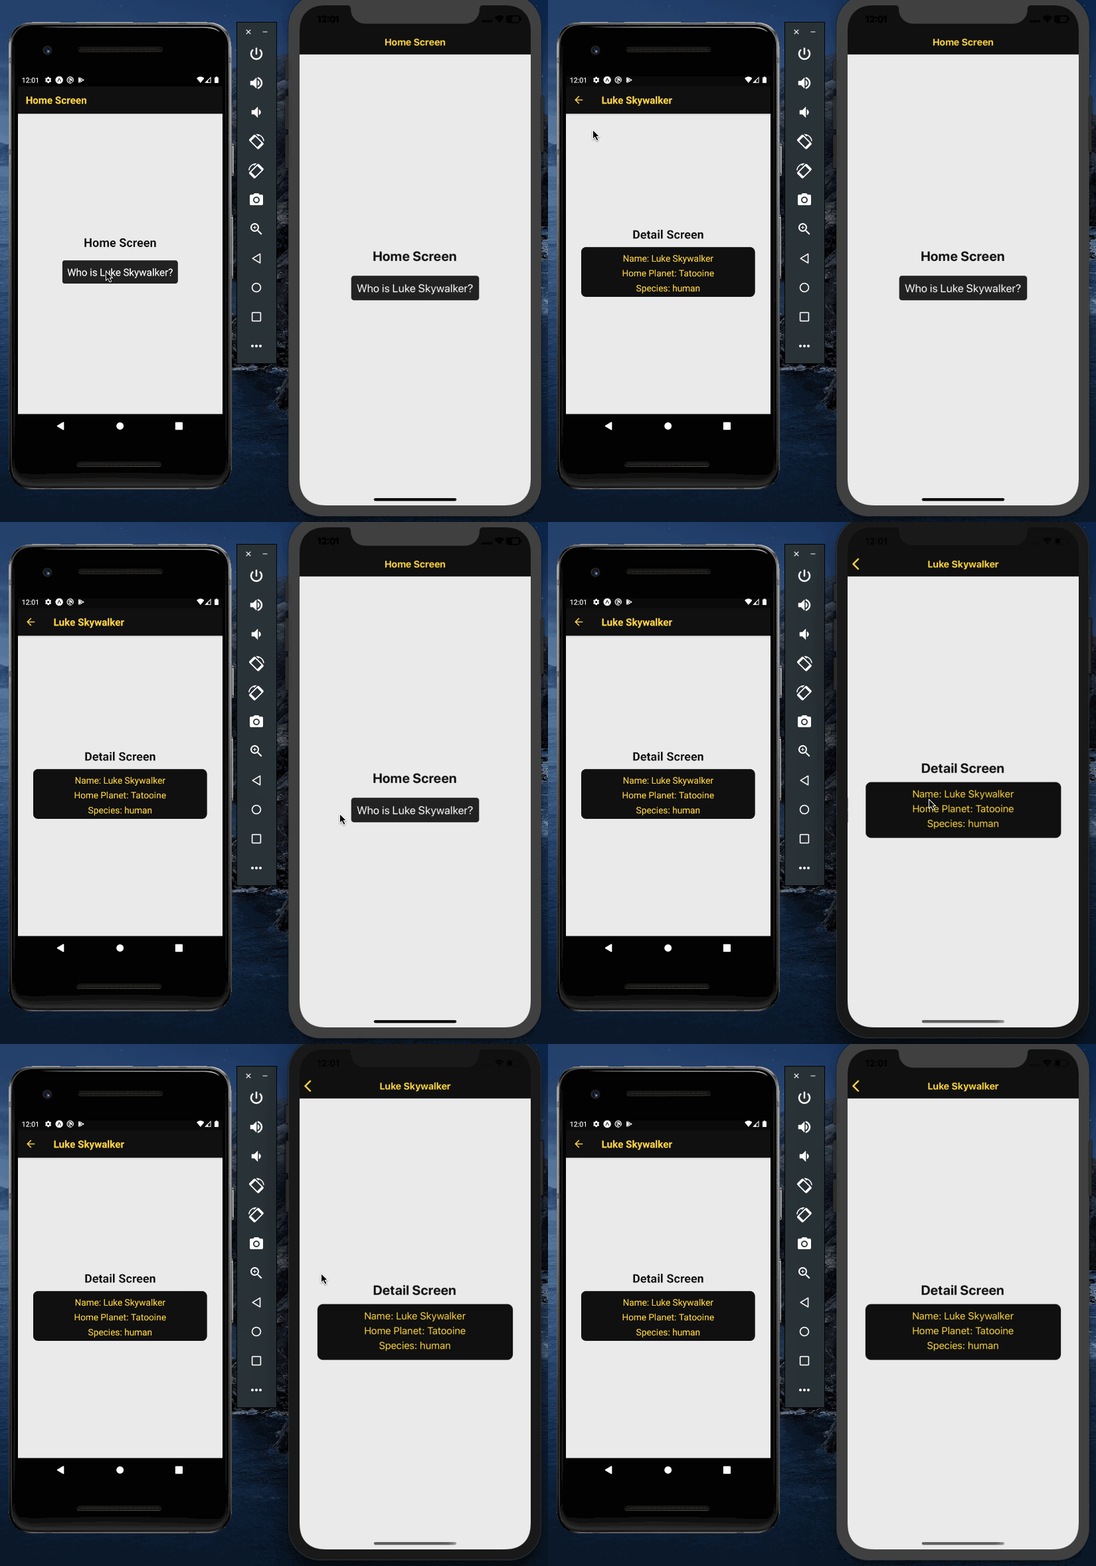
Making the back button title invisible on iOS
So far, you might have noticed that on iOS, the back button shows the name of the previous screen by default. On Android, this behavior is only shown by a back button icon.
To make an iOS app just show the back button icon instead of the name of the previous screen in the stack, add the following property to screenOptionson Stack.Navigator:
<Stack.Navigator
  initialRouteName='Home'
  screenOptions={{
    gestureEnabled: true,
    headerStyle: {
      backgroundColor: '#101010'
    },
    headerTitleStyle: {
      fontWeight: 'bold'
    },
    headerTintColor: '#ffd700',
    headerBackTitleVisible: false
  }}>
  {/* ... */}
</Stack.Navigator>
Here’s the output:
Understanding header modes and changing them in the Android app
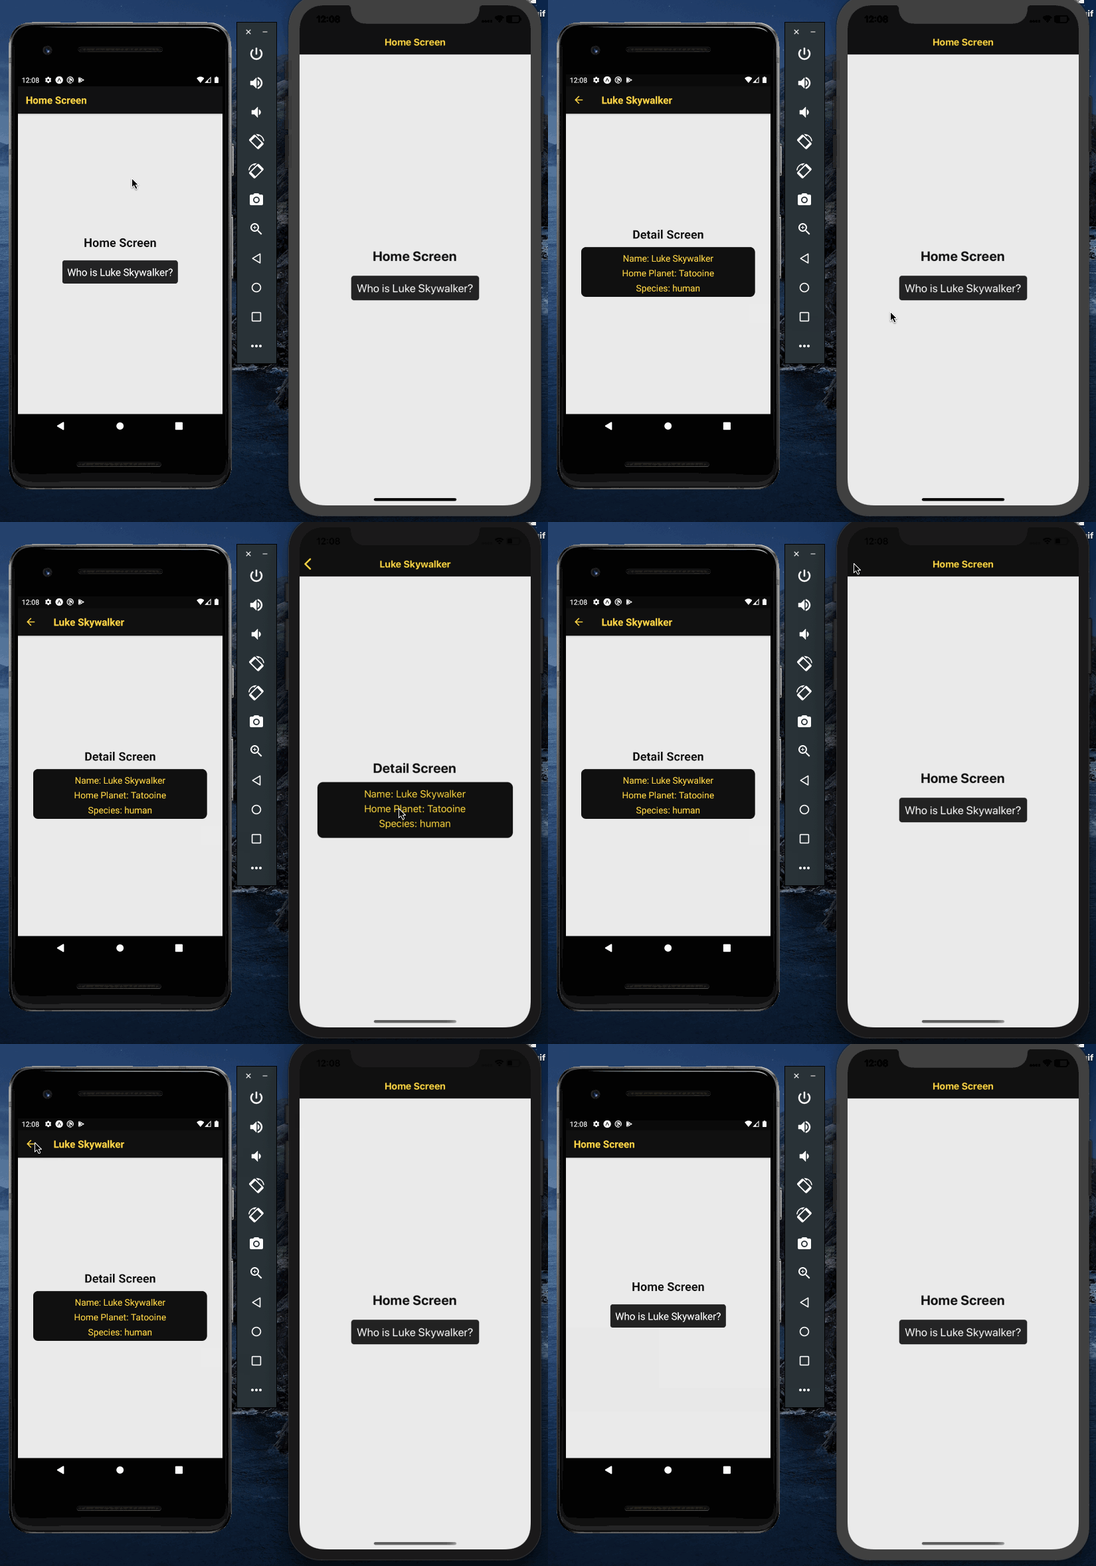
Using the react-navigation library, there are three header modes available that render the header in different ways. By default on iOS, the headerMode is of the value float.
On Android, the value screen is commonly used. These are the native patterns of how a header renders on each platform. The last header mode value is none, which ensures that there is no header rendered.
Take a look at the below demo to see how it differs on both platforms:
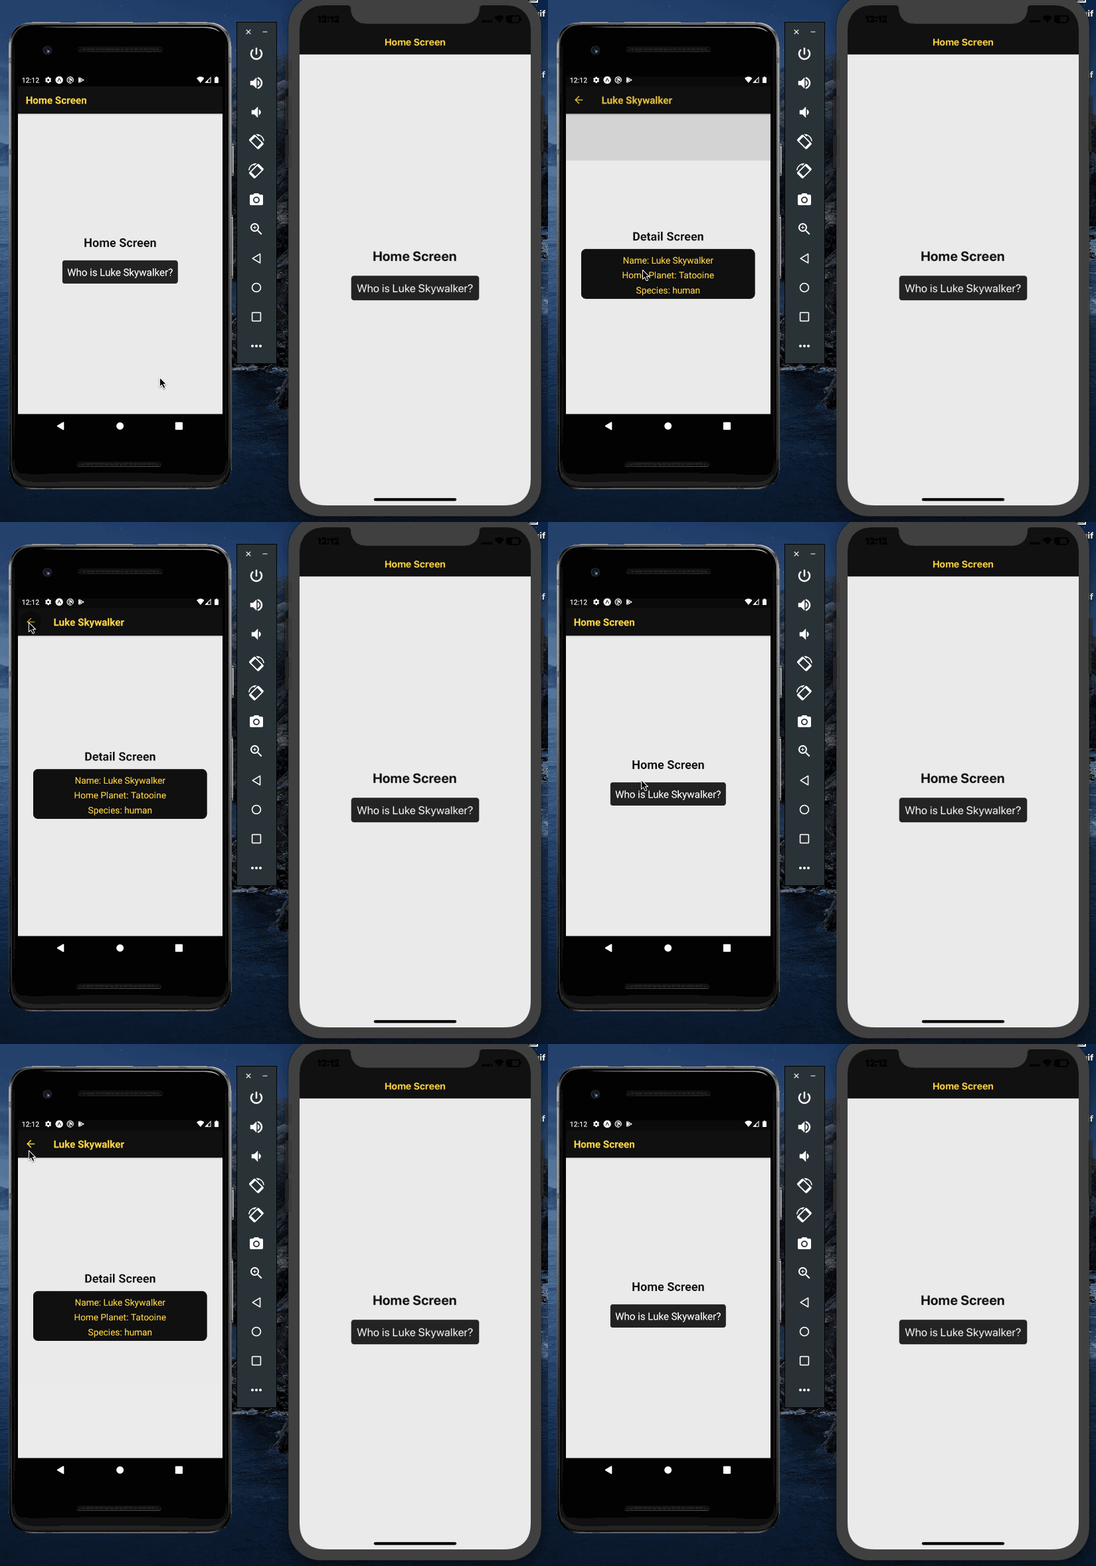
In the section, let’s make the header mode of the Android app behave in the same way as the iOS app. Just add the property headerMode with the value of float in Stack.Navigator:
<Stack.Navigator
  initialRouteName='Home'
  screenOptions={{
    gestureEnabled: true,
    headerStyle: {
      backgroundColor: '#101010'
    },
    headerTitleStyle: {
      fontWeight: 'bold'
    },
    headerTintColor: '#ffd700',
    headerBackTitleVisible: false
  }}
  headerMode='float'>
  {/* ... */}
</Stack.Navigator>
The header in the Android app, when navigating from one screen to another, is going to stay fixed, just like in the iOS app:
Directly navigating from the third screen to the top of the stack screen navigator
Finally, let’s create a small demo showing how you can leverage a helper method from the navigation prop to navigate back to the top or the first screen in the stack navigator from any other screen in the navigator’s structure—no matter how deep.
Start by creating a new file called Settings.js inside the src/screens/directory, and add the following component snippet:
import React from 'react'
import { StyleSheet, View, Text } from 'react-native'

function Settings() {
  return (
    <View style={styles.container}>
      <Text style={styles.text}>Settings</Text>
    </View>
  )
}

const styles = StyleSheet.create({
  container: {
    flex: 1,
    justifyContent: 'center',
    alignItems: 'center',
    backgroundColor: '#ebebeb'
  },
  text: {
    color: '#101010',
    fontSize: 24,
    fontWeight: 'bold'
  }
})

export default Settings
Next, modify the MainStackNavigator.js file and import a new screen.
import Settings from '../screens/Settings'
Add this newly-imported screen to the current Stack.Navigator.
<Stack.Screen
  name='Settings'
  component={Settings}
  options={{ title: 'Settings' }}
/>
Open Detail.js and modify it to add a button. When this button is pressed, the navigator leads to the Settings screen.
import React from 'react'
import { StyleSheet, View, Text, TouchableOpacity } from 'react-native'

function Detail(props) {
  const { route, navigation } = props
  const { item } = route.params
  const { name, home, species } = item
  return (
    <View style={styles.container}>
      <Text style={styles.text}>Detail Screen</Text>
      <View style={styles.card}>
        <Text style={styles.cardText}>Name: {name}</Text>
        <Text style={styles.cardText}>Home Planet: {home}</Text>
        <Text style={styles.cardText}>Species: {species}</Text>
      </View>
      <TouchableOpacity
        style={styles.buttonContainer}
        onPress={() => navigation.navigate('Settings')}>
        <Text style={styles.buttonText}>Go to Settings</Text>
      </TouchableOpacity>
    </View>
  )
}

const styles = StyleSheet.create({
  container: {
    flex: 1,
    justifyContent: 'center',
    alignItems: 'center',
    backgroundColor: '#ebebeb'
  },
  text: {
    color: '#101010',
    fontSize: 24,
    fontWeight: 'bold'
  },
  card: {
    width: 350,
    height: 100,
    borderRadius: 10,
    backgroundColor: '#101010',
    margin: 10,
    padding: 10,
    alignItems: 'center'
  },
  cardText: {
    fontSize: 18,
    color: '#ffd700',
    marginBottom: 5
  },
  buttonContainer: {
    backgroundColor: '#222',
    borderRadius: 5,
    padding: 10,
    margin: 20
  },
  buttonText: {
    fontSize: 20,
    color: '#fff'
  }
})

export default Detail
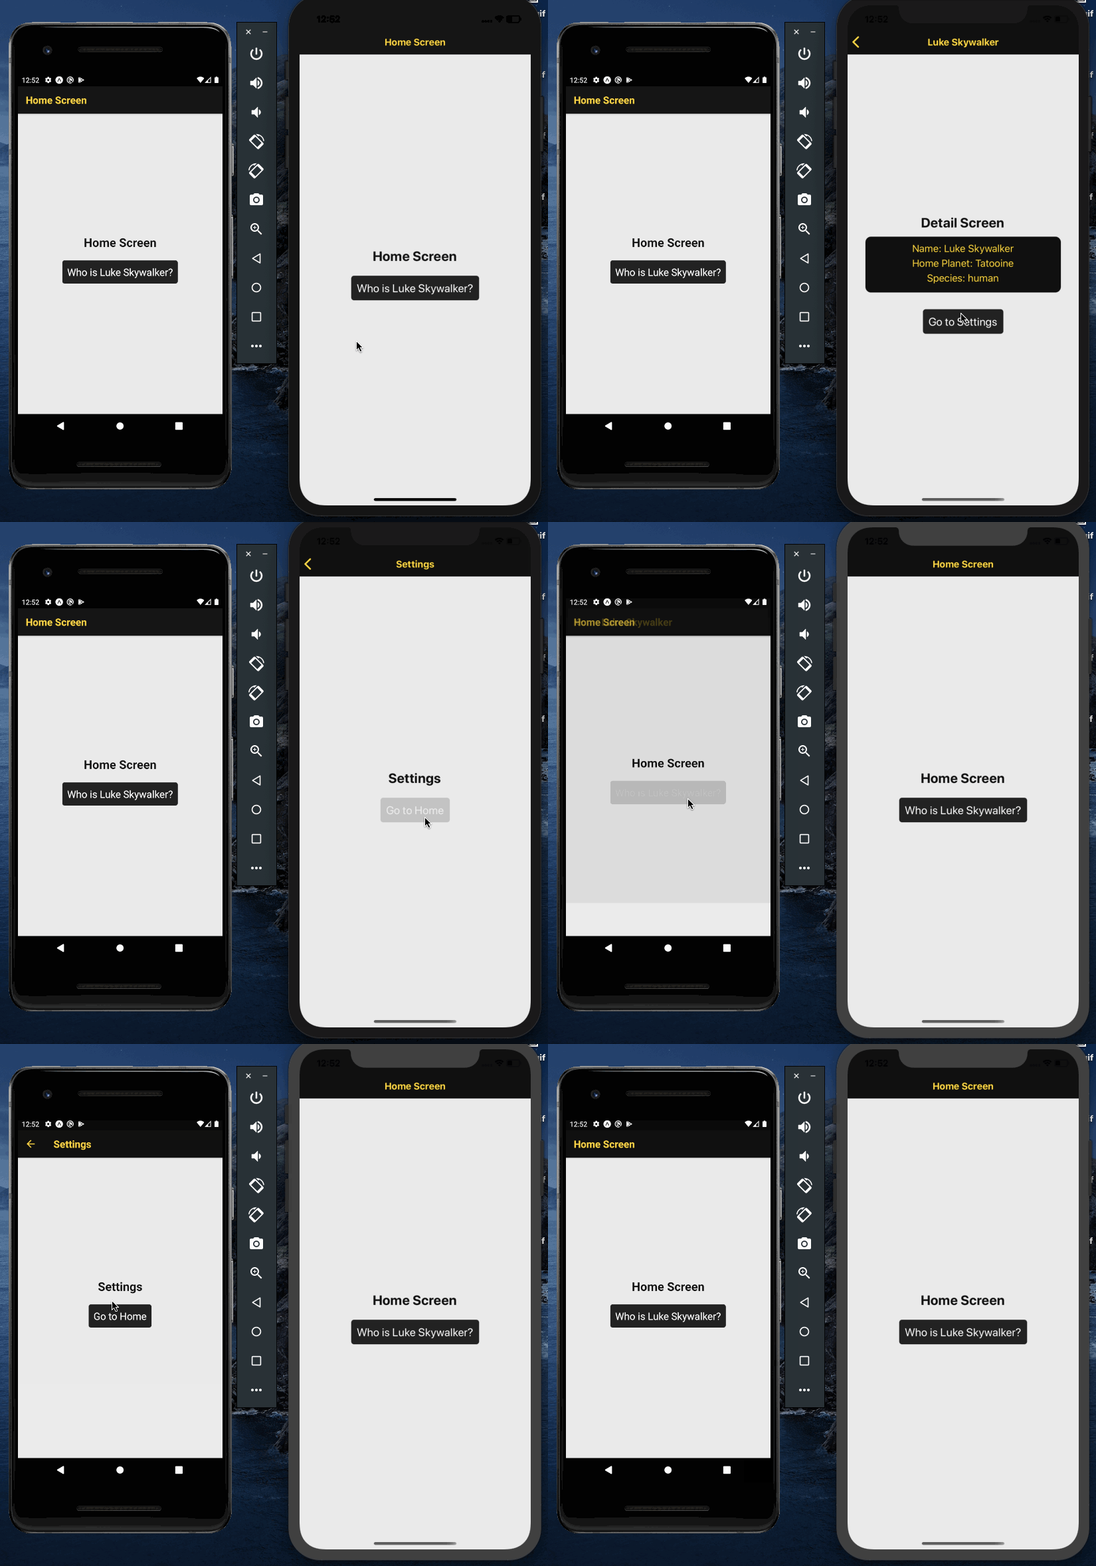
In the following demo, you’ll notice that to move back from the Settingsscreen to the Home screen, you have to pass through the Detail screen.
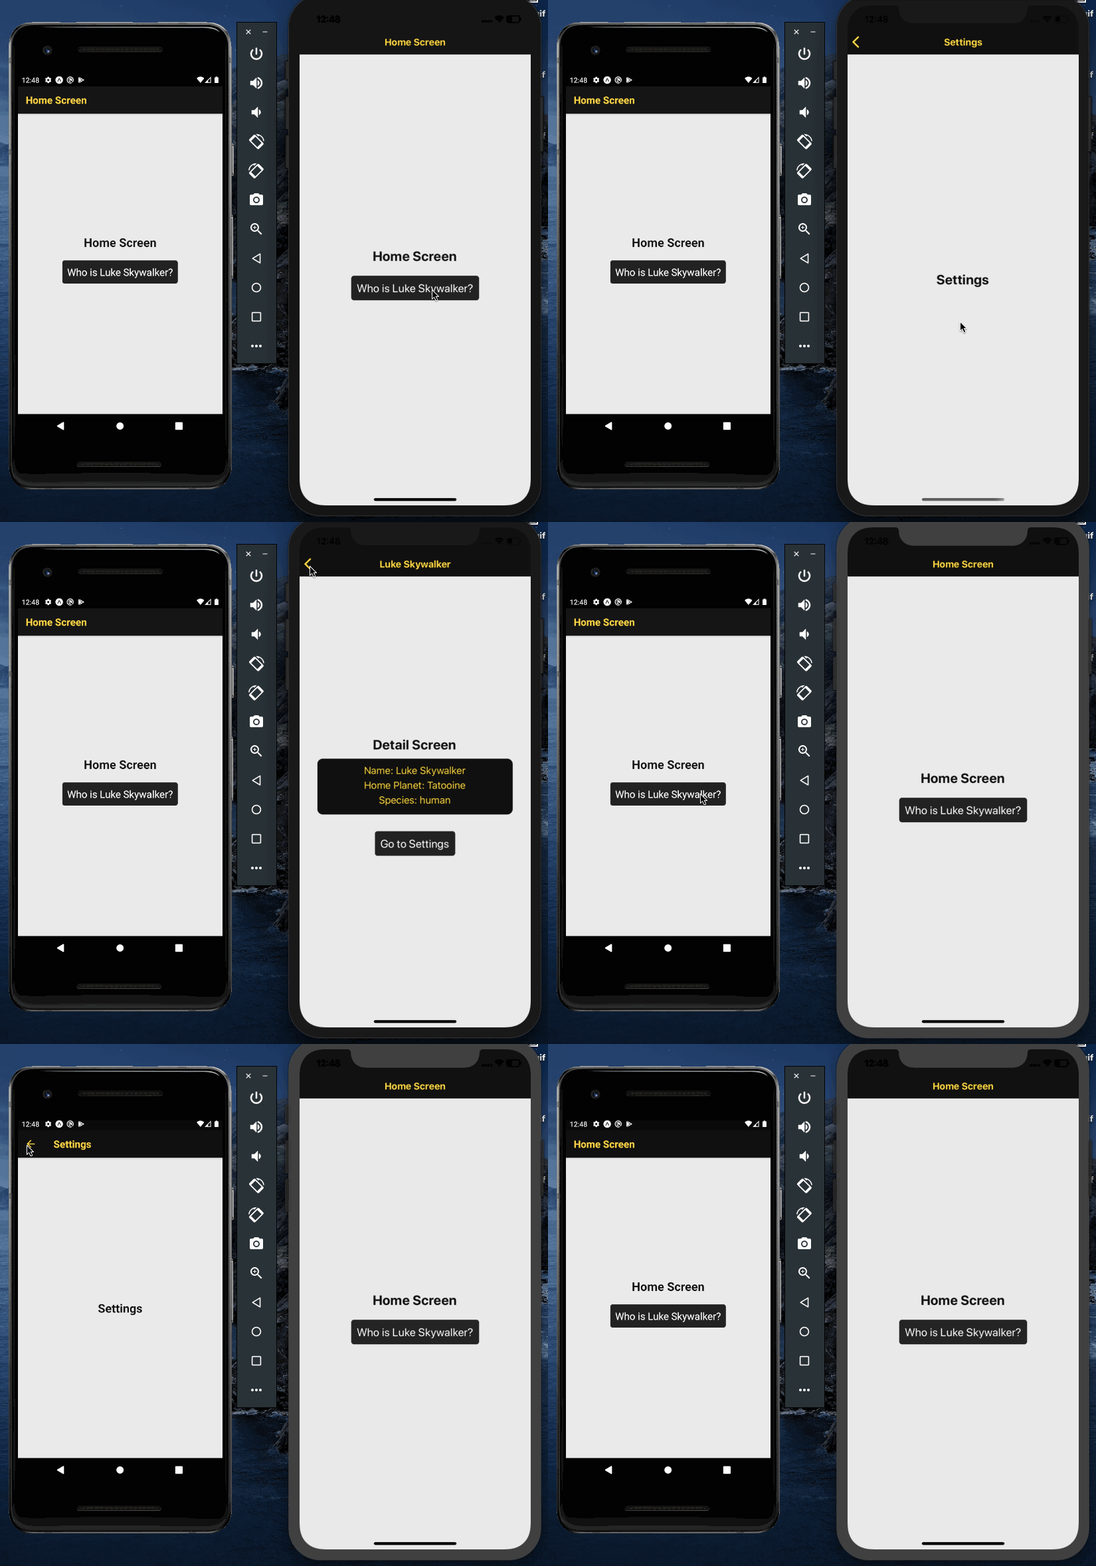
However, using the helper method navigation.popToTop() without any arguments, you can navigate from the Settings screen to the Home screen directly.
To accomplish this, modify the Settings.js file as shown below by adding a button. The onPress of this button is going to make use of the helper method.
import React from 'react'
import { StyleSheet, View, Text, TouchableOpacity } from 'react-native'

function Settings(props) {
  const { navigation } = props
  return (
    <View style={styles.container}>
      <Text style={styles.text}>Settings</Text>
      <TouchableOpacity
        style={styles.buttonContainer}
        onPress={() => navigation.popToTop()}>
        <Text style={styles.buttonText}>Go to Home</Text>
      </TouchableOpacity>
    </View>
  )
}

const styles = StyleSheet.create({
  container: {
    flex: 1,
    justifyContent: 'center',
    alignItems: 'center',
    backgroundColor: '#ebebeb'
  },
  text: {
    color: '#101010',
    fontSize: 24,
    fontWeight: 'bold'
  },
  buttonContainer: {
    backgroundColor: '#222',
    borderRadius: 5,
    padding: 10,
    margin: 20
  },
  buttonText: {
    fontSize: 20,
    color: '#fff'
  }
})

export default Settings
Here’s the demo:
Conclusion
Congratulations! You’ve completed this tutorial.
In this tutorial, we’ve discussed many strategies and properties that you can apply and implement in your stack navigator. The main objective is to get familiar with the component-based configuration of the stack navigator in the latest version of the react-navigation library.
Here is the link to the complete Stack Navigator API—I’d recommend checking it out.
You can find the complete code for this tutorial at this GitHub repo.
If you’d like to receive more React Native tutorials in your inbox, you can sign up for my newsletter here.