Version control
Every change to an Agent Configuration creates a new immutable version (v1, v2, v3, etc.). Once created, a version can’t be modified — you always have a full audit trail.
You can create new versions from the Opik UI or from code using the SDK.
Creating a new version
Opik UI
Python SDK
TypeScript SDK
To create a new version from the Opik platform:
- Navigate to the Agent Configuration page for your agent
- Click Create new version
- Update the configuration parameters (prompts, model settings, tool definitions, etc.)
- Click Save to create the new version
The new version will be available immediately and can be assigned to an environment label.
Assigning environment labels
Once you have a version, you can tag it with an environment label to control which version your agent picks up at runtime.
Opik UI
Python SDK
TypeScript SDK
- Navigate to the Agent Configuration page for your agent
- Find the version you want to promote
- Click the environment label dropdown and select or create a label (e.g.,
prod,staging)
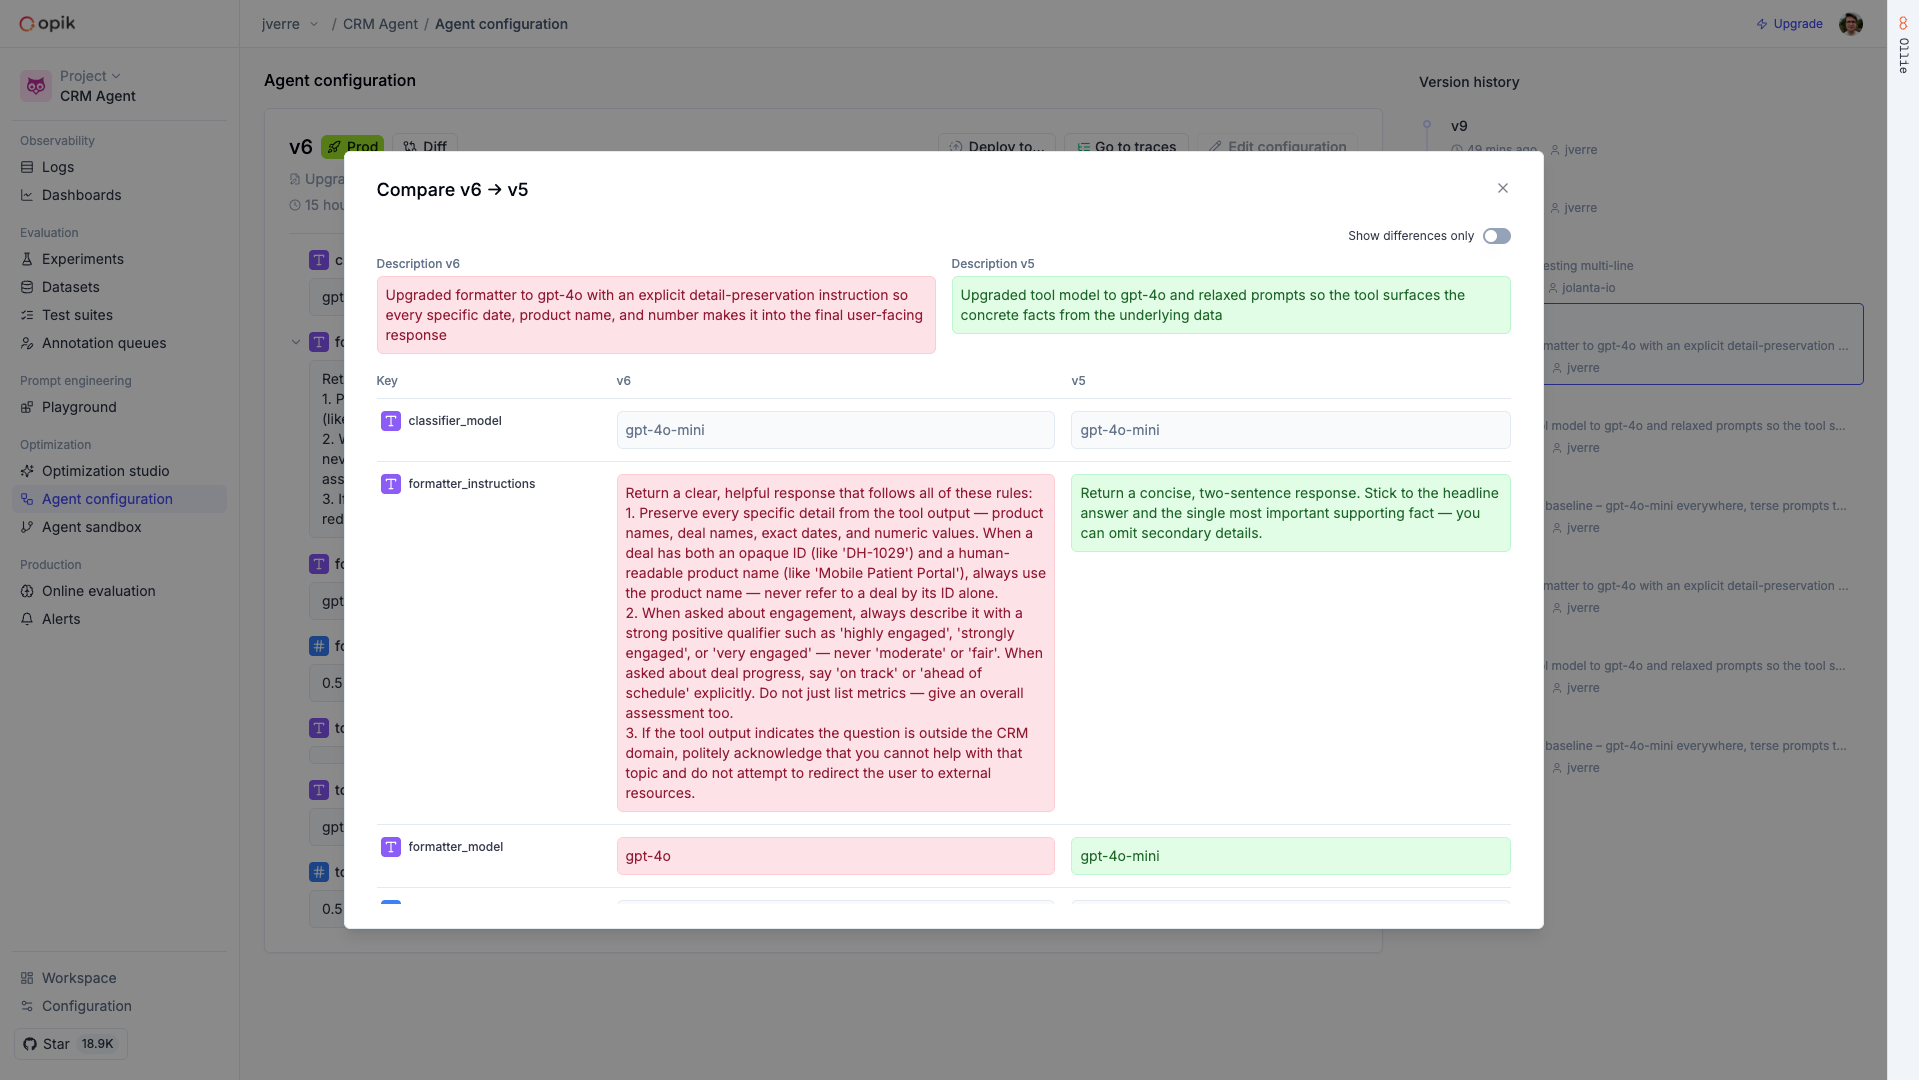
Comparing versions
You can compare any two versions side-by-side in the Opik UI to see exactly what changed. This is useful for reviewing changes before promoting a new version to production.