Introduction
Today, AI developers use computer vision (CV) to incorporate solutions to identify, classify, and respond to objects in real time. Some common tasks include image classification, facial detection, pose estimation, segmentation, etc. With models like YOLOv8 achieving state-of-the-art results on various object detection and semantic segmentation benchmarks, CV has gained remarkable accuracy and efficiency.
Let’s explore image segmentation, the limitations of segmentation models, and the process of fine-tuning YOLOv8 for image segmentation.
What is Image Segmentation?
Image segmentation is a process of dividing a digital image into multiple segments or regions at the pixel level. It enables CV models to understand the content of an image on a detailed level and perform relevant actions based on the segmented regions.
Image segmentation is widely applied in areas such as medical imaging for tasks like, tumor detection, disease diagnosis, and organ segmentation. Moreover, it is used in robotics for object recognition and manipulation, and autonomous vehicles for detecting and classifying objects.
Some commonly used image segmentation techniques in computer vision include instance segmentation, panoptic segmentation, region-based segmentation, and thresholding segmentation.
Why Fine-tune a Model?
Fine-tuning a model involves taking a pre-trained model and adapting it to perform well on a new, specific task or data set. This process helps enhance model performance on previously unseen data. For instance, an image segmentation model trained on horizontally taken smartphone images may not perform well on vertical satellite imagery.
By fine-tuning the model, we can leverage the model’s pre-training on general object segmentation to develop a more precise model. This helps deliver an optimized model without going through the entire training process, saving time and computing resources.
Moreover, since our custom dataset may not contain millions of examples, fine-tuning becomes a favorable approach compared to training the model from scratch.
Fine-tuning a model provides the following benefits:
- Enhances the model’s performance.
- Saves computational resources and reduces training time.
- Allows the model to leverage pre-trained knowledge for the target task.
- Enables the model to adapt to previously unseen or new data distributions.
- Customizes the model for specific use cases, optimizing its performance.
Limitations of Image Segmentation Models
While image segmentation models have made significant progress in recent years, they still have some limitations. Some of them include the following.
- Handling unstructured and unevenly distributed 3D data: With the rise of image acquisition equipment such as LiDAR cameras, there is a growing need for segmentation techniques in 3D data, such as point clouds, voxels, etc. However, the representation and processing of these unstructured, disordered, redundant, and unevenly distributed 3D data remain a significant challenge for segmentation algorithms.
- Limited availability of labeled datasets: In some domains, there is a scarcity of datasets with fine-grained annotations, making it difficult to train segmentation networks using supervised learning algorithms.
- Computational complexity and real-time performance: Deep learning networks used in image segmentation require significant computing resources due to their computational complexity during training. Achieving real-time segmentation, necessary in various domains like video processing, which aims for at least 25 frames per second, remains challenging.
- Limited ability to handle noise and variations in image quality: Many image segmentation algorithms are sensitive to noise and variations in image quality, making it difficult to achieve accurate results on images with poor quality or low resolution.
What is YOLOv8: A Brief Explanation
YOLOv8, short for “You Only Look Once version 8,” is a state-of-the-art model that can be used for image classification, object detection, and instance segmentation tasks. It is an evolution of the YOLO family of models, renowned for their real-time object detection capabilities.
YOLOv8 introduces significant architectural advancements and developer experience that distinguish it from its predecessor, YOLOv5. The key improvements of YOLOv8 include:
- An anchor-free detection system departing from the anchor-based approach.
- Modifications to the convolutional blocks utilized within the model enhance its overall performance.
- Implementation of mosaic augmentation during training, which is disabled in the final 10 epochs.
YOLOv8 can be executed from the command line interface (CLI) or installed as a PIP package to facilitate usage. Furthermore, it provides multiple integrations for labeling, training, and deployment, further streamlining the workflow.
When evaluated on the MS COCO dataset test-dev 2017, YOLOv8x attained an impressive average precision (AP) of 53.9% with an image size of 640 pixels, surpassing the 50.7% achieved by YOLOv5 on the same input size. Moreover, YOLOv8x exhibits a speed of 280 FPS on an NVIDIA A100 and TensorRT, highlighting its efficiency and computational performance.
Fine-tuning YOLOv8 Model with Comet
Despite its impressive performance, pre-trained models like the YOLOv8 struggle against case-specific and niche tasks. To alter these models to your need, it is important to fine-tune them against a custom dataset. Let’s see how we can fine-tune YOLOv8 for instance segmentation!
We will use the open images dataset for fine-tuning and the Comet platform integration for experiment tracking, logging, and model storage.
This experiment has been run inside a Google Colab environment with a GPU runtime.
Data Exploration
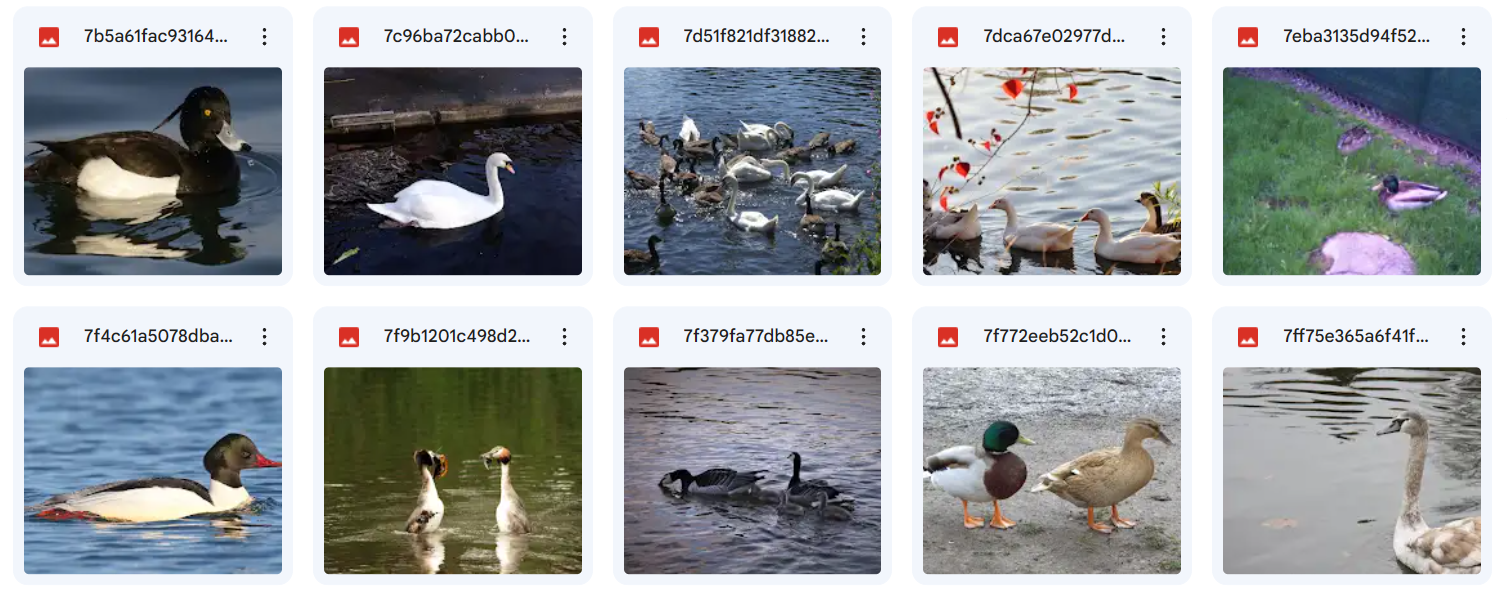
We will fine-tune the model to segment ‘ducks’ within an image. The relevant dataset and annotations are from the open images dataset. This dataset consists of 400 images for this experiment, with 50 images for the validation set. The sample dataset is publicly available on Kaggle. Here is a glimpse of the training set:
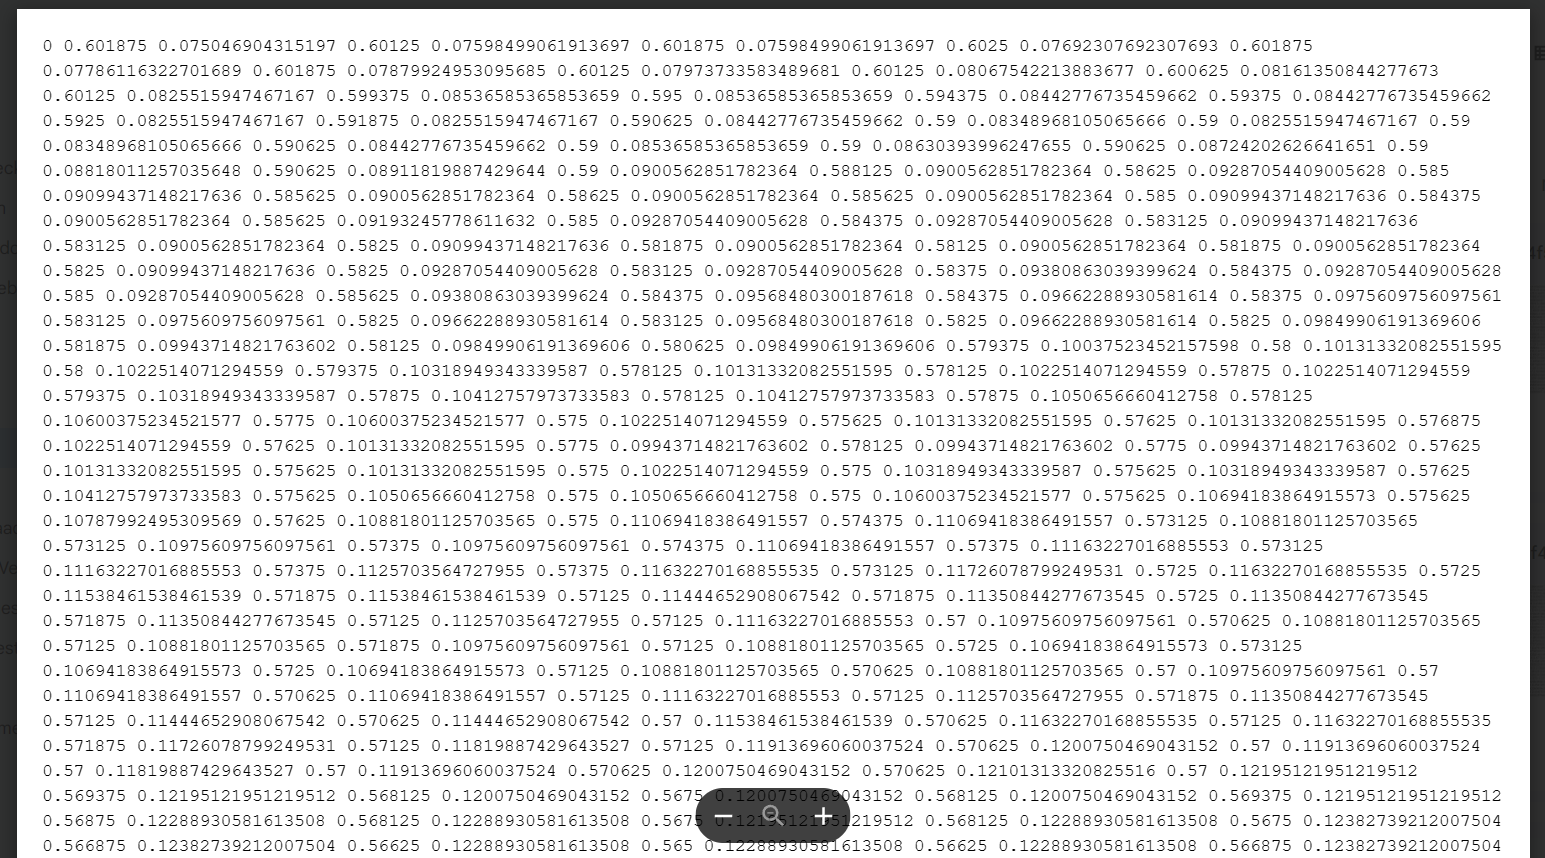
The annotation file for an image segmentation task consists of the class label followed by the pixel coordinates that form the segmentation mask.
Baseline experiment with the pre-trained model
Before moving on with the custom dataset training, let’s see what the pre-trained model outputs for our custom dataset.
First, we install the required libraries.
!pip install ultralytics comet_ml torch torchvision kaggle --quiet
The ultralytics package will allow us to access the YOLOv8 models, comet_ml will allow us to initiate experiments within the comet platform while torch and torchvision are required for necessary imports within YOLOv8.
Next, we import the necessary packages.
import comet_ml
from ultralytics import YOLO
import os
from google.colab import files
Importing our data
We import our dataset from Kaggle. For this we will require the Kaggle API token and the relevant dataset URI. To access the dataset, you will have to create and upload your own Kaggle token to the Colab workspace. Once that is done, you can access the dataset by running the following command.
!kaggle datasets download haziqasajid5122/yolov8-finetuning-dataset-ducks
!unzip yolov8-finetuning-dataset-ducks -d /content/Data
!cp /content/Data/config.yaml /content/config.yaml
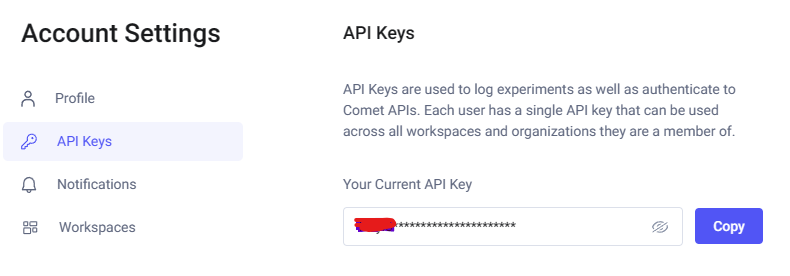
To run experiments with comet_ml we need an API key. Grab your API key from a free Comet account. You can find the API key under the Account Settings -> API Keys.
The easiest way to use this key is to set it as an environment variable.
os.environ[“COMET_API_KEY”] = “<YOUR_API_KEY_HERE>”
Now, when we initialize the Comet project, it will automatically detect this key and proceed with the setup.
comet_ml.login(“YOLOv8-With-Comet”)
Next, we need to choose a pre-trained YOLO model. By default, ultralytics includes several models for each task with varying sizes. The segmentation module includes
- YOLOv8n-seg
- YOLOv8s-seg
- YOLOv8m-seg
- YOLOv8l-seg
- YOLOv8x-seg
Complete details of the models can be found in the official documentation.
We will use the YOLOv8m-seg (medium) model since it should provide us with a balance between training performance and results.
model = YOLO(‘yolov8m-seg.pt’)
When the model is first invoked, it will be automatically downloaded to your local device.
Now let’s see how this model works on our custom dataset.
results = model.predict("/content/Data/images/val/0a411d151f978818.png", save=True)
Our experiments are run in the Google Colab environment with a mounted Google Drive, which is why the path looks like this. You will have to change the path according to your system. Now back to the results.
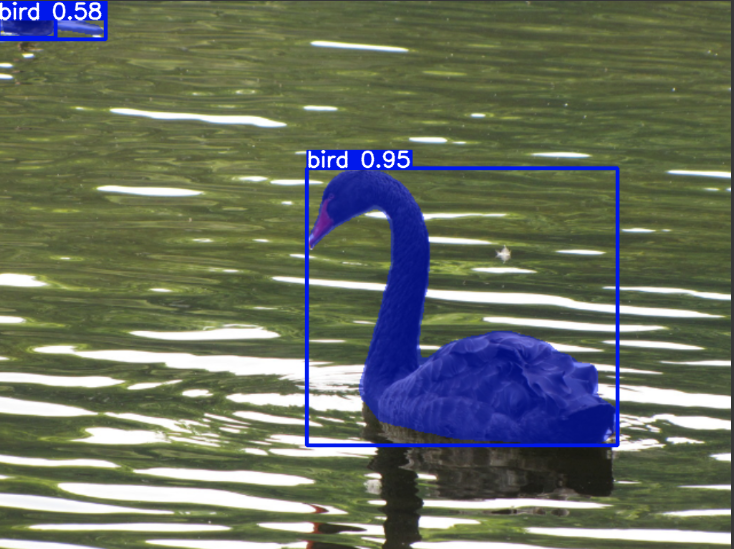
The image is correctly segmented as a ‘bird’, which is expected since the pre-trained model is trained on the COCO dataset. However, we wish to teach the model what type of bird this is, i.e., a duck in this case.
Fine-tuning
For custom dataset training, YOLO expects the data to be in a certain format. The directory structure for training and validation images and labels is shown below.
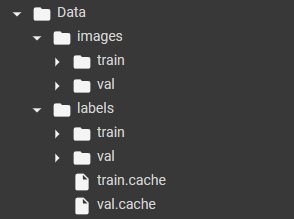
The subfolder for `images` contains all the ‘.png’ files, and the labels directory contains annotations in ‘.txt’ format.
YOLO also expects a `.yaml` file which contains the details of the paths for the dataset and the class labels in the dataset. You can find the complete details of custom datasets in the dataset guide. Since we only have one class in the dataset, our ‘.yaml’ has the following information:
path: /content/Data
train: images/train
val: images/val

nc: 1
names:
  0: duck
Note that the path configurations for the dataset differ according to your system.
Now that we have all the necessary details in place, we simply need to start the training:
results = model.train(
    data="/content/config.yaml",
    project="YOLOv8-With-Comet",
    batch=12,
    save_json=True,
    epochs=15,
    pretrained=True
)
As soon as the training is submitted, Comet will automatically create an experiment in your comet workspace to track the run.
Before moving on to the experiment logs, let’s see if our fine-tuned model performs as expected.
results = model.predict("/content/Data/images/val/0a411d151f978818.png", save=True)
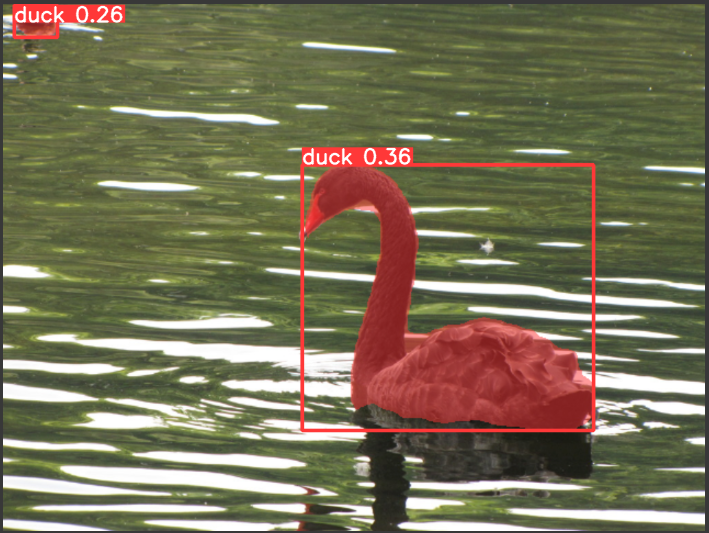
The model recognizes the duck accurately. This fine-tuned model is now ready for task-specific implementation. Although further training with hyperparameter optimization and a larger dataset is advisable.
Logging With Comet
Comet will track as many experiments as we choose to log and will display metrics for each run.
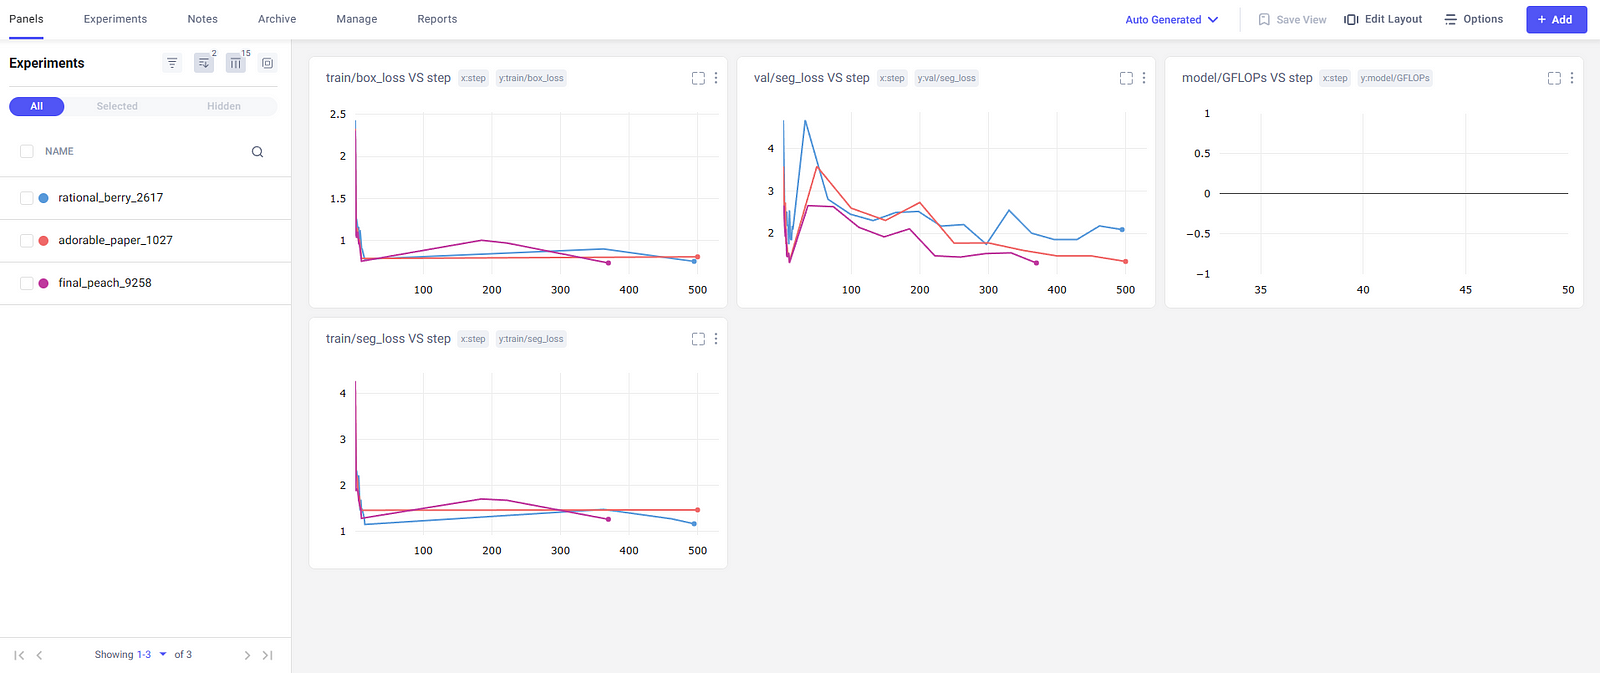
The left panel displays all the experiments (if no name is specified, Comet will assign a random one) and different metrics for each experiment. Now, let’s take a look at our latest run.
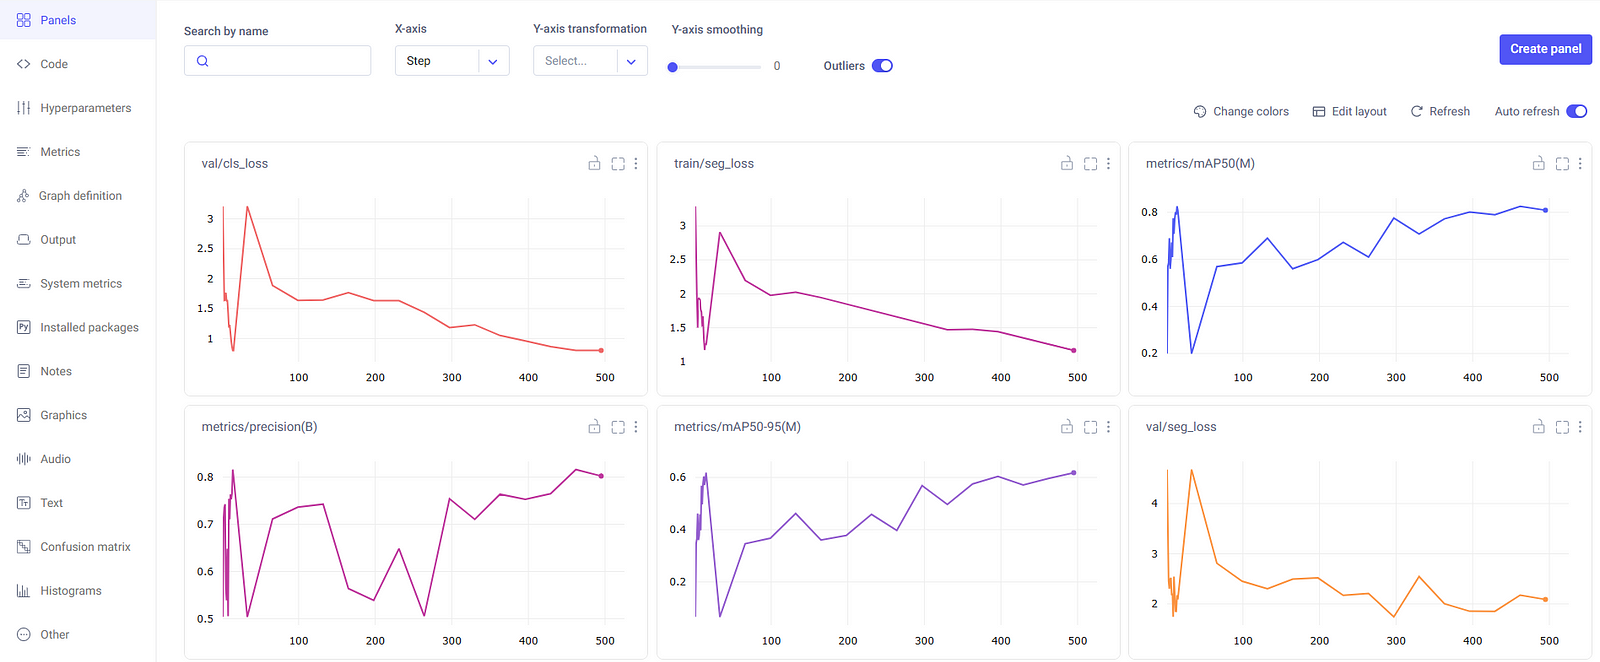
First of all, we see some common metrics auto-logged against each epoch. Some of these common metrics include:
- Segment Mask Loss (
seg_loss) - Class Loss (
cls_loss) - Precision
- Mean Average Precision (
mAP50–95)
From this bird’s-eye-view, we can see that the loss has been decreasing and mAP has been increasing, but haven’t yet leveled off. This means increasing the number of epochs may potentially lead to a better model. It’s certainly worth checking in further experiment runs!
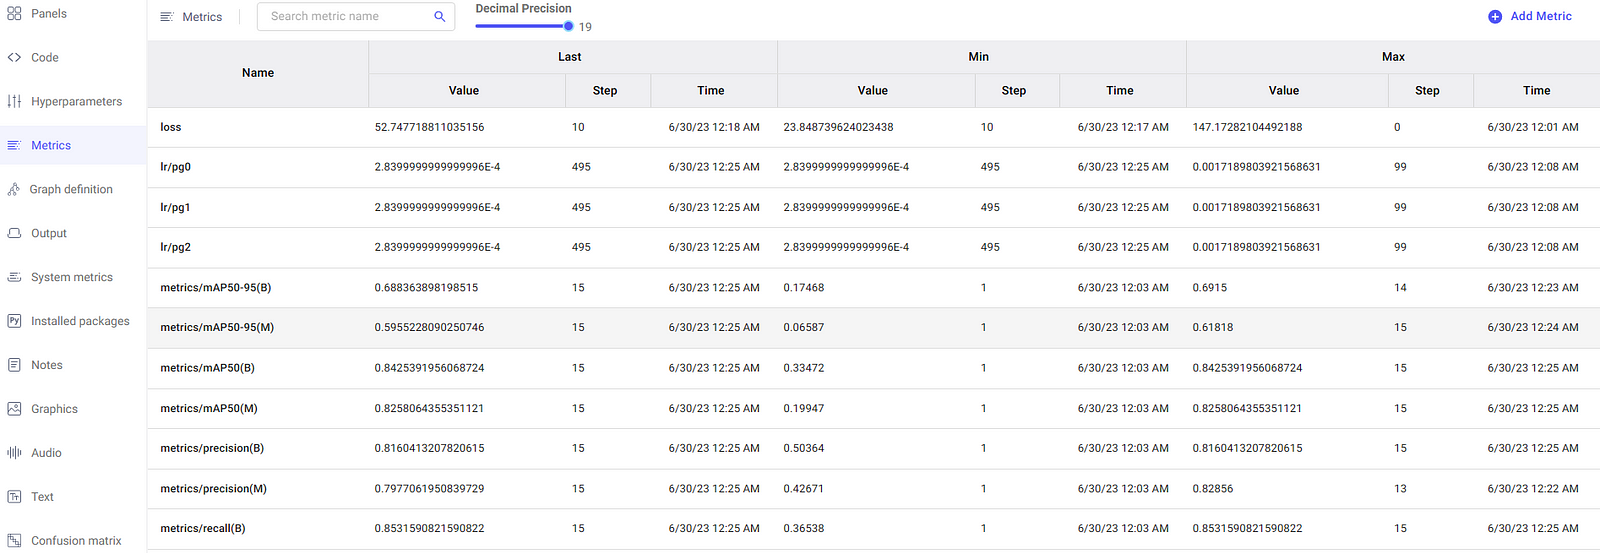
For a more tabular view, we can also view the metrics in a separate pane, as shown below.
Interactive Confusion Matrix
Comet also automatically logs a confusion matrix of our predictions, which you can find in the Confusion Matrix tab. For more details on how to use the confusion matrix, check out this blog post.
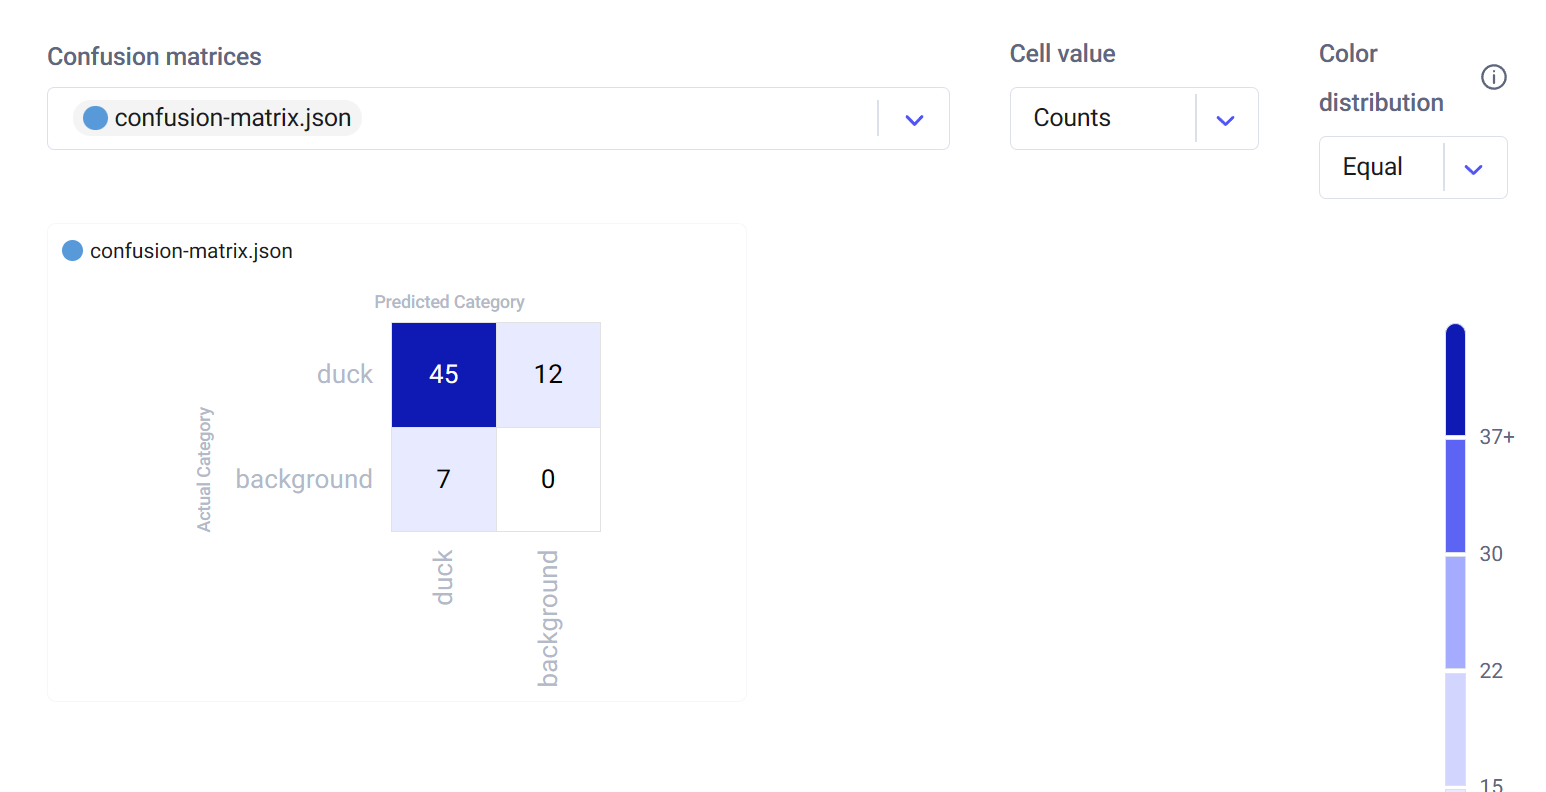
From this graphic, we can see that our fine-tuned model detected and segmented 45 ducks from our validation dataset correctly, which represents a 79% success rate over the positive label category.
System Metrics
Moreover, Comet also keeps a log of system metrics so that we can identify bottlenecks in our process and work to improve them.
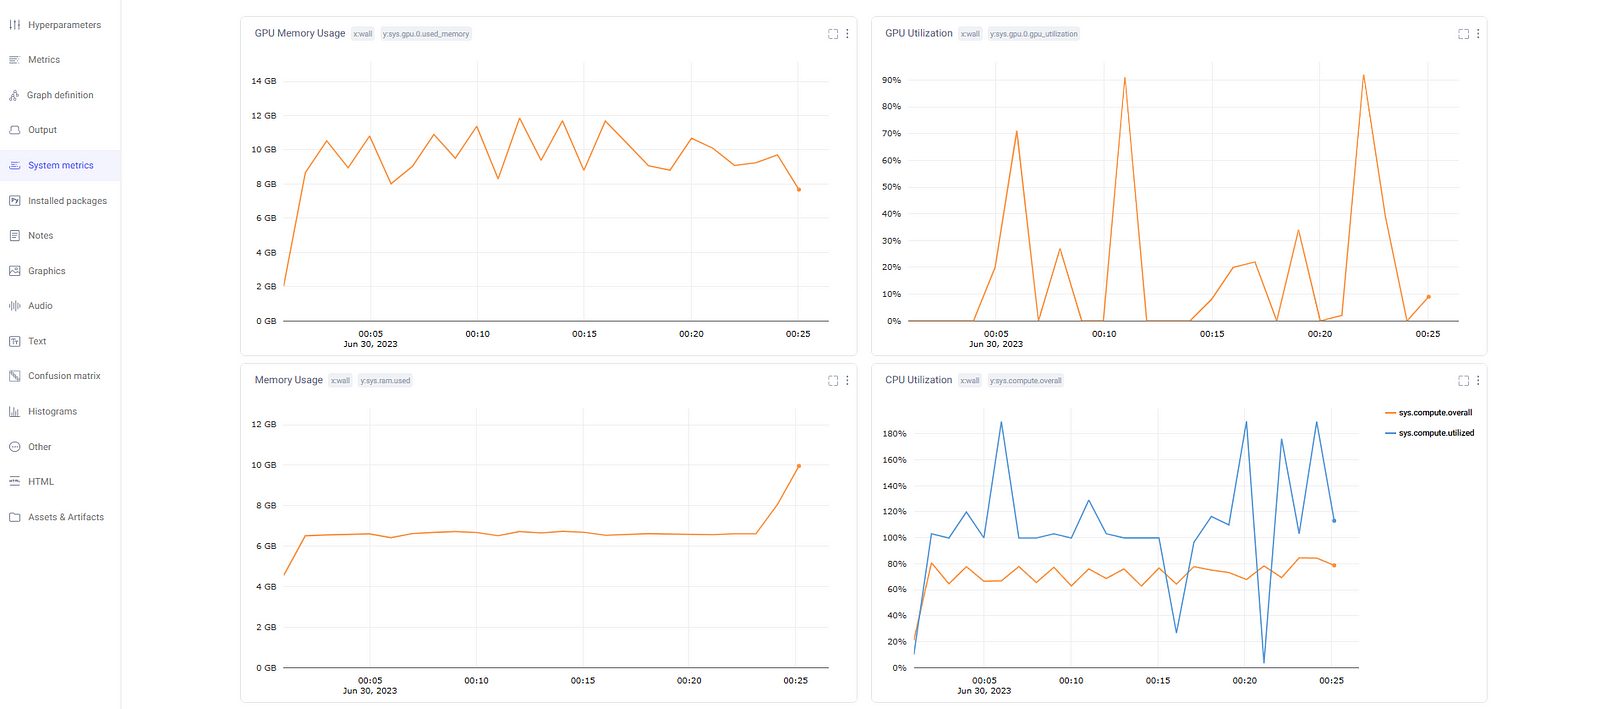
These auto-logged metrics include information like:
- GPU Utilization
- GPU Memory Utilization
- CPU Utilization
- RAM Utilization
Final Thoughts
Overall, Comet provides a great platform to track and version control your machine learning tasks. It provides an interactive birds-eye view of the entire run to understand model performance and helps take measures for improvement.
It also stores all experiment details (run configurations, hyper-parameters), graphics, and models, which can contribute to better team collaboration.
Model fine-tuning is an important part of the machine learning ecosystem. It allows machine learning engineers to skip the hassle of training entire models from scratch and build high-performing task-specific applications. Fine-tuning is performed by loading pre-trained weights from an existing model and training them further to learn the patterns specific to our needs.
However, the experimentation procedure remains complex. The Comet platform automatically tracks all your machine learning runs. It logs all necessary metrics for model evaluation and stores experiment details and trained models for collaboration and future reference.
To experience Comet’s full potential, create a free account today.
