Comet is an experimentation platform that permits you to track and monitor experiments. You can write your Comet experiments using your preferred language including Python, R, and Java.
In this tutorial, I describe how to write a Comet experiment in Java. In particular, I will use the Comet Java library and the weka library, to achieve this objective.
The article is organized as follows:
- Environment setup
- Dataset loading
- Model classification and evaluation
- Results in Comet
Environment Setup
Firstly, I need to install the Comet Java library. I download it from the Comet official Web site and I install it through Maven:
mvn clean install
Then, I download weka from its official website, and I install it, by following the described procedure.
Now, I create a new maven project by running the following command in a terminal:
mvn archetype:generate \
  -DgroupId=ml.example \
  -DartifactId=comet-classification \
  -DarchetypeArtifactId=maven-archetype-quickstart \
  -DarchetypeVersion=1.4 \
  -DinteractiveMode=false
I enter the created directory and I edit the pom.xml file by adding the list of dependencies in the dependencies section, as follows:
<dependency>
   <groupId>ml.comet</groupId>
   <artifactId>comet-java-client</artifactId
   <version>1.1.10</version>
</dependency><dependency>
   <groupId>nz.ac.waikato.cms.weka</groupId>
   <artifactId>weka-stable</artifactId>
   <version>3.8.6</version>
</dependency>
Now, I create a new project in Comet, and I copy the API KEY. I create a directory, named config with a new file, named applications.conf, and I put it in the main directory of the project. In the applications.conf file I save the information to access Comet:
comet {
     baseUrl = "https://www.comet.com"
     apiKey = "MY API KEY"
     project = "MY PROJECT NAME"
     workspace = "MY WORKSPACE"
}
I edit the pom.xml file, by adding the config directory to the project classpath:
<resources>
  <resource>
    <directory>src/main/config</directory>
  </resource>
</resources>
Now, I’m ready to run my experiment!
Students and start ups can use Comet for free! Sign up today and get started.
Dataset Loading
As a use case, I will use the breast cancer dataset available on Kaggle under the CC0 public license. The idea is to build a classification task which returns the diagnosis (benign/malignant) given some input features. I will implement a KNN classifier to solve this task.
I open the App.java file, located under main → java → ml → example, and I edit the App class by adding the main method. I write all the following code in the main method of the App class.
I wrap all the following code in a try — catch block, which I omit for simplicity.
Firstly, I load the dataset:
CSVLoader loader = new CSVLoader();
loader.setSource(new File("src/main/source/breast-cancer.csv"));
Instances data = loader.getDataSet();
Then, I set the target class to the second column of the dataset:
data.setClassIndex(1);
I split the dataset into training and test sets:
int trainSize = (int) Math.round(data.numInstances() * 0.7);
int testSize = data.numInstances() - trainSize;
Instances train_set = new Instances(data, 0, trainSize);
Instances test_set = new Instances(data, trainSize, testSize);
Now, I create the Comet experiment:
OnlineExperiment exp = ExperimentBuilder.OnlineExperiment().build();
exp.setExperimentName("Decision Tree");
Model Classification and Evaluation
I’m ready to train the model. I build a Decision Tree classifier and I train it on the training set:
Classifier cls = new J48();
cls.buildClassifier(train_set);
I evaluate the model on the test set:
Evaluation eval = new Evaluation(test_set);
eval.evaluateModel(cls,test_set);
double precision = eval.precision(1);
double recall = eval.recall(1);
double accuracy = eval.pctCorrect();
I log the evaluation metrics in Comet:
exp.logMetric("precision", precision);
exp.logMetric("recall", recall);
exp.logMetric("accuracy", accuracy);
Finally, I terminate the experiment:
exp.end();
Now I run all the experiments from the project main directory as follows:
mvn clean compile exec:java -Dexec.mainClass="ml.example.App"
Results in Comet
Once the experiment terminates, I can see the results in Comet. The following figure shows the Comet dashboard when the experiment is completed:
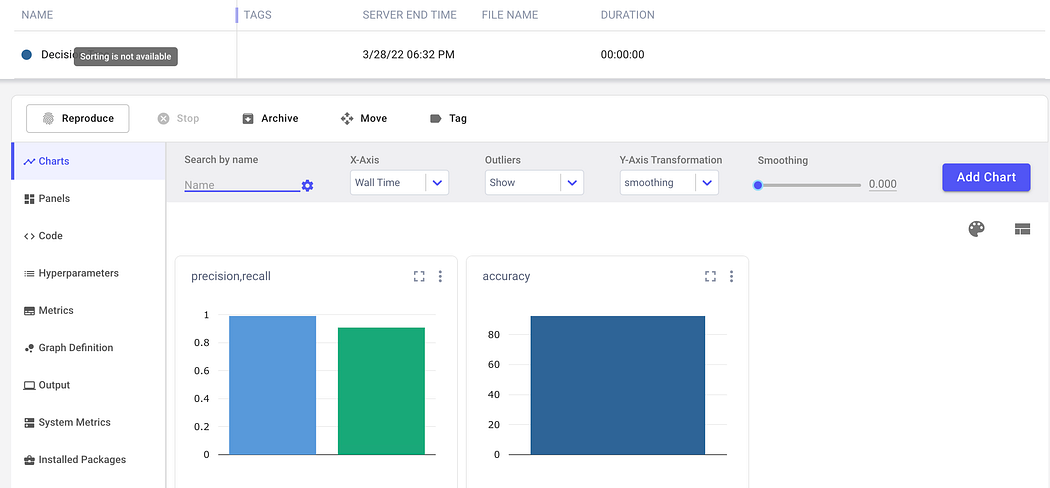
Image by Author
Comet has produced the precision, recall, and accuracy graphs automatically!
Summary
Congratulations! You have just learned how to run a Comet experiment in Java, using the weka library. For more details on the functions provided by the Comet Java library, you can refer to the Comet official documentation.
You can download the full code of this tutorial from my Github repository. You only need to configure the applications.conf file! In addition, you can see the live experiment directly in Comet, at this link.
Happy coding! Happy Comet!