For AI agents: a documentation index is available at the root level at /llms.txt and /llms-full.txt. Append /llms.txt to any URL for a page-level index, or .md for the markdown version of any page.
Copy to LLMGithubGo to App
DocumentationIntegrationsBuilding Self-Improving AgentsSelf-hosting OpikSDK & API reference
    • Overview
  • AI Coding Assistants
    • MCP Server
  • TypeScript
    • Opik TypeScript SDK
  • Python
      • AG2
      • Agent Spec
      • Agno
      • BeeAI
      • Claude Agent SDK
      • Autogen
      • CrewAI
      • DSPy
      • Google ADK
      • Haystack
      • Harbor
      • Instructor
      • LangChain
      • LangGraph
      • LangServe
      • LiveKit Agents
      • Llama Index
      • Microsoft Agent Framework
      • OpenAI Agents
      • Pipecat
      • Pydantic AI
      • Semantic Kernel
      • Smolagents
      • Strands Agents
      • Temporal
      • VoltAgent
    • Opik Python SDK
    • OpenTelemetry Python SDK
  • Java
    • Spring AI
    • Quarkus LangChain4j
  • .NET
  • Ruby
    • OpenTelemetry Ruby SDK
  • No-Code
    • Cursor
    • Dify
    • Flowise
    • Langflow
    • n8n
    • OpenClaw
    • OpenAI Codex
    • OpenWebUI
    • Prompt Flow
  • Multi-Language
    • OpenTelemetry
LogoLogo
Copy to LLMGithubGo to App
On this page
  • Account Setup
  • Getting Started
  • Installation
  • Configuring Opik
  • Configuring DSPy
  • Logging DSPy calls
PythonFrameworks

Observability for DSPy with Opik

Was this page helpful?
Previous

Observability for Google Agent Development Kit (Python) with Opik

Next
Built with

DSPy is the framework for programming—rather than prompting—language models.

In this guide, we will showcase how to integrate Opik with DSPy so that all the DSPy calls are logged as traces in Opik.

Account Setup

Comet provides a hosted version of the Opik platform, simply create an account and grab your API Key.

You can also run the Opik platform locally, see the installation guide for more information.

Getting Started

Installation

First, ensure you have both opik and dspy installed:

$pip install opik dspy

Configuring Opik

Configure the Opik Python SDK for your deployment type. See the Python SDK Configuration guide for detailed instructions on:

  • CLI configuration: opik configure
  • Code configuration: opik.configure()
  • Self-hosted vs Cloud vs Enterprise setup
  • Configuration files and environment variables

Configuring DSPy

In order to configure DSPy, you will need to have your LLM provider API key. For this example, we’ll use OpenAI. You can find or create your OpenAI API Key in this page.

You can set it as an environment variable:

$export OPENAI_API_KEY="YOUR_API_KEY"

Or set it programmatically:

1import os
2import getpass
3
4if "OPENAI_API_KEY" not in os.environ:
5 os.environ["OPENAI_API_KEY"] = getpass.getpass("Enter your OpenAI API key: ")

Logging DSPy calls

In order to log traces to Opik, you will need to set the opik callback:

1import dspy
2from opik.integrations.dspy.callback import OpikCallback
3
4lm = dspy.LM("openai/gpt-4o-mini")
5
6project_name = "DSPY"
7opik_callback = OpikCallback(project_name=project_name, log_graph=True)
8
9dspy.configure(lm=lm, callbacks=[opik_callback])
10
11cot = dspy.ChainOfThought("question -> answer")
12cot(question="What is the meaning of life?")

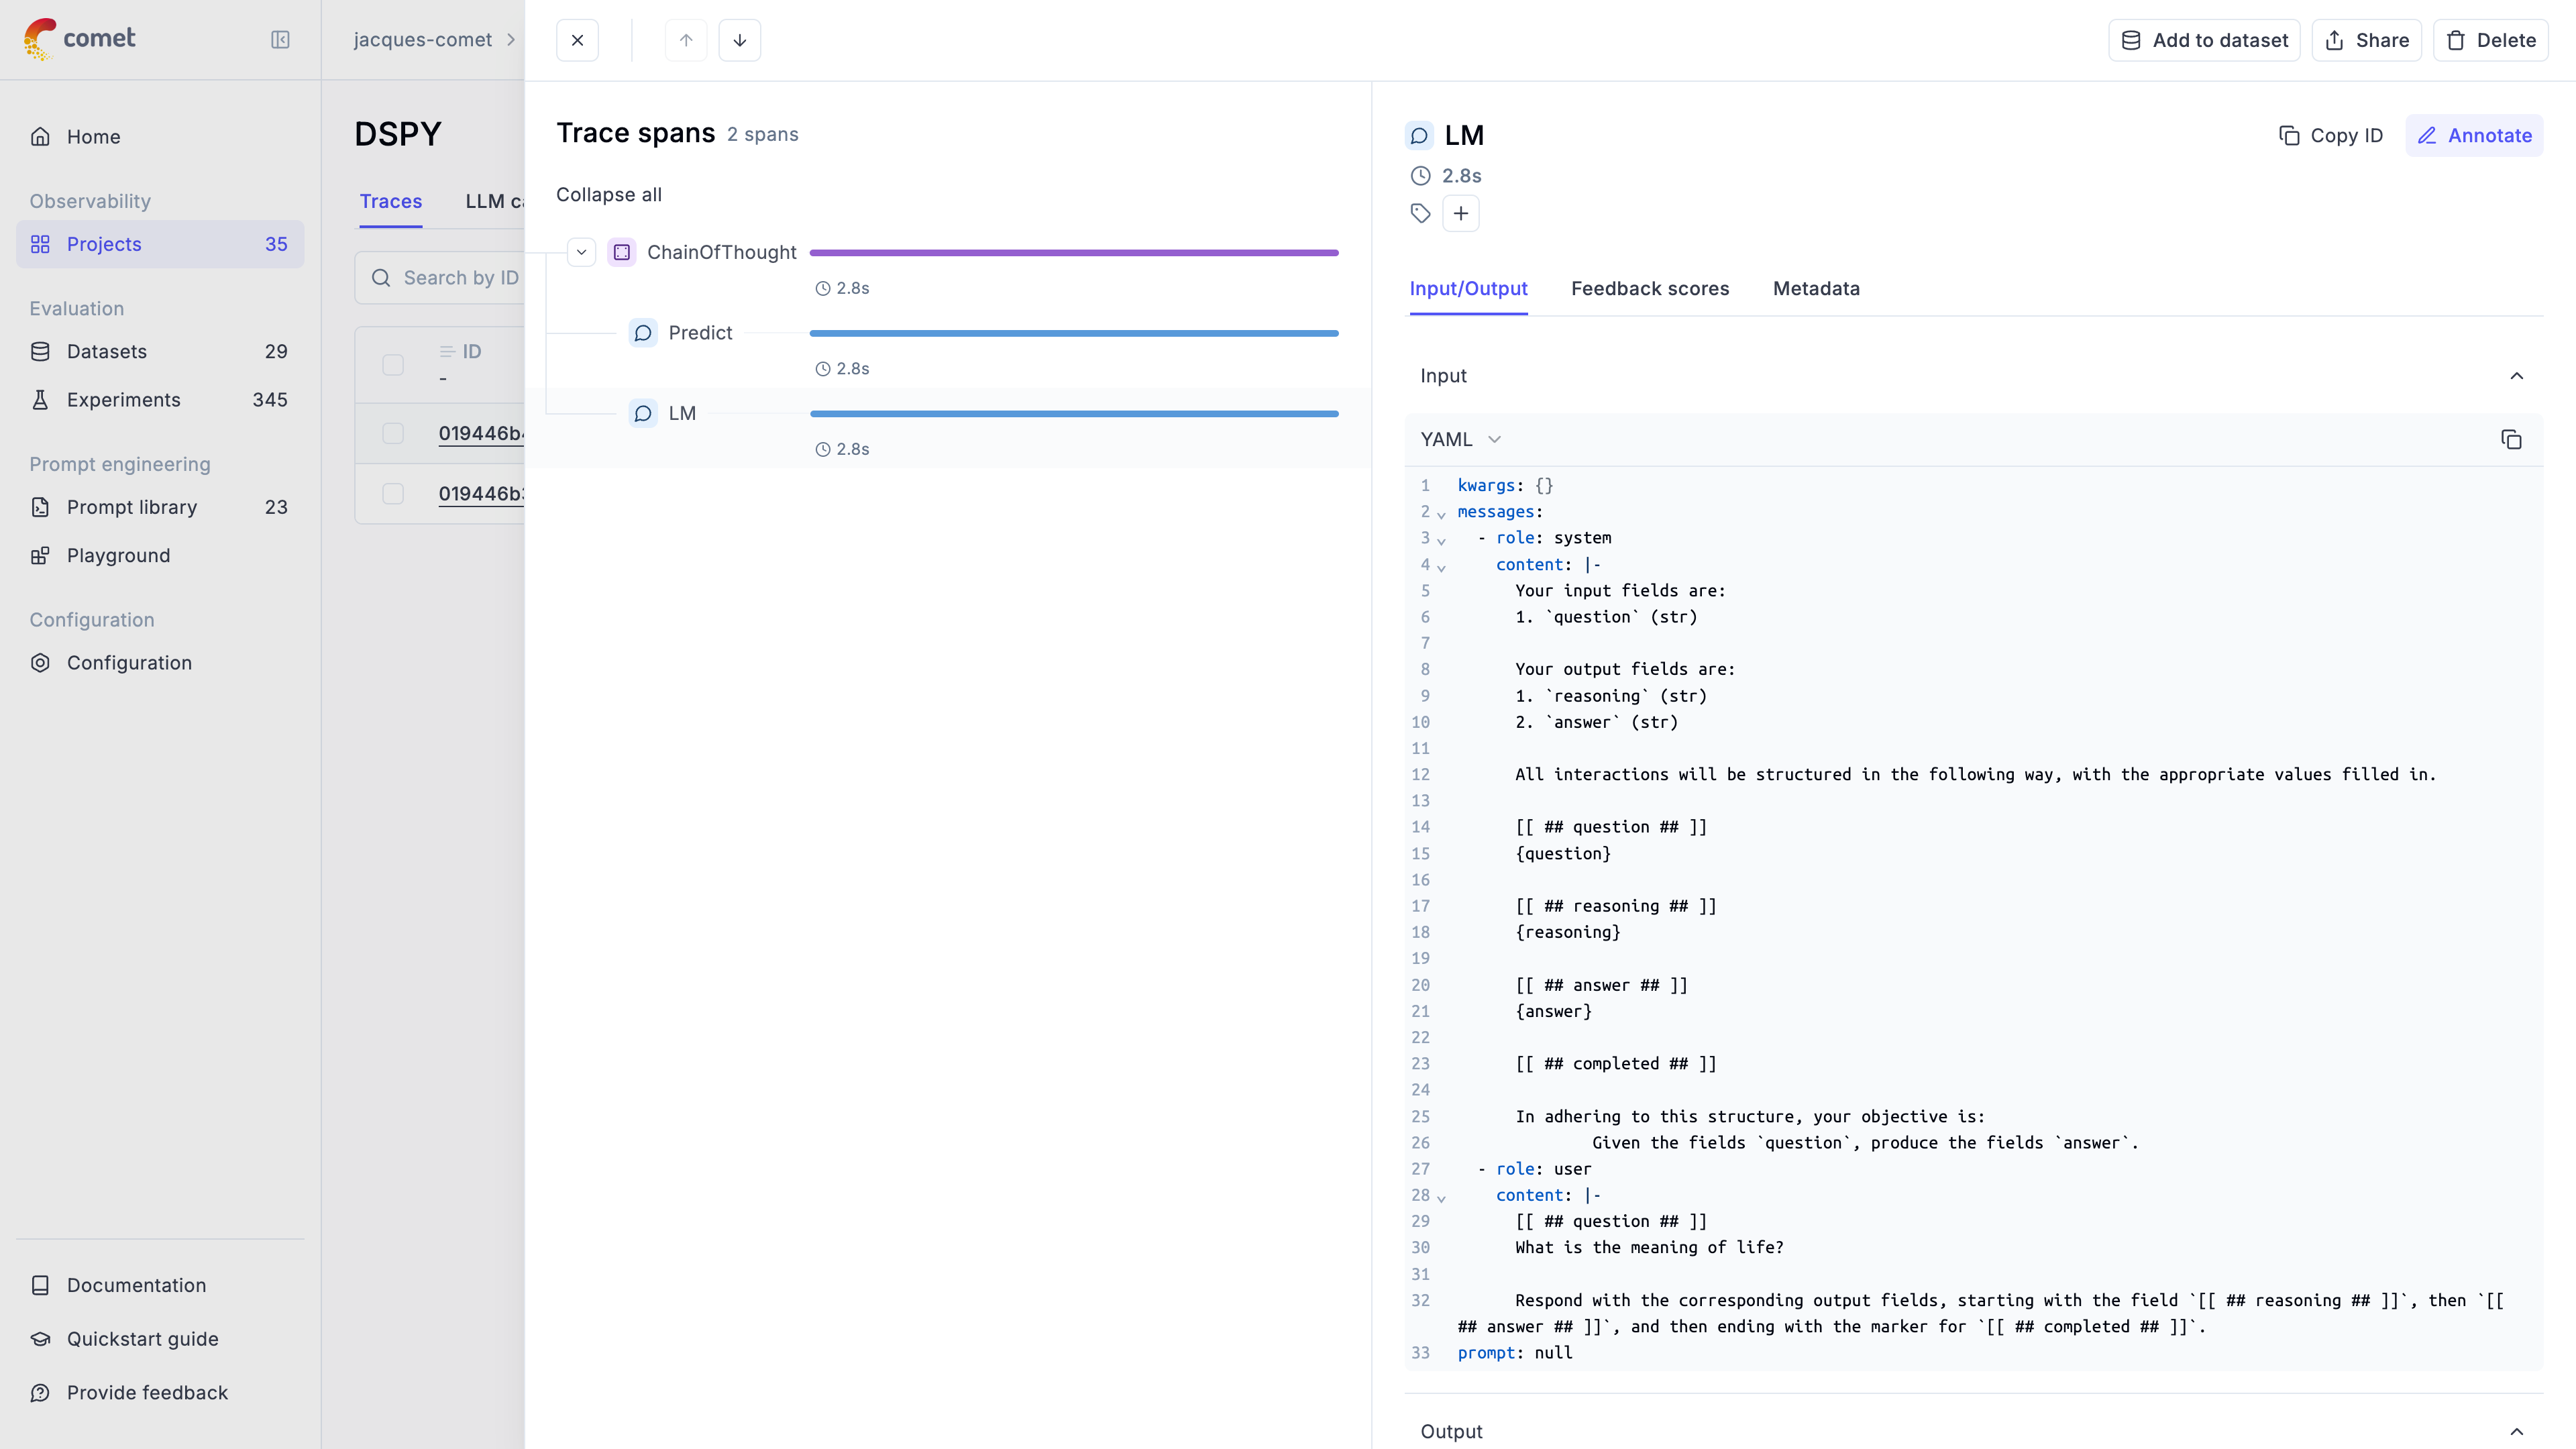
The trace is now logged to the Opik platform:

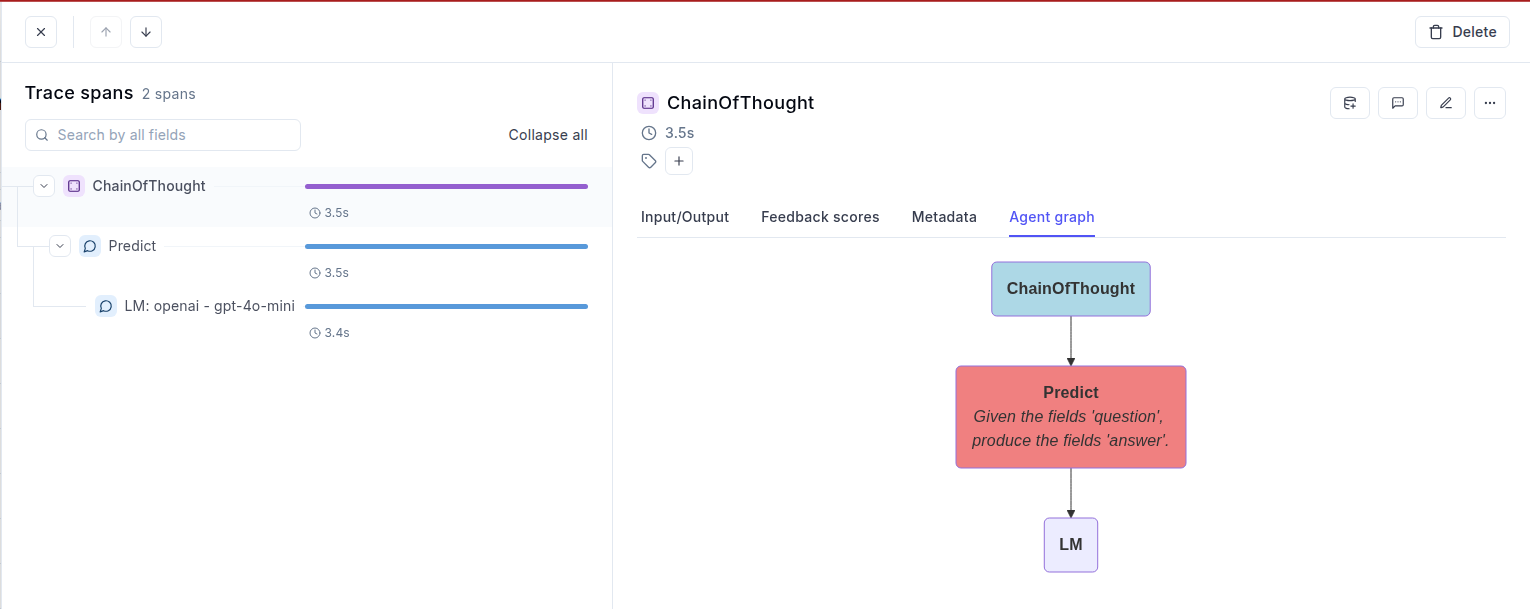
If you set log_graph to True in the OpikCallback, then each module graph is also displayed in the “Agent graph” tab: