Building Self-Improving Agents
Building Self-Improving Agents
Most teams build an agent, ship it, and hope for the best. When something breaks, they dig through logs, guess at the fix, and redeploy. There’s no systematic way to learn from production failures or prove that a change actually helped.
Opik takes a different approach. Every production trace becomes a potential learning signal. Every failure becomes a test case. Every fix is verified before it ships. The result is an agent that gets measurably better with every iteration — not because you’re doing more work, but because the platform closes the loop for you.
The flywheel
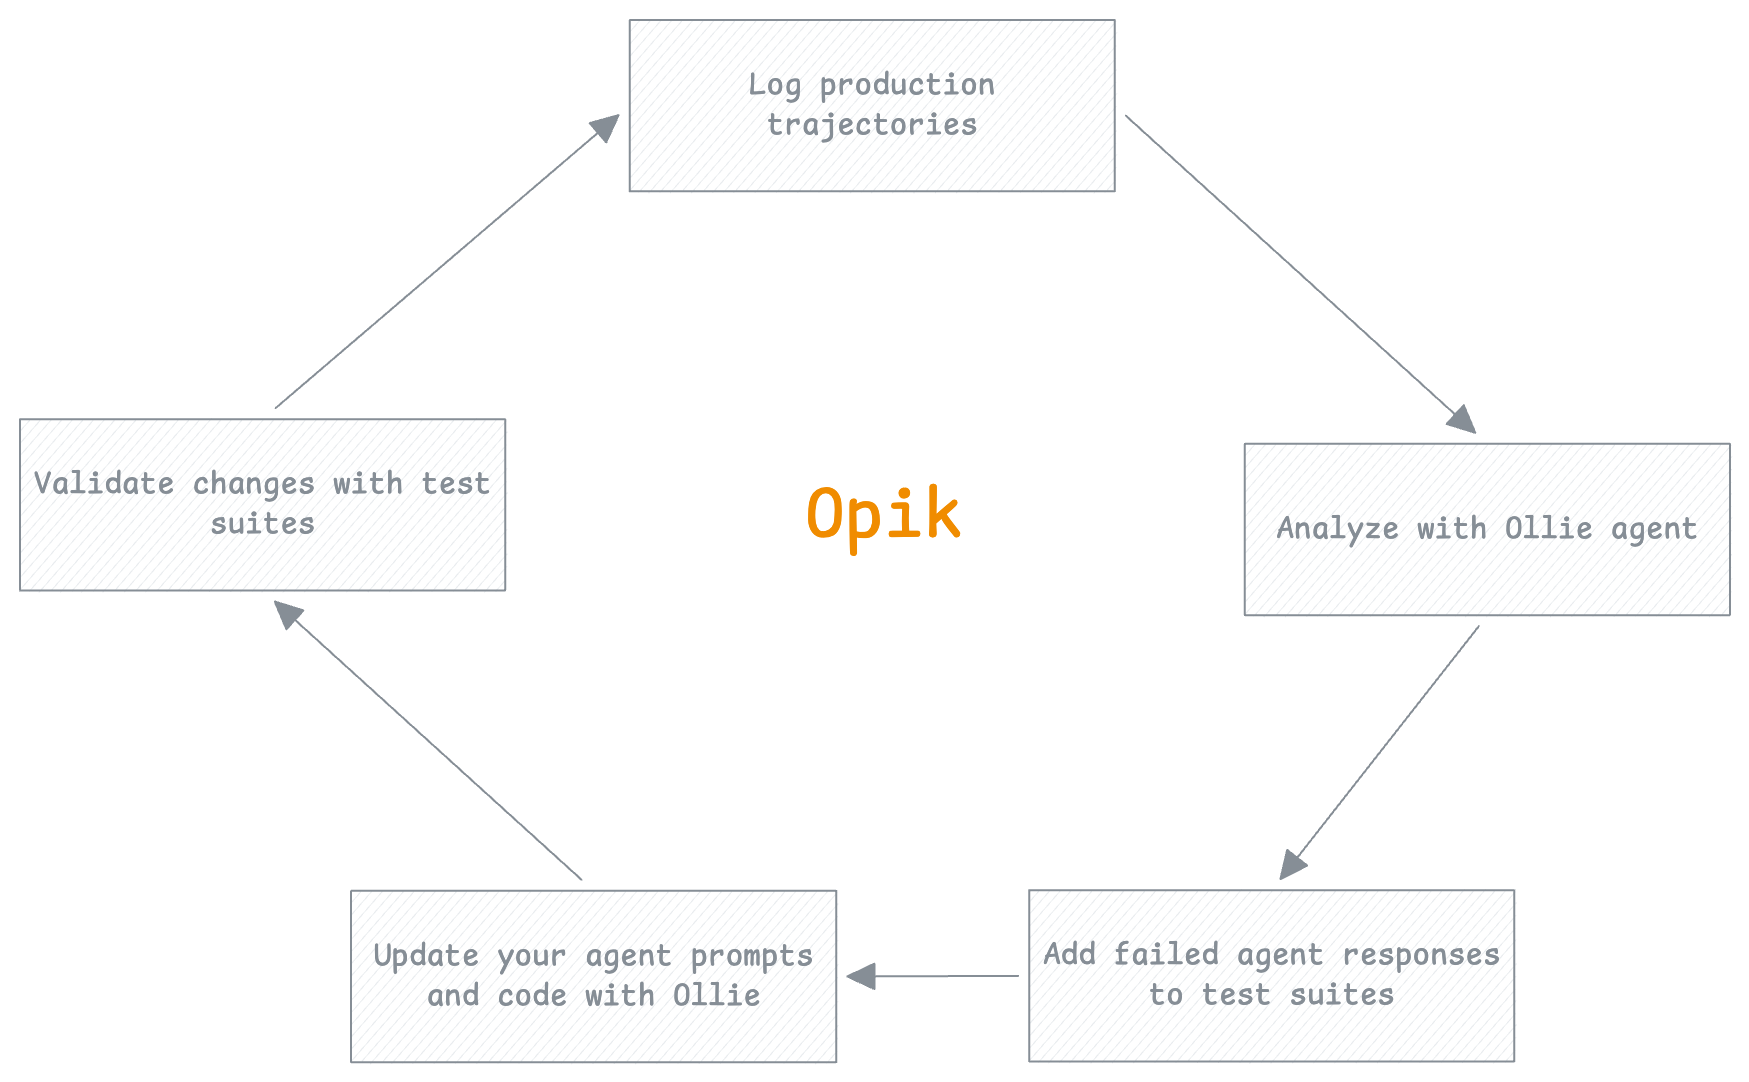
The flywheel is the core loop that makes your agent better over time. Each turn through the cycle adds a new test case, fixes a real failure, and verifies the fix before it reaches production. The more you use it, the faster and more reliable it becomes.
You don’t write test suites from scratch. You build them incrementally from real production failures. Your test coverage always reflects the actual failure modes of your agent.
Log production trajectories
Every request your agent handles is captured as a trace in Opik. LLM calls, tool invocations, retrieval steps, token usage, latencies — the full execution path is logged automatically.
Where this happens in Opik: The Traces dashboard shows every request with filtering by status, latency, cost, and custom tags.
Analyze with Ollie agent
When you spot a trace that looks wrong — a hallucinated answer, ignored context, a failed tool call — open Ollie from the trace view. Describe what looks off, and Ollie walks the span tree to find the root cause.
Ollie doesn’t just summarize the trace. It reads the full execution path, compares failing runs to successful ones, and identifies exactly which step went wrong and why.
Example prompts:
- “Why did the final answer ignore the retrieved context?”
- “Which tool call caused this trace to fail?”
- “Compare this to a recent successful trace for the same query type”
Where this happens in Opik: The Ollie debug panel is available from any trace view.
Add failed agent responses to test suites
Once you understand the failure, turn it into a test case. Add the trace to a test suite with a natural-language assertion that captures the expected behavior. This is how your test coverage grows — not from a separate test-writing phase, but from real production failures.
Example assertions:
- “The response must cite specific facts from the retrieved context”
- “The tool call must return a non-empty result”
- “The response must not contain information not present in the context”
You can add test cases through Ollie, the Opik UI, or the SDK:
Where this happens in Opik: Test Suites in the Evaluation section.
Update your agent prompts and code with Ollie
With the root cause identified and a test case in place, fix the issue. This might mean updating a prompt, adjusting tool definitions, or changing retrieval parameters.
With opik connect running, Ollie can read your source files and propose code changes directly. You see the diff, approve it, and the file is updated on your machine. Nothing changes without your click.
This is the step where Ollie’s full power shows — it has context from the trace (what went wrong), the test suite (what “correct” looks like), and your code (where to make the change). See Ollie and your codebase for the full workflow.
Where this happens in Opik: The Ollie chat panel with opik connect active.
Validate changes with test suites
Before shipping, run the test suite against your updated agent. The suite checks every test case — including the one you just added — so you confirm the fix works and nothing else regressed.
You get a pass/fail summary for every assertion. If something fails, you’re back to step 2 — but now with a tighter feedback loop because the test case already exists.
Where this happens in Opik: Experiment comparison shows side-by-side results across runs.
Why it accelerates
The flywheel isn’t just a process — it’s a compounding investment:
- Each turn adds a test case. After 50 production failures caught and fixed, you have 50 regression tests that run automatically.
- Ollie gets more context. The more traces and test cases in your workspace, the better Ollie can diagnose new issues by comparing to known patterns.
- Confidence grows. With a comprehensive test suite, you can ship changes faster because you know regressions will be caught.
- Failure rate drops. Each fix addresses a real production failure mode. Over time, the easy failures are eliminated and your agent handles edge cases that would have broken it before.
You don’t need to complete every step every time. Sometimes you just want to analyze a trace and understand it. Sometimes you want to add a test case without fixing anything yet. The flywheel is a direction, not a rigid sequence.
Next steps
- Ollie and your codebase — How
opik connectlets Ollie read and edit your code - Getting started with evaluation — Run your first test suite
- Debugging agents with Ollie — Example prompts and the full debug workflow