Quickstart
With Comet, you can effectively manage, visualize, and optimize both traditional ML and LLM throughout their lifecycle—from initial experimentation to ongoing production monitoring.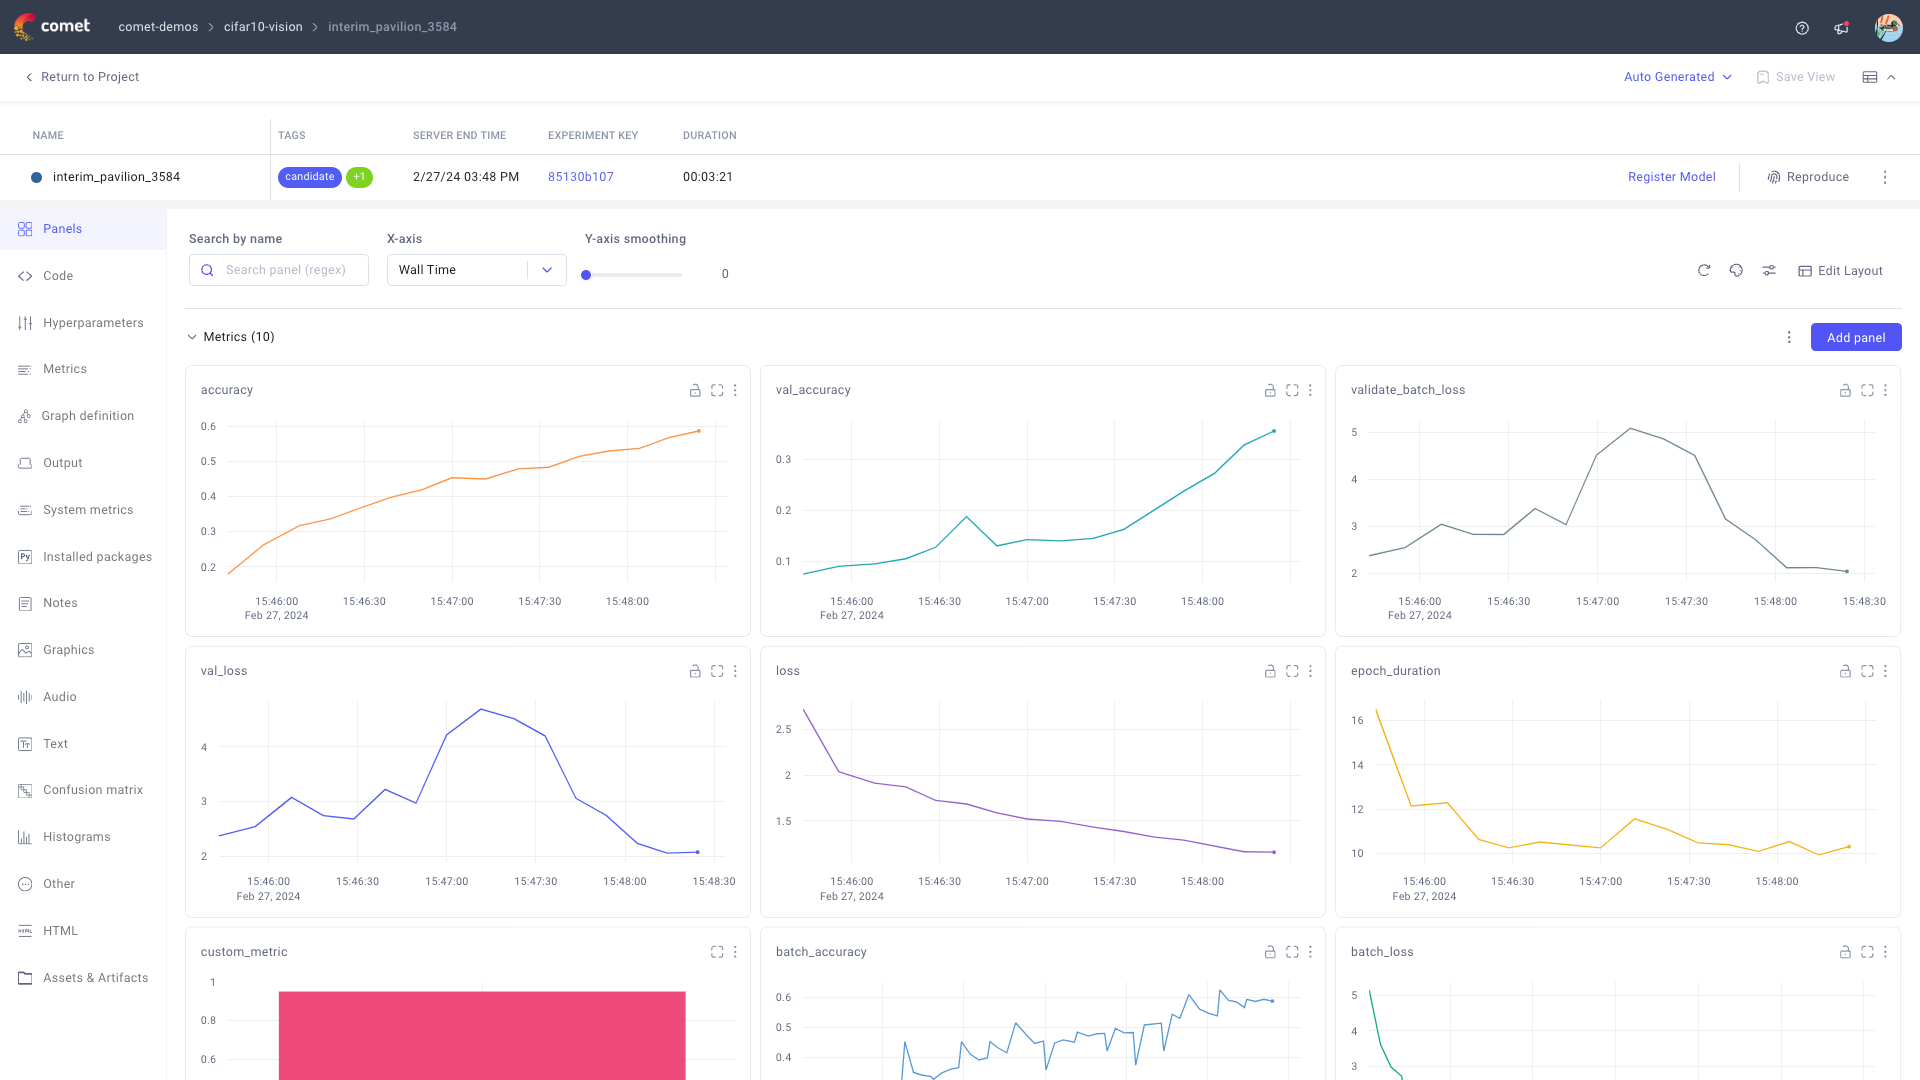
Follow this quickstart to get started with ML experiment and LLM prompt management on Comet.
Get started: Experiment Management
1. Install and configure the Comet ML SDK
The comet-ml Python package allows you to programmatically set up and interact with your ML experiments on Comet. You can use pip to install the library in your local environment:
pip install comet_ml
%pip install comet_ml
The Comet ML SDK then authenticates to your user space via API key. The API key is stored in .comet.config together with other configuration settings (such as workspace and project). You can set up your API key, or update your default configuration, as follows:
comet init
1 2 3 | |
Note that, while you can pass the api_key as an argument to init(), this is not recommended for security purposes unless the API key is retrieved dynamically from a secure vault for example.
Further details, as well as other configuration approaches, are available in the Configure the SDK page.
2. Log your training run as an experiment
Comet defines a training run as an experiment. To track your experiments with Comet:
Start an
Experimentobject.1 2 3
import comet_ml exp = comet_ml.Experiment(project_name="demo-project")The complete list of supported arguments is accessible at
comet_ml.Experiment().Log metrics, parameters, visualizations, code, and other assets relevant for your experiment management.
1 2 3 4 5 6 7
import math import random for step in range(100): accuracy = math.log(1 + step + random.uniform(-0.4, 0.4))/5 loss = 5 - math.log(1 + step + random.uniform(-0.4, 0.4)) exp.log_metrics({'accuracy': accuracy, 'loss': loss}, step=step)1 2 3
parameters = {'batch_size': 32, 'learning_rate': 0.0001} exp.log_parameters(parameters)Please refer to the Logging Data section for detailed information and examples for each metadata type.
Tip
By default, Comet automatically logs a number of relevant metrics, parameters, and visualizations for all the most popular ML frameworks.
Find all references in the Integrations section.Run your code!
Comet will automatically track your experiment and stop logging when your code terminates.
Tip
Consider adding
exp.end()at the end of your code to ensure all logging is completed before exiting.
3. Visualize the experiment in the UI
Comet links you to the Single Experiment page in the Comet UI when starting the experiment. Else, refer to Find your way around for information on how to navigate to your experiment from the comet.com homepage.
From the Experiment page, you can:
Access to all metadata, including training metrics and hyper-parameters, logged during the training run.
Manage (rename, tag, move, and archive) the experiment.
Please refer to the Experiment Page page for more details.
From the Project Panels page, you can then compare this experiment with other experiments in the demo project by applying Compare on two or more selected experiments.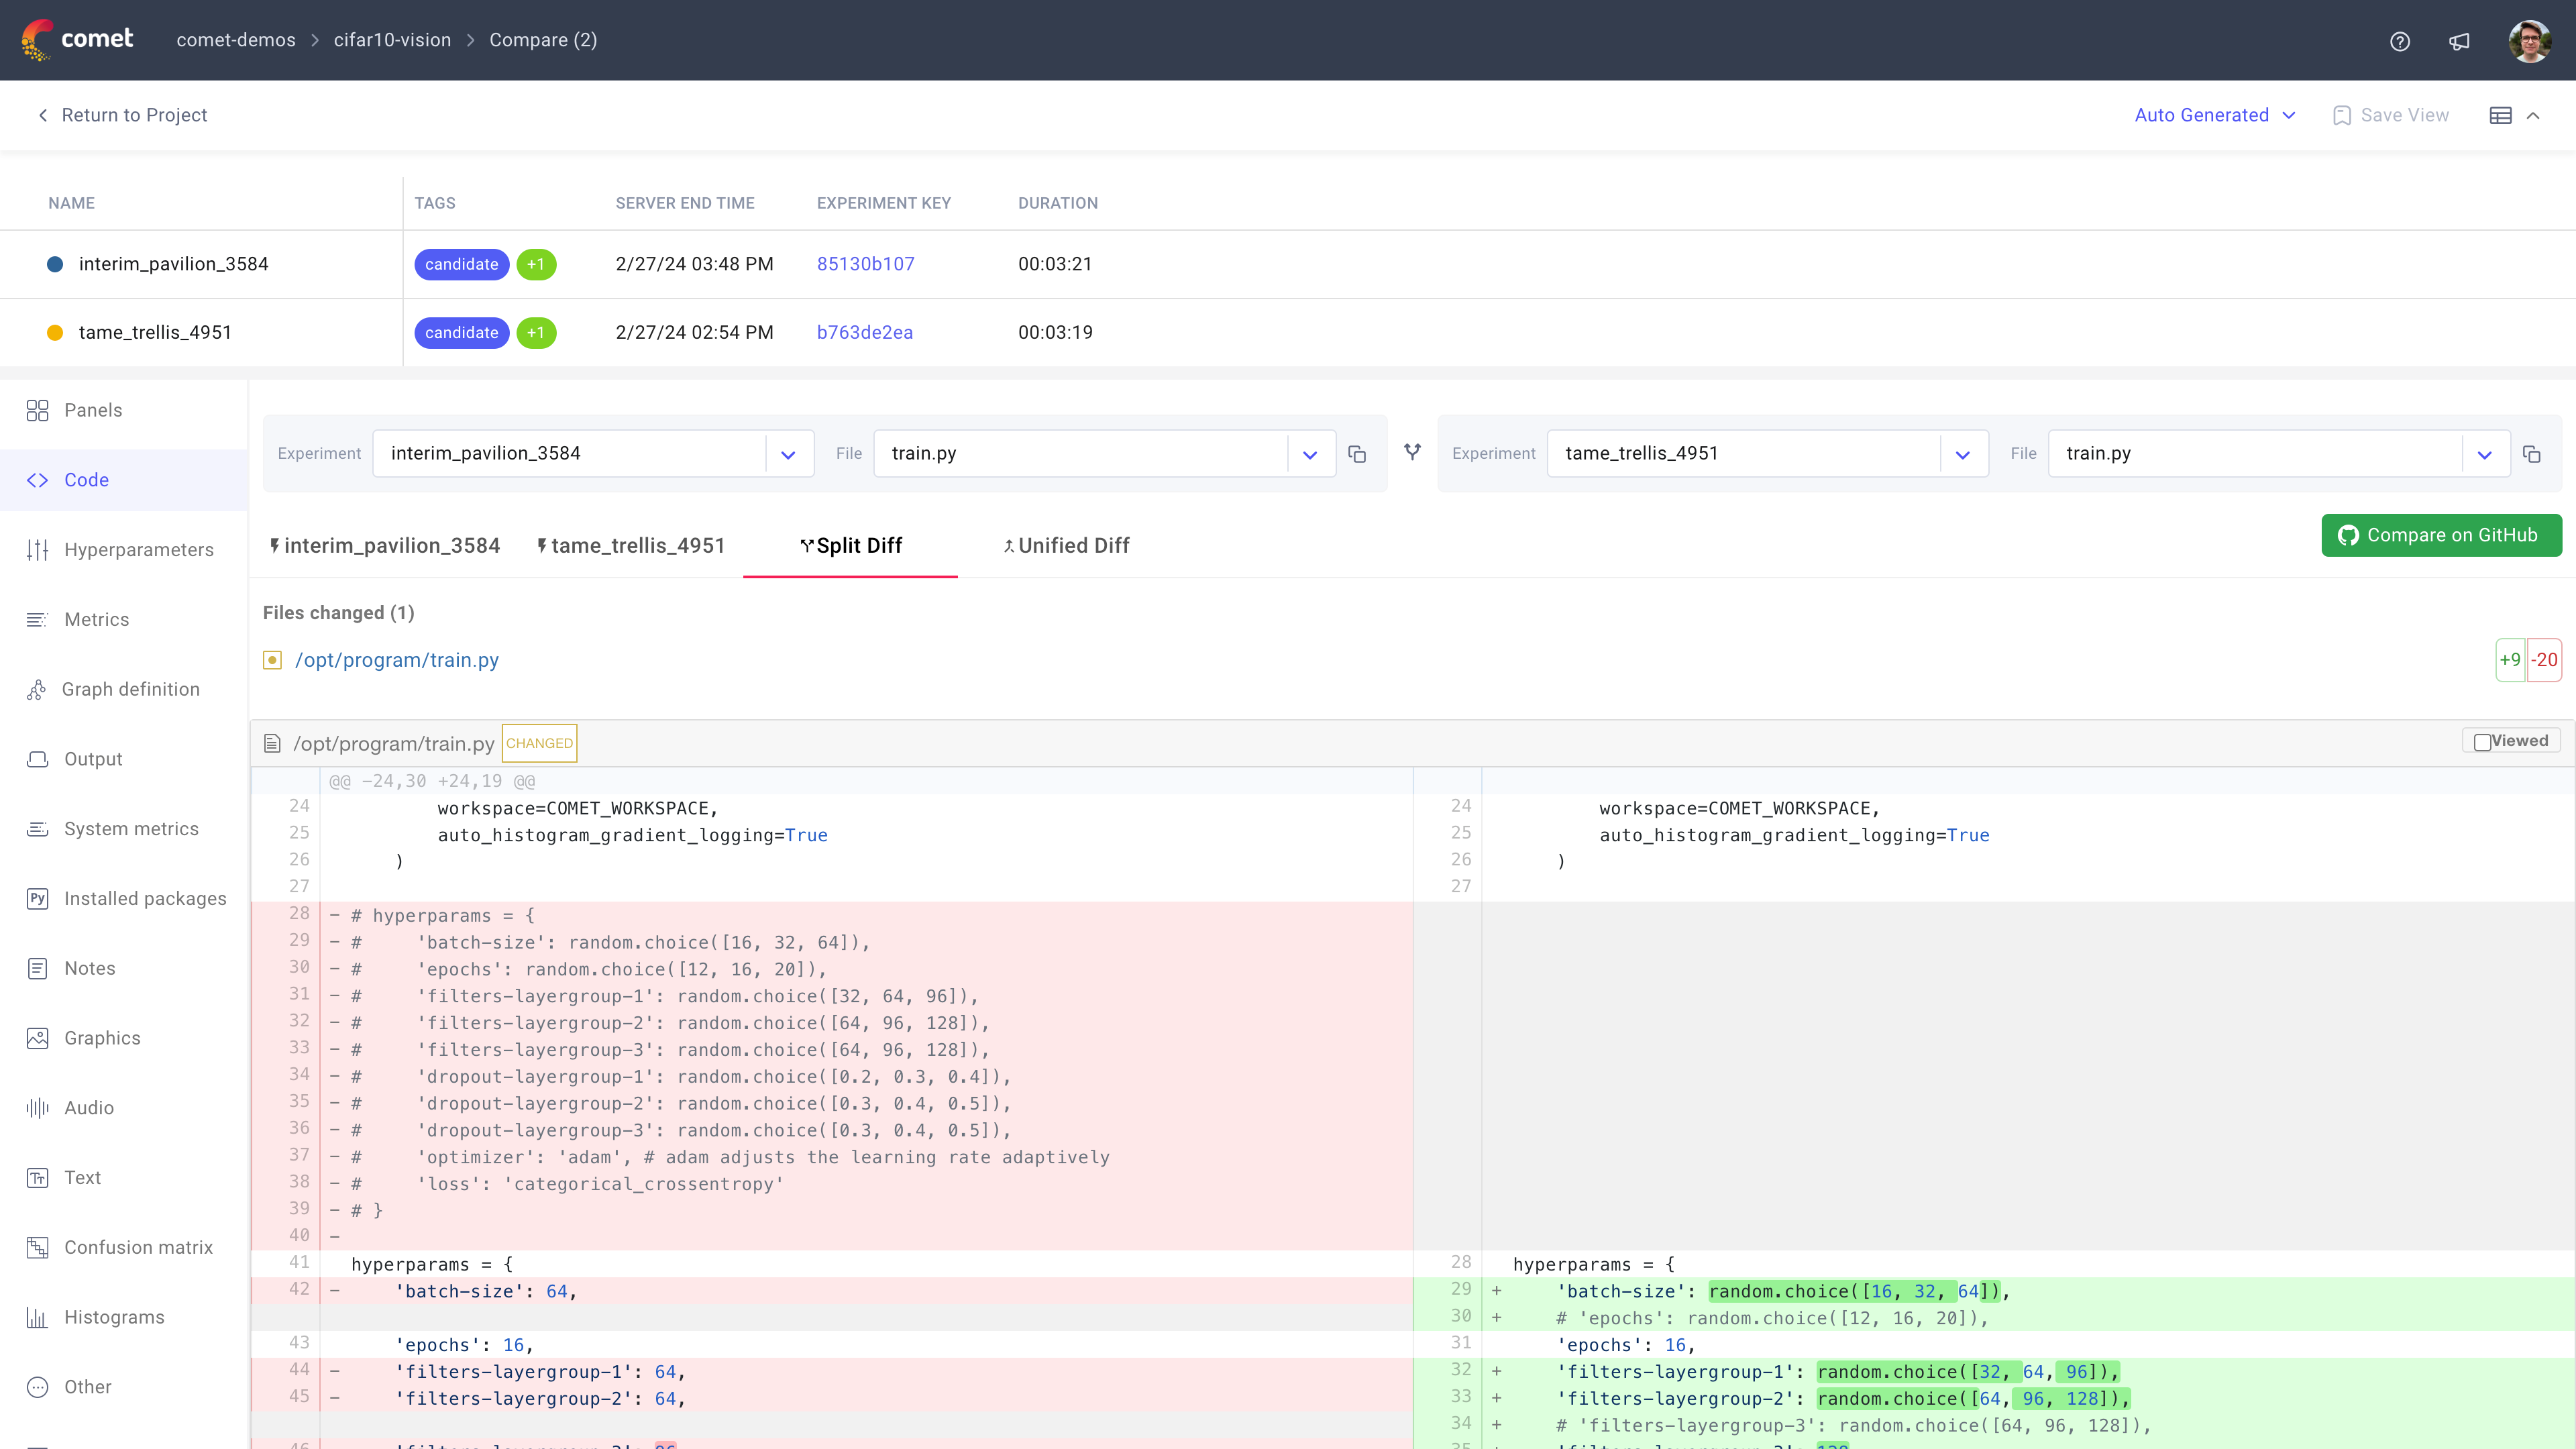
Please refer to the Compare Experiments page for more details.
Putting it all together!
To run an ML experiment with Comet from your Jupyter notebook, you need to:
Install the Comet ML SDK, and initialize it with your API key.
and1% pip install comet_ml1 2
import comet_ml comet_ml.init()Update your training code to start a Comet experiment, and log metrics and parameters to it.
1 2 3 4 5 6 7 8 9 10 11 12
import math import random exp = comet_ml.Experiment(project_name="demo-project") parameters = {'batch_size': 32, 'learning_rate': 0.0001} exp.log_parameters(parameters) for step in range(100): accuracy = math.log(1 + step + random.uniform(-0.4, 0.4))/5 loss = 5 - math.log(1 + step + random.uniform(-0.4, 0.4)) exp.log_metrics({'accuracy': accuracy, 'loss': loss}, step=step)Visualize and manage the experiment from the Comet UI.
Note
Comet supports multiple programming languages. The most commonly used language for Comet users is Python, which is the focus of this quickstart and all other guides.
If you are interested in R or Java, please refer to R SDK and Java SDK respectively for instructions.
Get started: Prompt Management
1. Install and configure the Comet LLM SDK
The comet_llm Python package allows you to programmatically set up and interact with your LLM prompts (and chains) on Comet. You can use pip to install the library in your local environment:
pip install comet_llm
%pip install comet_llm
The Comet LLM SDK then authenticates to your user space via API key. The API key is stored in .comet.config together with other configuration settings (such as workspace and project). You can set up your API key, or update your default configuration, by running:
1 2 3 | |
Warning
While you can pass the api_key as an argument to init(), this is not recommended for security purposes.
Further details, as well as other configuration approaches, are available in the Configure the LLM SDK page.
2. Log prompts and chains for any LLM
Comet defines both simple prompts and chains of prompts as Prompt objects.
1 2 3 4 5 6 7 8 9 10 11 | |
While only prompt and output are required arguments, we recommend always providing the model argument too for traceability.
You can refer to log_prompt() for a full list of arguments and metadata supported.
1 2 3 4 5 6 7 8 9 10 11 12 13 14 15 16 17 18 | |
Span objects can be nested within each other to support complex chaining. In this example, the chain is composed of one only "user" prompt.
You can refer to the Comet LLM SDK page for more details on the methods used in the example above.
Please refer to the Comet LLM Overview page for more details, instructions, and examples.
Note
The Comet LLM SDK is model-agnostic: you can use the same syntax to log prompts for any LLM model!
3. Visualize prompts and chains in the UI
You can access all your LLM prompts and chains from the Prompts page in the Comet UI.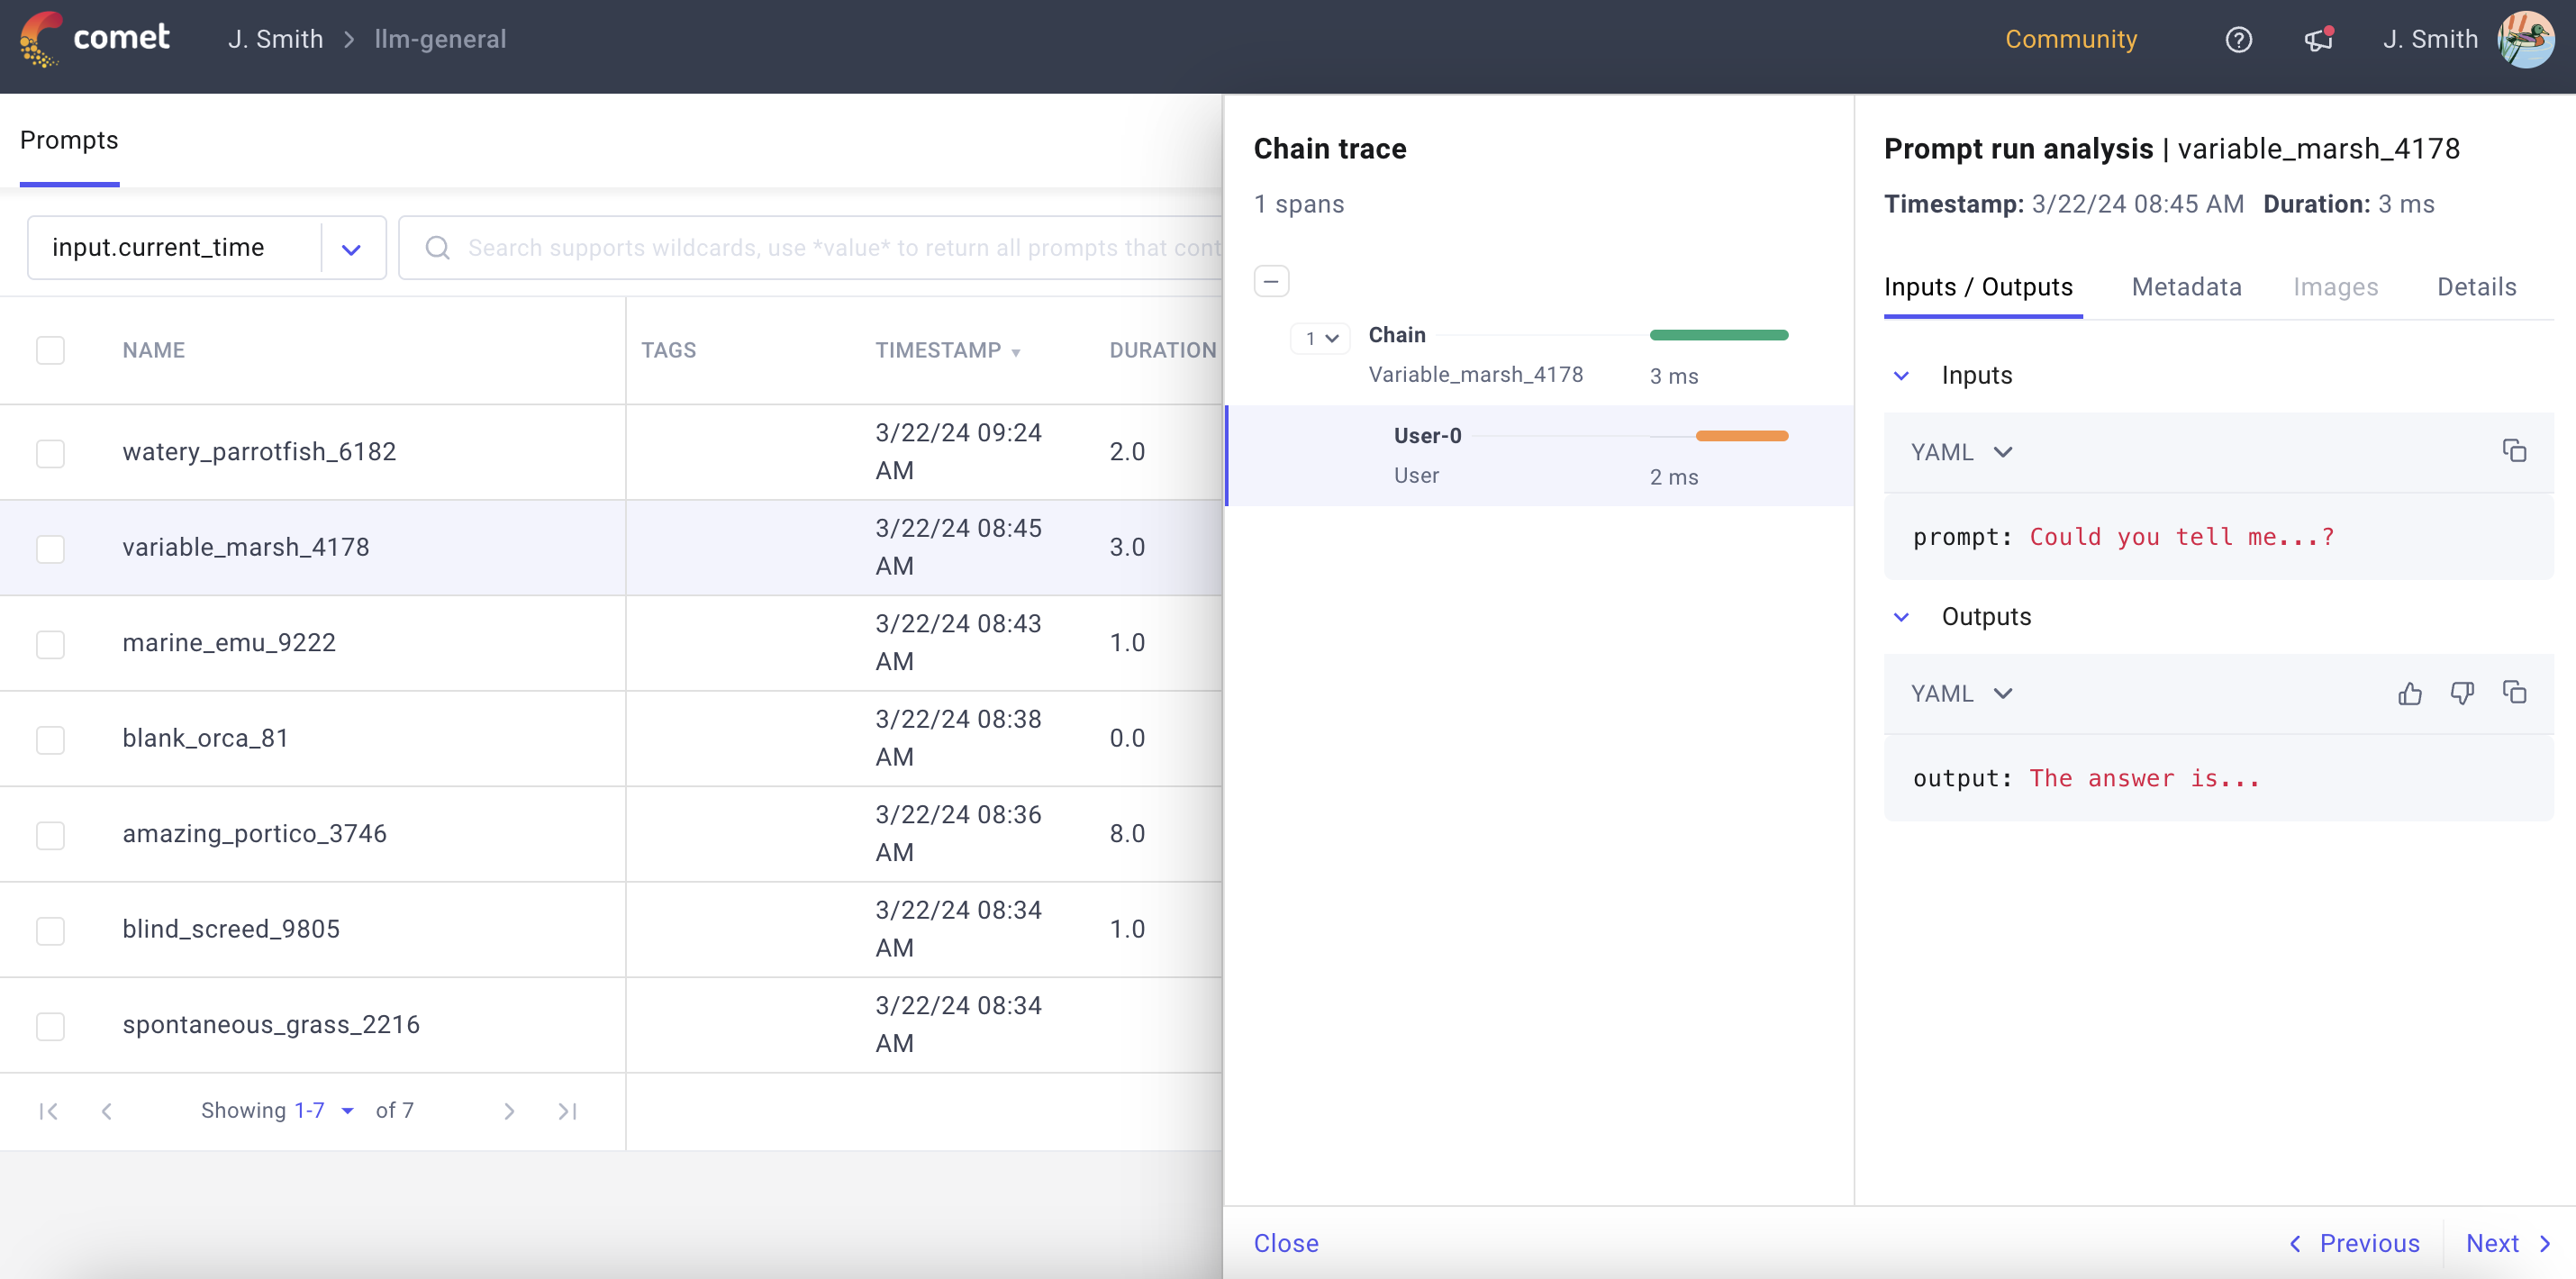
Please refer to the Prompts Table page for detailed information on how to navigate and customize this dashboard.
Try it now!
We have created two demo projects for you to get started with managing prompts and chains, respectively, from the Comet UI. Open the demo Comet LLM Projects by clicking below!
 Example LLM Project with prompts
What's next?
- Read about the many logging functionalities offered by Comet ML experiments
- Discover how to run automated hyperparameter tuning with Comet ML Optimizer
- Learn all the details behind Comet LLM
- Discover how to use Comet for your production models with Model Production Monitoring
- Become a master at navigating the Comet UI