Track your trained models
Comet Model Registry allows you to track and manage all your models in a single place.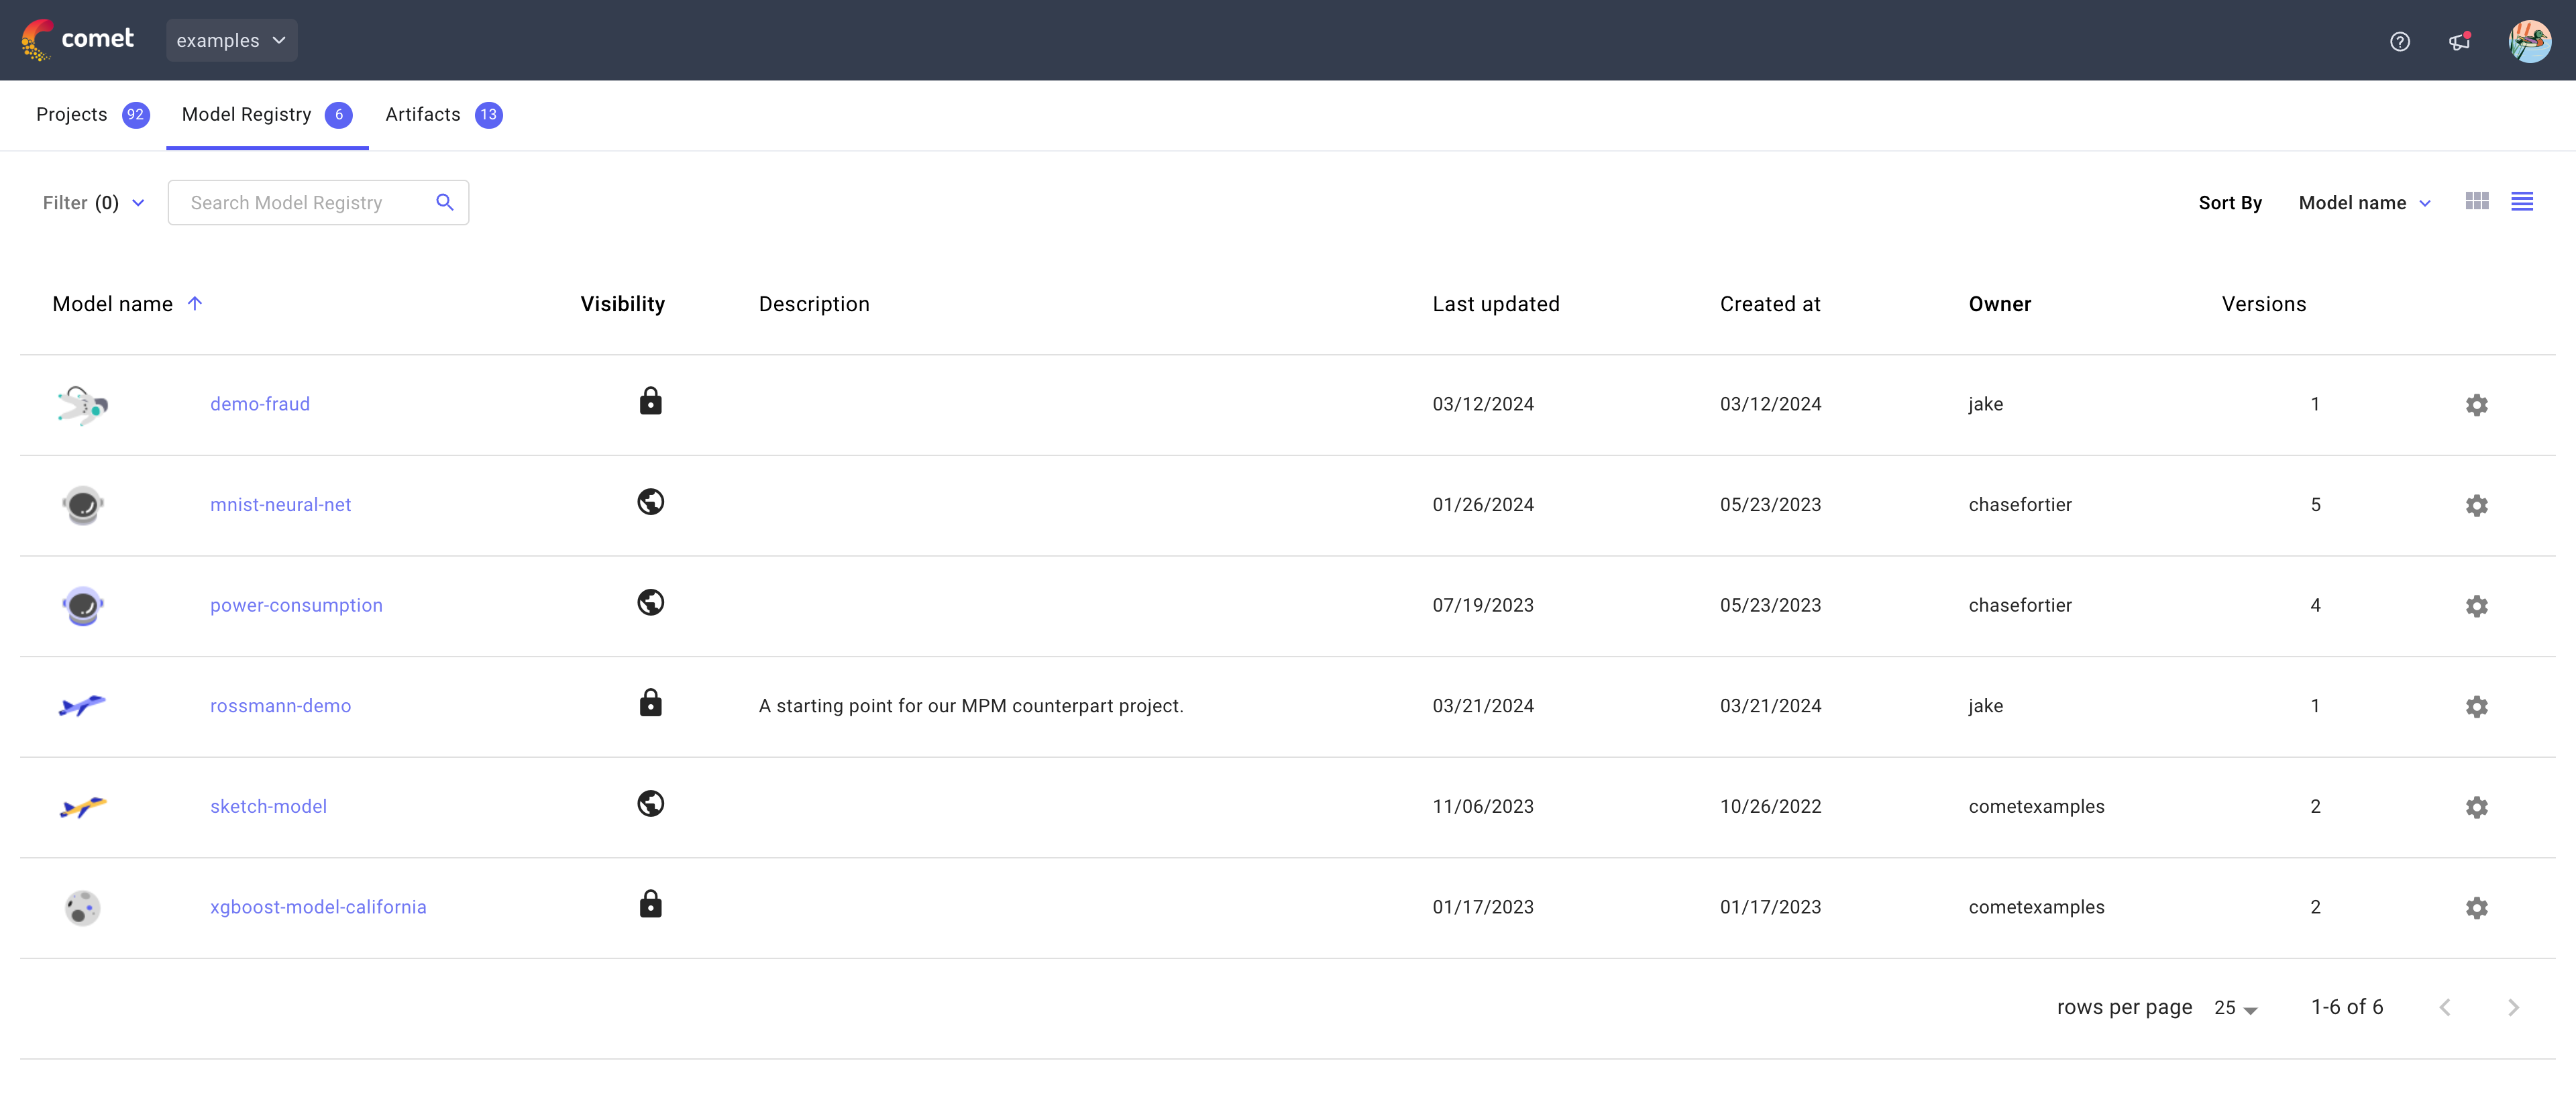
For each registered model, you can review relevant information such as model card, lineage, usage instructions, set tags, and model status. And, you can connect all your model activity via web-hooks to your CI/CD pipeline.
Get started with Model Registry
The Comet Model Registry is defined at the workspace level, but supports tracking trained models at the experiment level.
Given a Comet Experiment, the general steps to save a model to the Model Registry are:
- Log the trained model using the
log_model()method offered by the Comet SDK. - Register the model, either from the Comet UI or Comet SDK.
- Manage versions, history, and webhooks for the registered model.
- Deploy the registered model.
Below you can find a step-by-step walkthrough of an end-to-end example.
Prerequisites
Make sure that you have correctly configured the Comet SDK and that you have the code set ready to create and run the experiment for model training / tuning.
1. Log the trained model
You can log any trained or fine-tuned model to Comet, whether it is saved to local disk / cloud or hosted in memory as a file-like object.
The example below trains a dummy sklearn classifier and logs it from filepath.
1 2 3 4 5 6 7 8 9 10 11 12 13 14 15 16 17 18 19 20 21 22 23 24 25 26 27 28 29 30 | |
The logged model is now available from the Assets & Artifacts tab of the Single Experiment page of the Comet UI. The url for the page is printed in the terminal after experiment creation.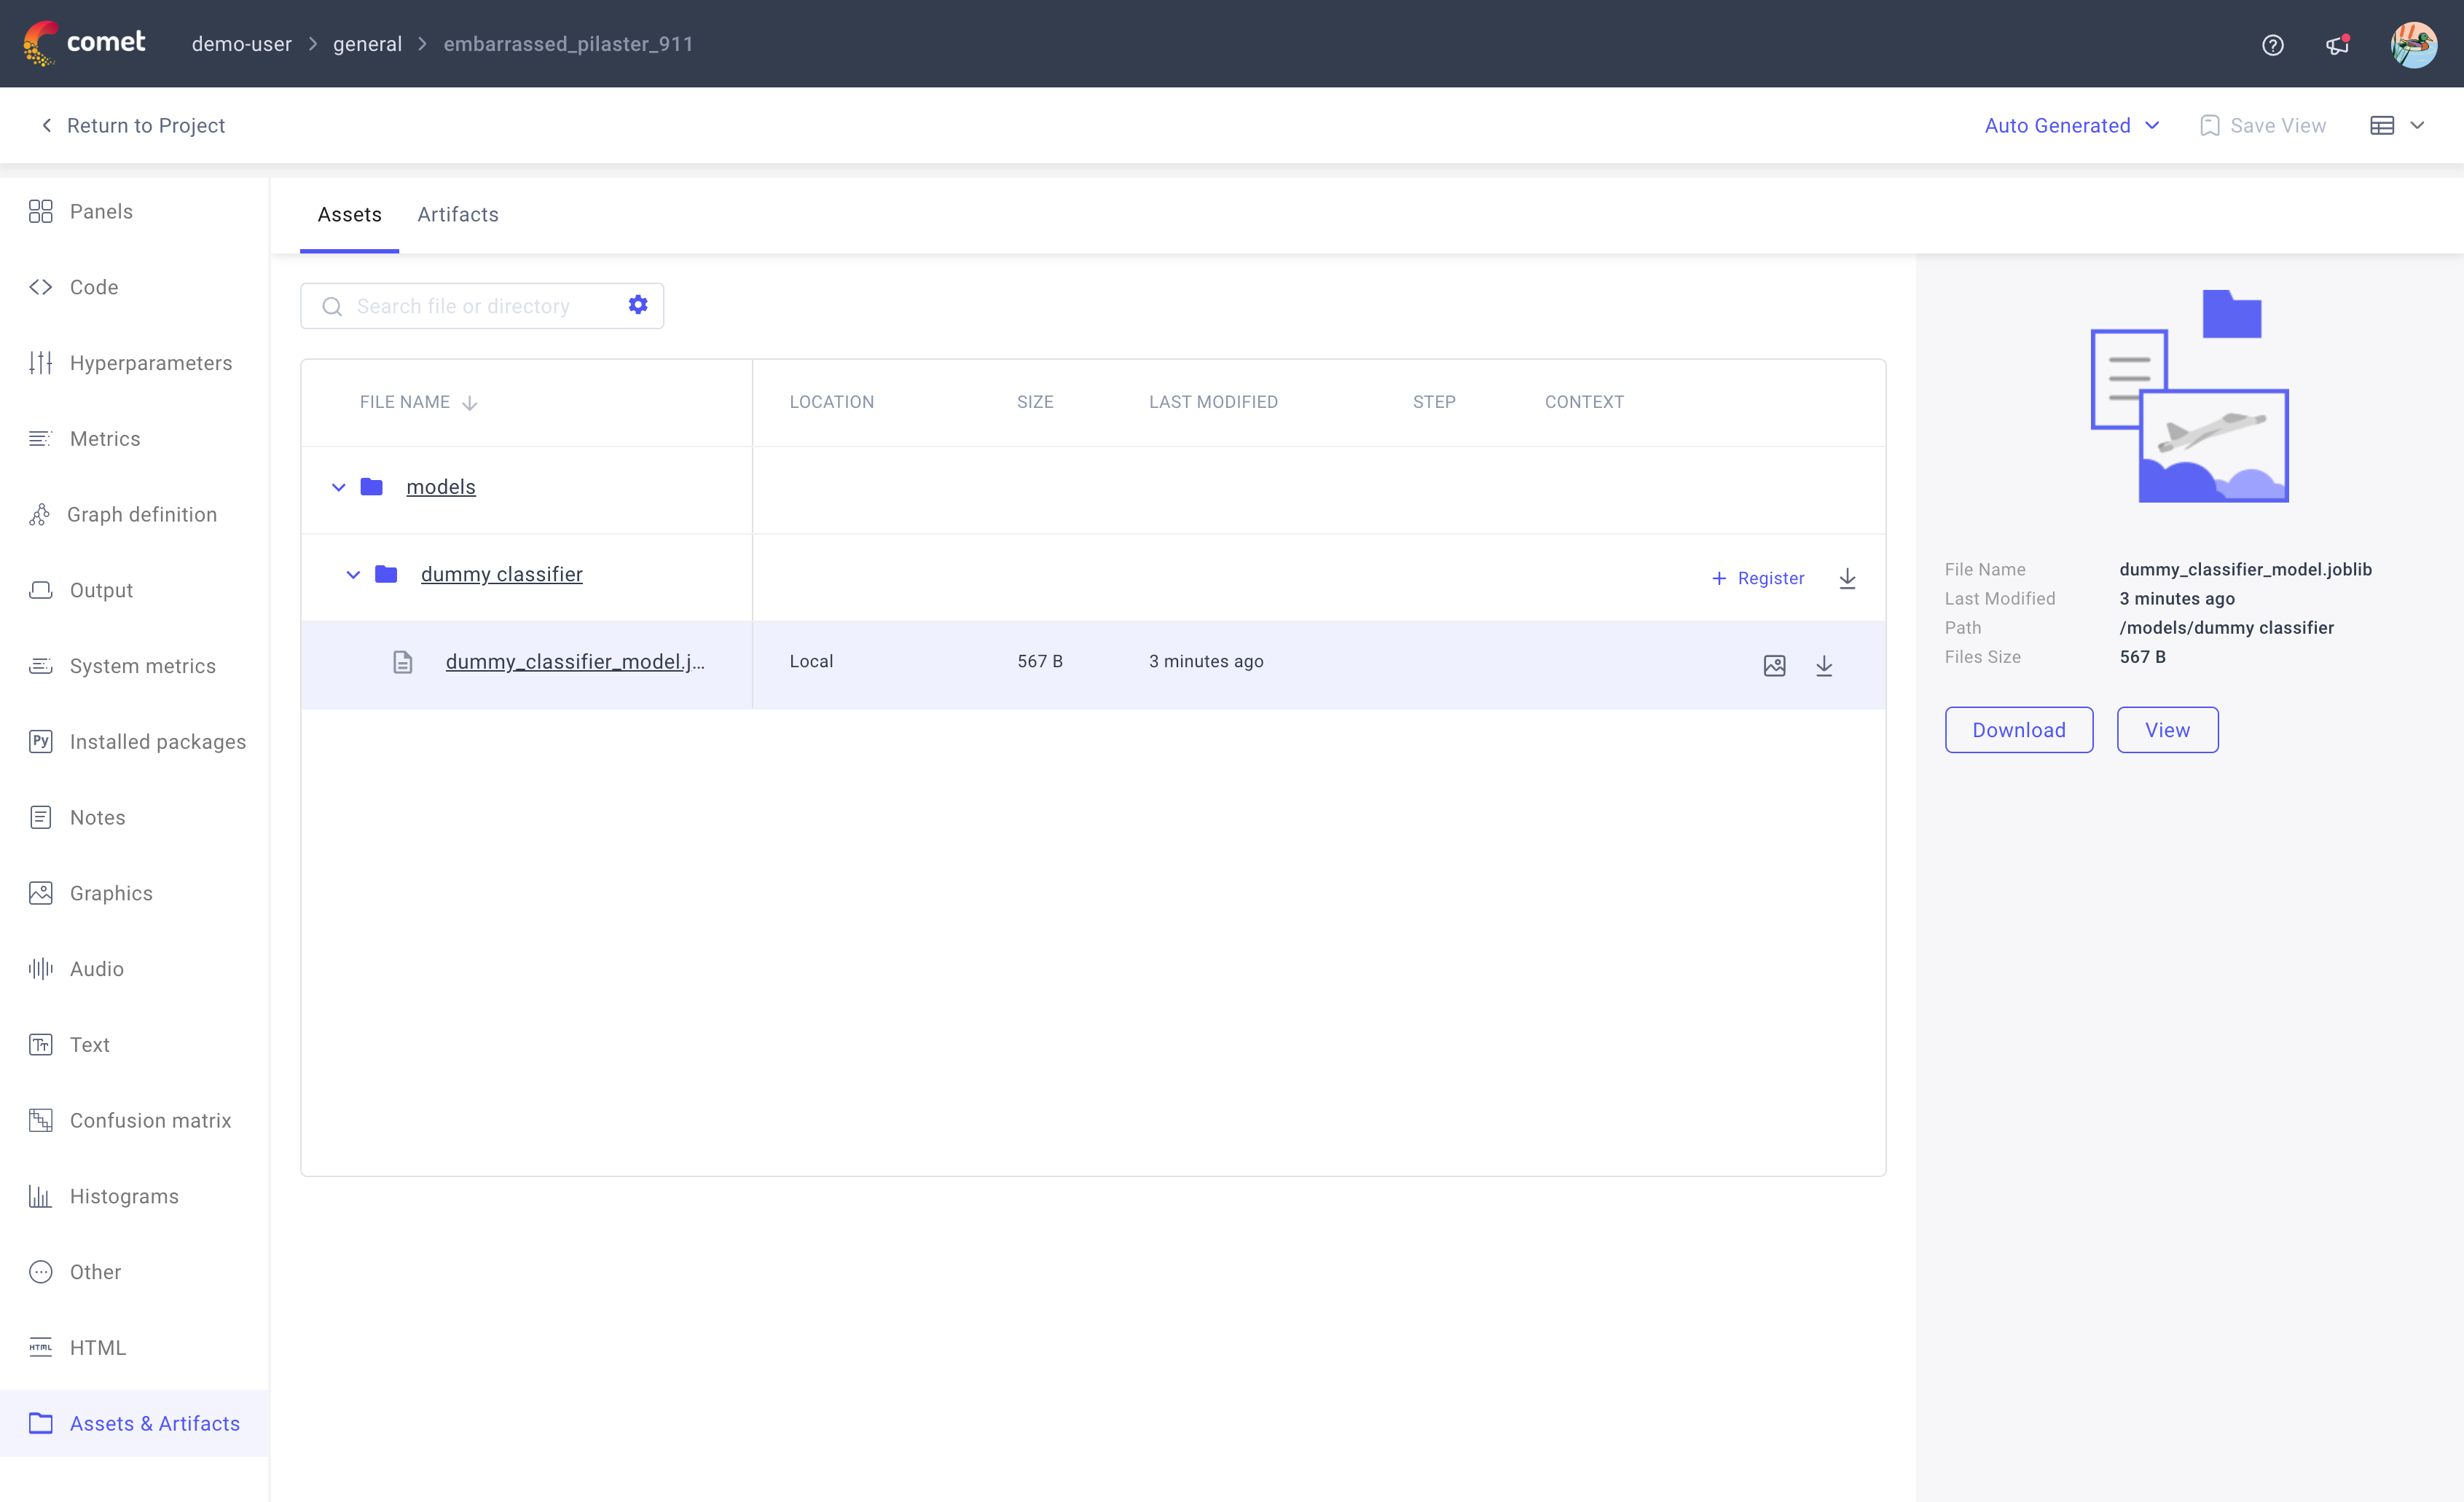
2. Register the model
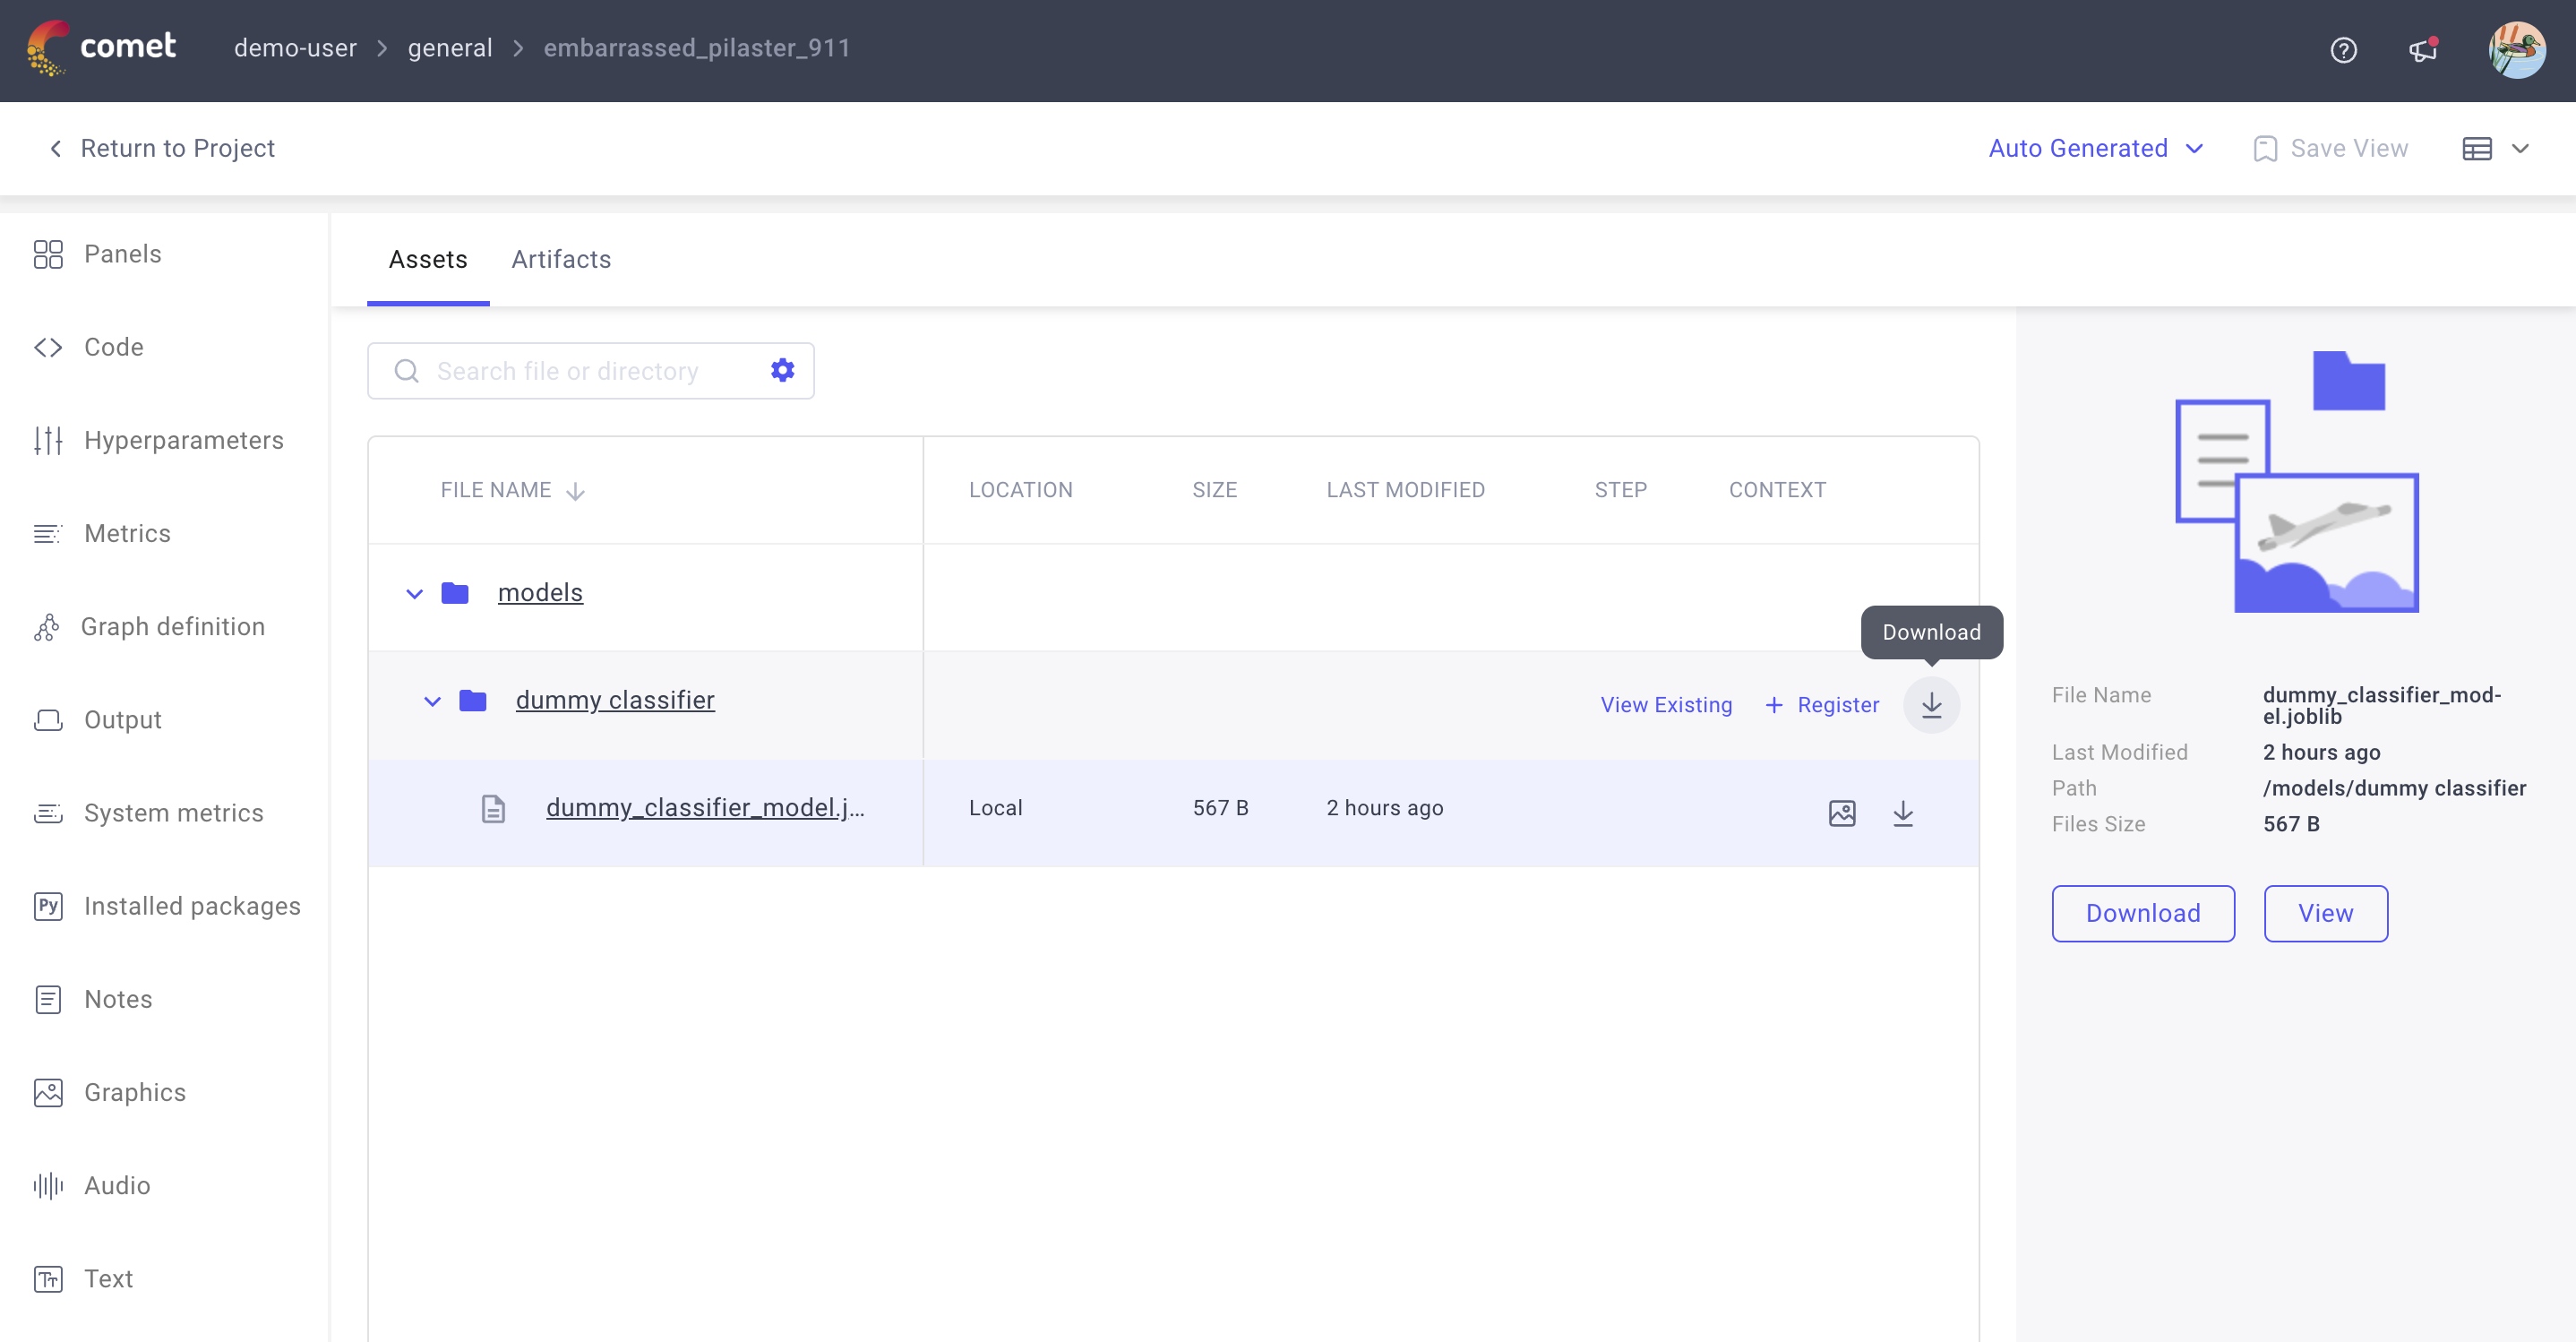
When you click on the + Register button by the model's folder name in the Assets & Artifacts tab of the Single Experiment page, the Register Model windows pops-up.
Note
If you have already registered models, the Register Model window will appear different to allow you the ability to either save to an existing registered model as a new version or to register a new model entirely.
When you register the model, you can specify:
- Name: required; auto-populated by Comet with the logged model name.
- Version: required; auto-populated by Comet with "1.0.0".
- Description: optional.
- Visibility: required; either public or private.
The Comet UI highlights registered models in the Assets & Artifacts tab by adding a View Existing button by the right side of any registered model asset as showcased in the screenshot below.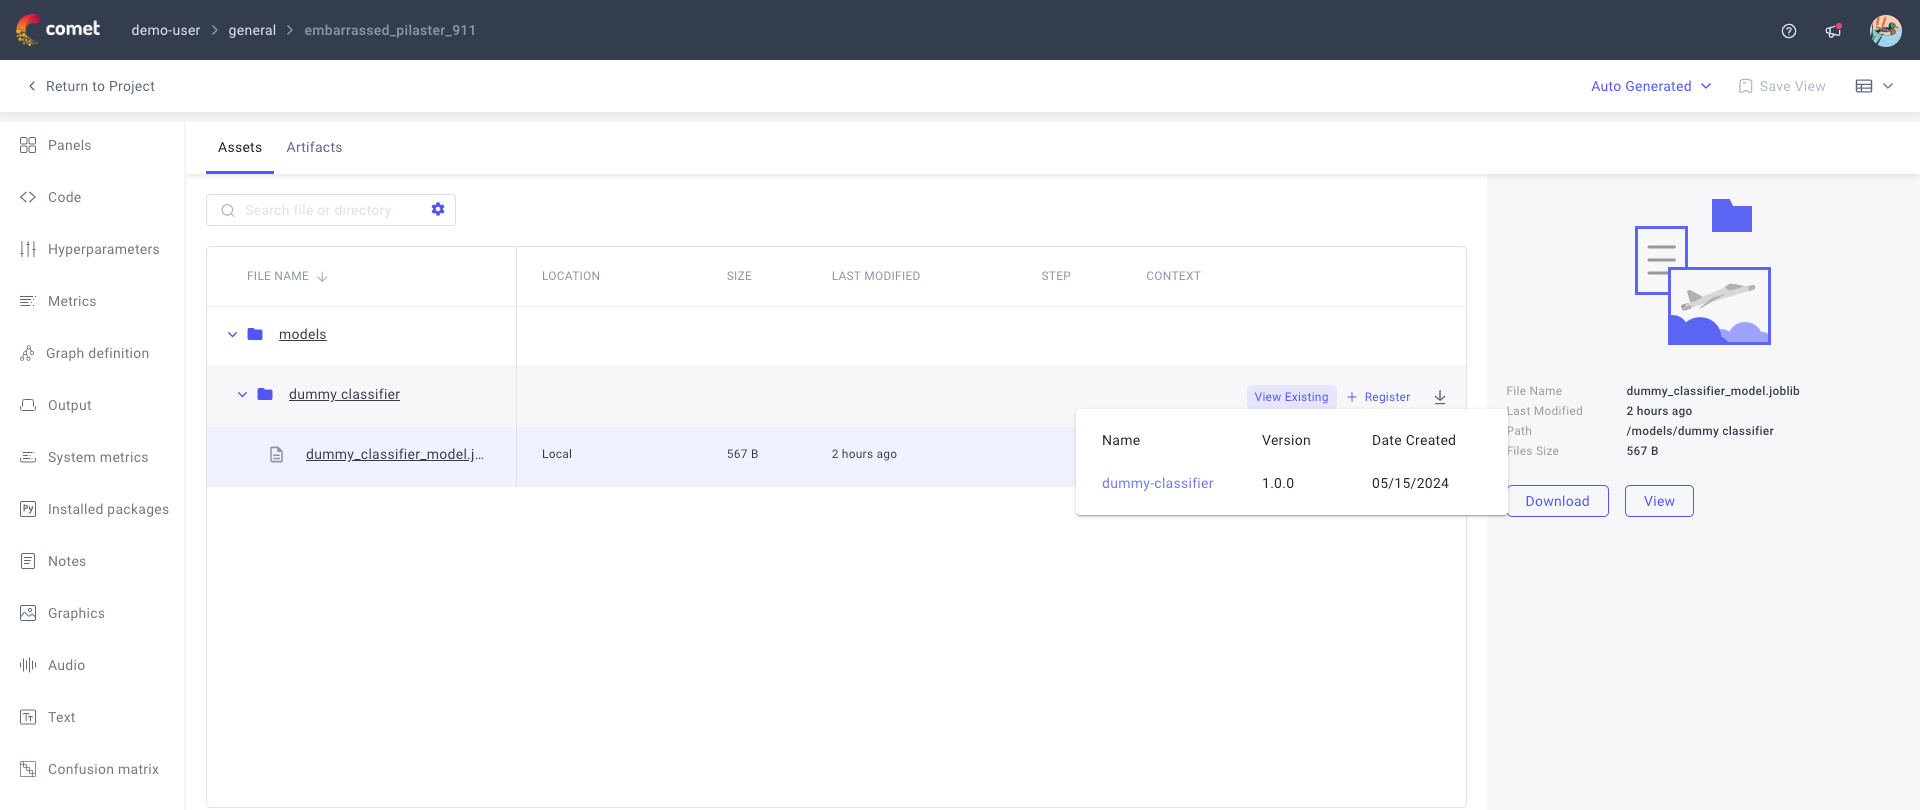
Comet supports other flows for registering the model, both from Comet UI and from Comet SDK. For more instructions, please refer to the Register a model docs page.
3. Manage the registered model
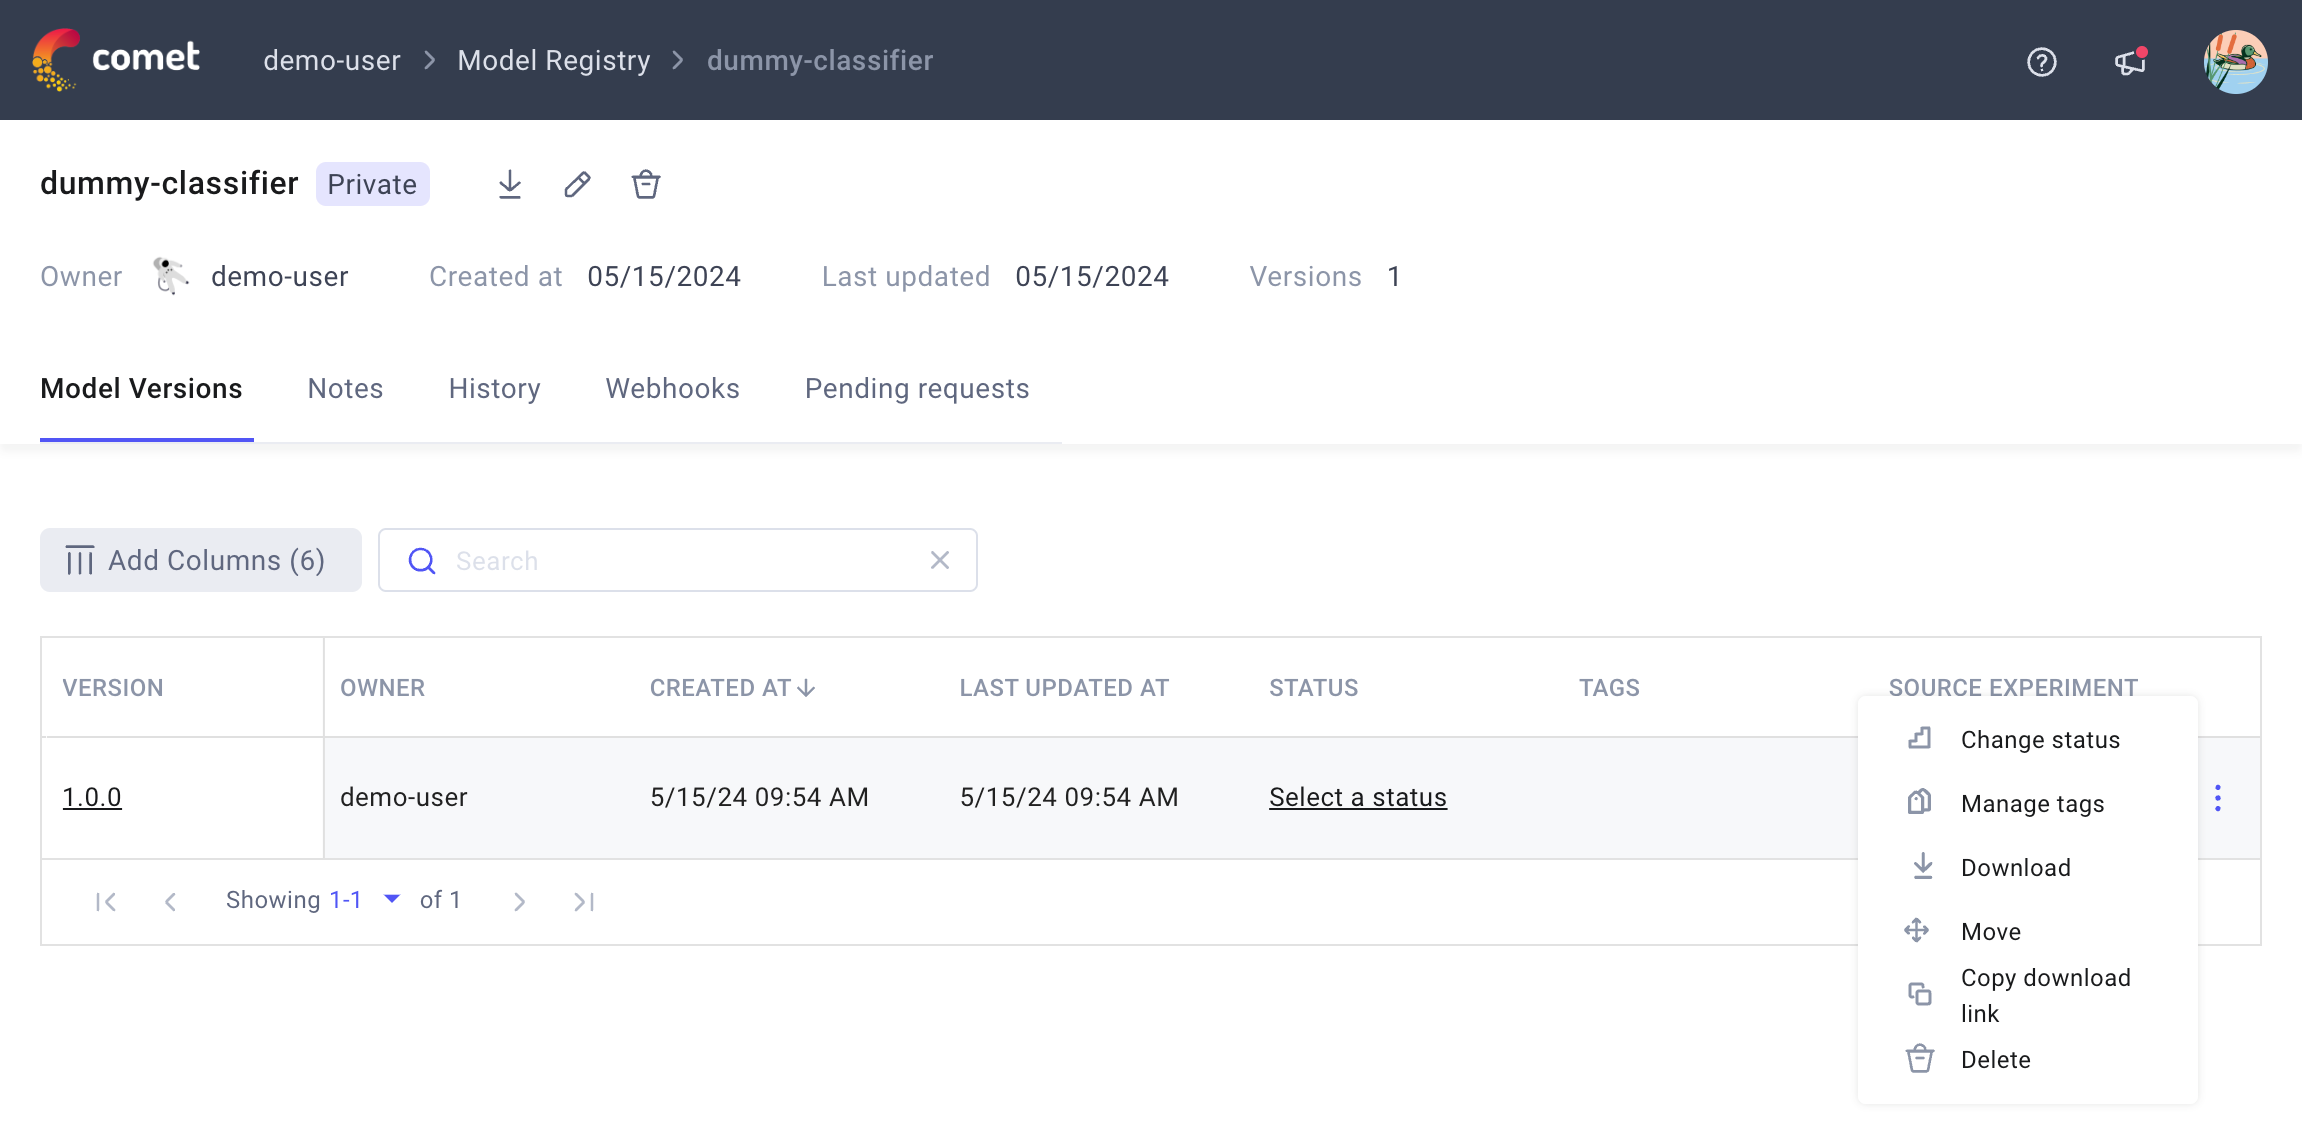
When you click on the View Existing button by a registered model's folder name in the Assets & Artifacts tab of the Single Experiment page, the Comet UI displays information about the registered model version including a link to the corresponding Model Registry page.
Alternatively, you can access the Model Registry page from your workspace home page by clicking on the Model Registry tabbed page.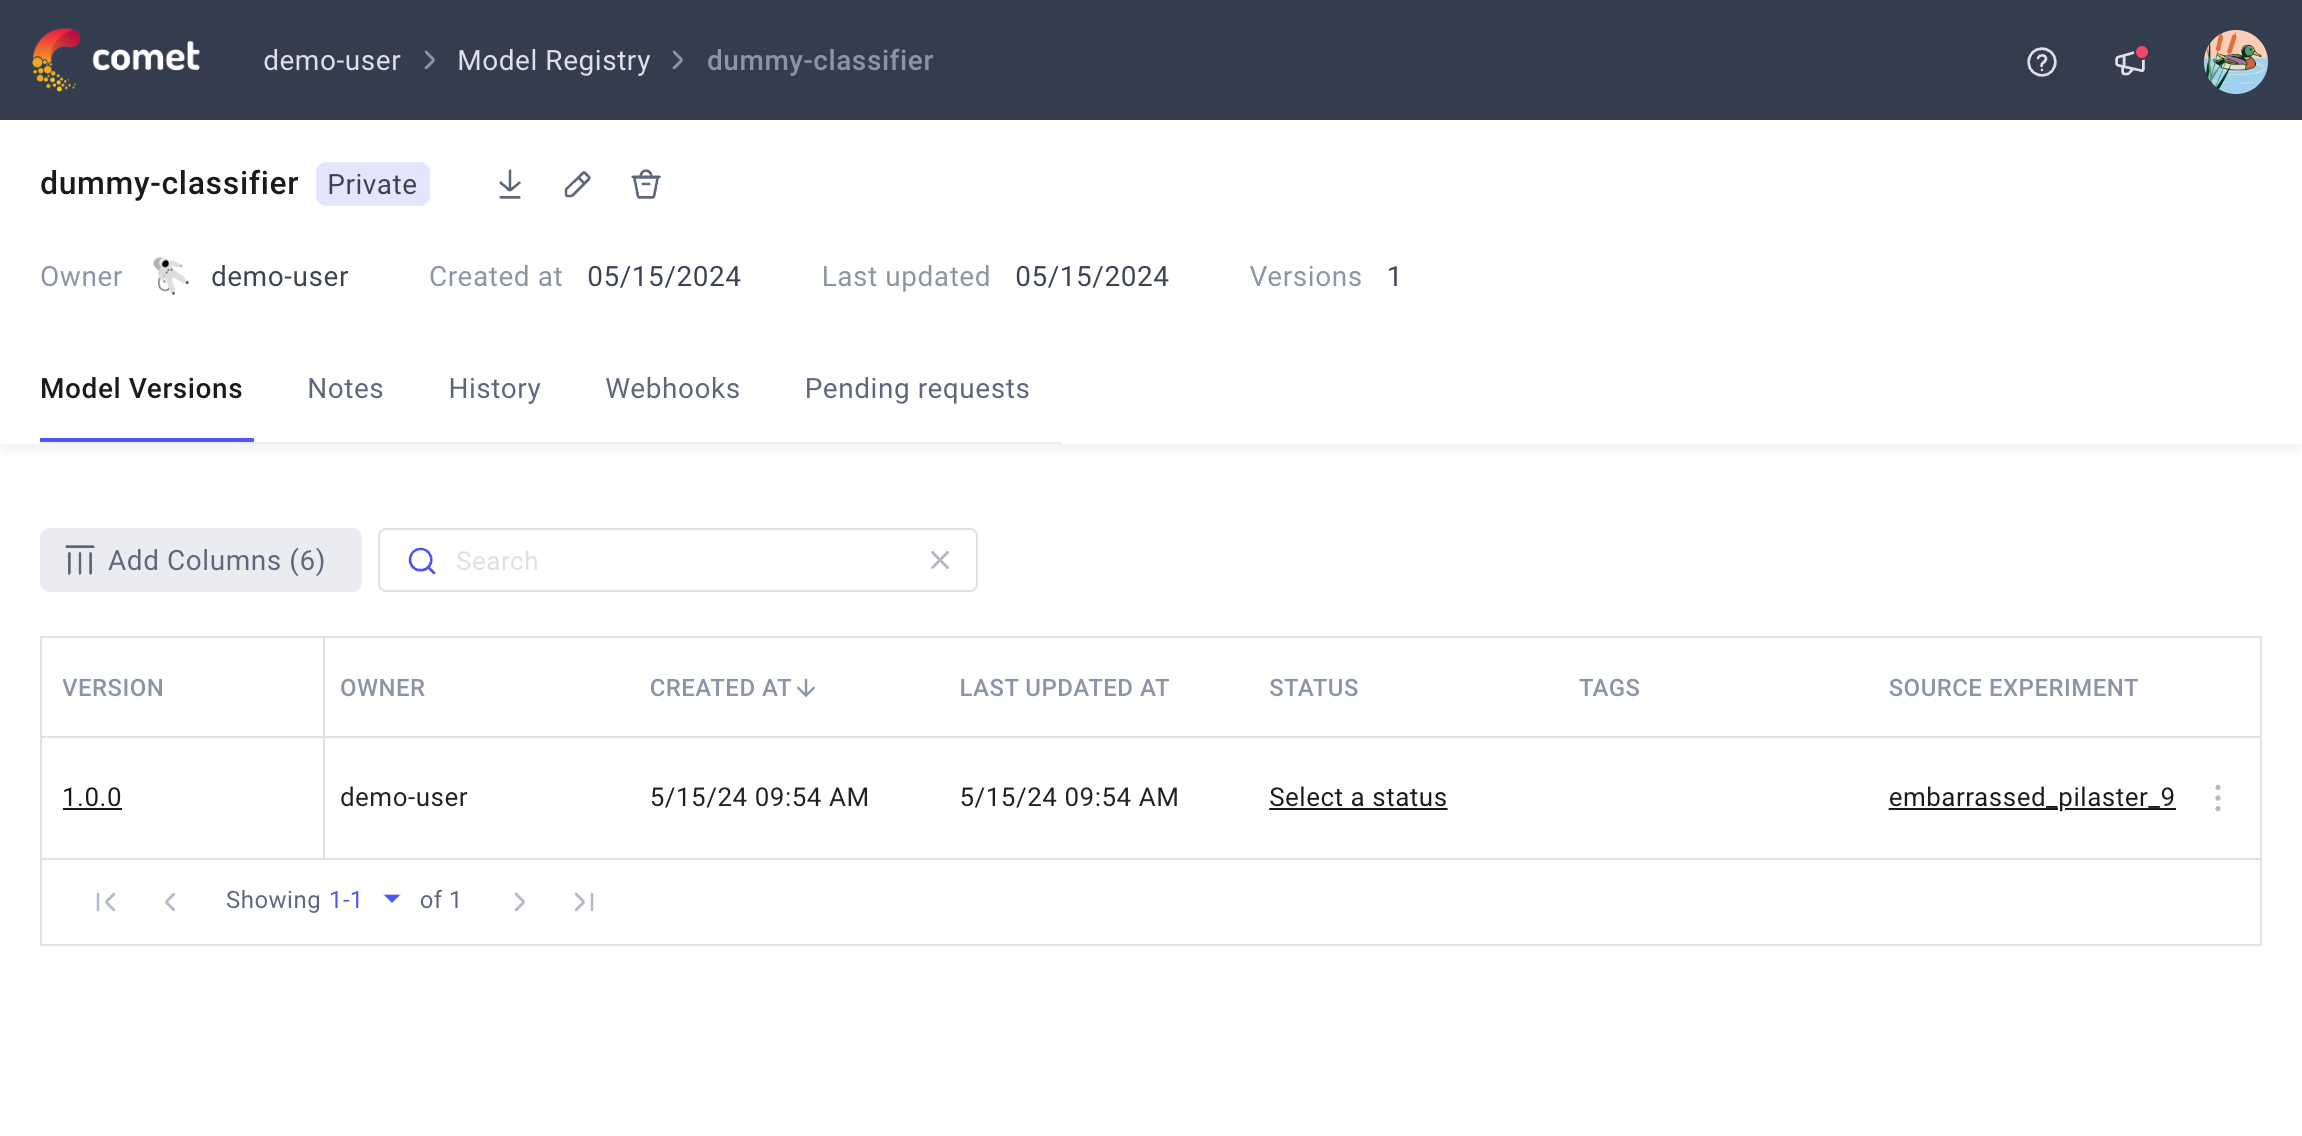
Model Registry supports a variety of management actions:
From the Model Versions page, you can:
- Change the model status.
- Manage tags.
- Customize the table view by adding and removing columns.
- ...
Find out more from the Manage a registered model docs page.
From the Notes page, you can add free-form text information about the model useful for team collaboration.
- From the History page, you can review all actions performed on the model across the days.
- From the Webhooks page, you can create webhooks based on changes to the model version, tags, and/or status. Find out more from the Configure webhooks docs page.
- From the Pending requests page, workspace owners can manage user requests to change model status.
4. Deploy the model
You can download and deploy your model programmatically via Comet UI or Comet SDK.
1 2 3 4 5 6 7 8 9 10 11 12 13 14 15 | |
Find more details in the Python SDK Model references.
To download a registered model as a .zip file, you can either:
• Click the download icon next to the model name in the Assets & Artifacts tab of the Single Experiment page.
• Download a specific version of the model through the table side menu of the Model Registry page.
The downloaded .zip file contains all of the files that were logged with the Experiment model as described in step 1. Log the trained model.
Note
If you logged remote assets to your models that are stored in AWS S3 or GCP GCS, assuming you have the right credentials and permissions configured, Model.download() will download them as well.
Learn more
- Register a model: Add / update a registered model via Comet UI and Comet SDK.
- Manage a registered model: Change model status.
- Configure webhooks: Define webhooks triggered by changes in model version, status, and tags.